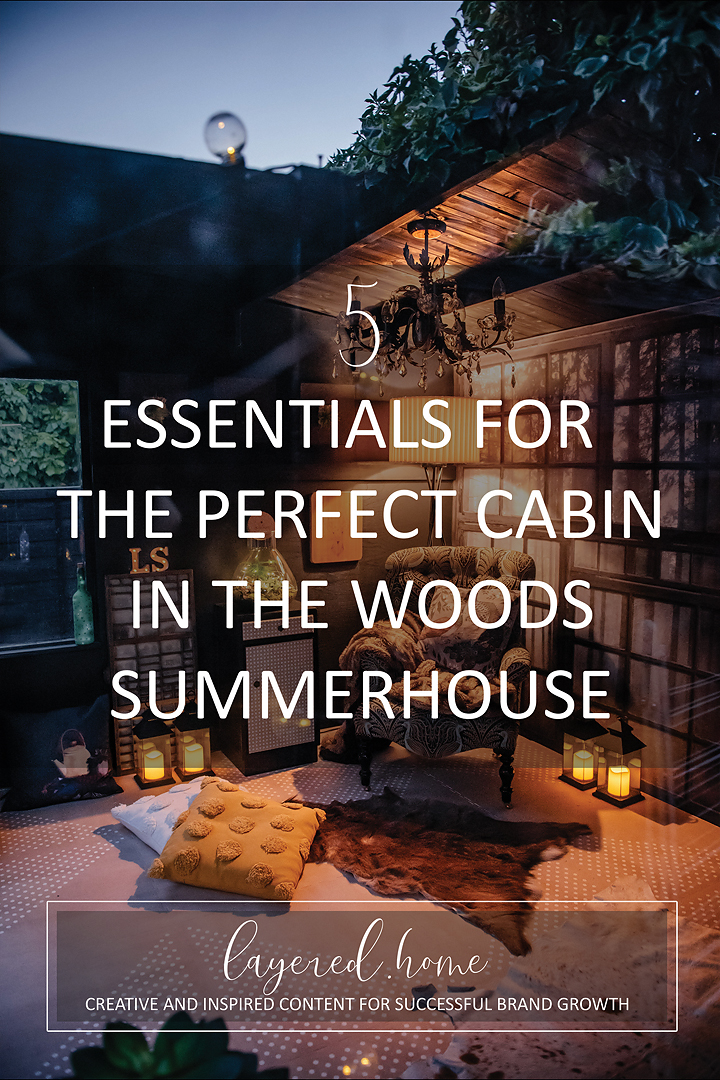
5 Essentials for the Perfect Cabin in the Woods Summerhouse
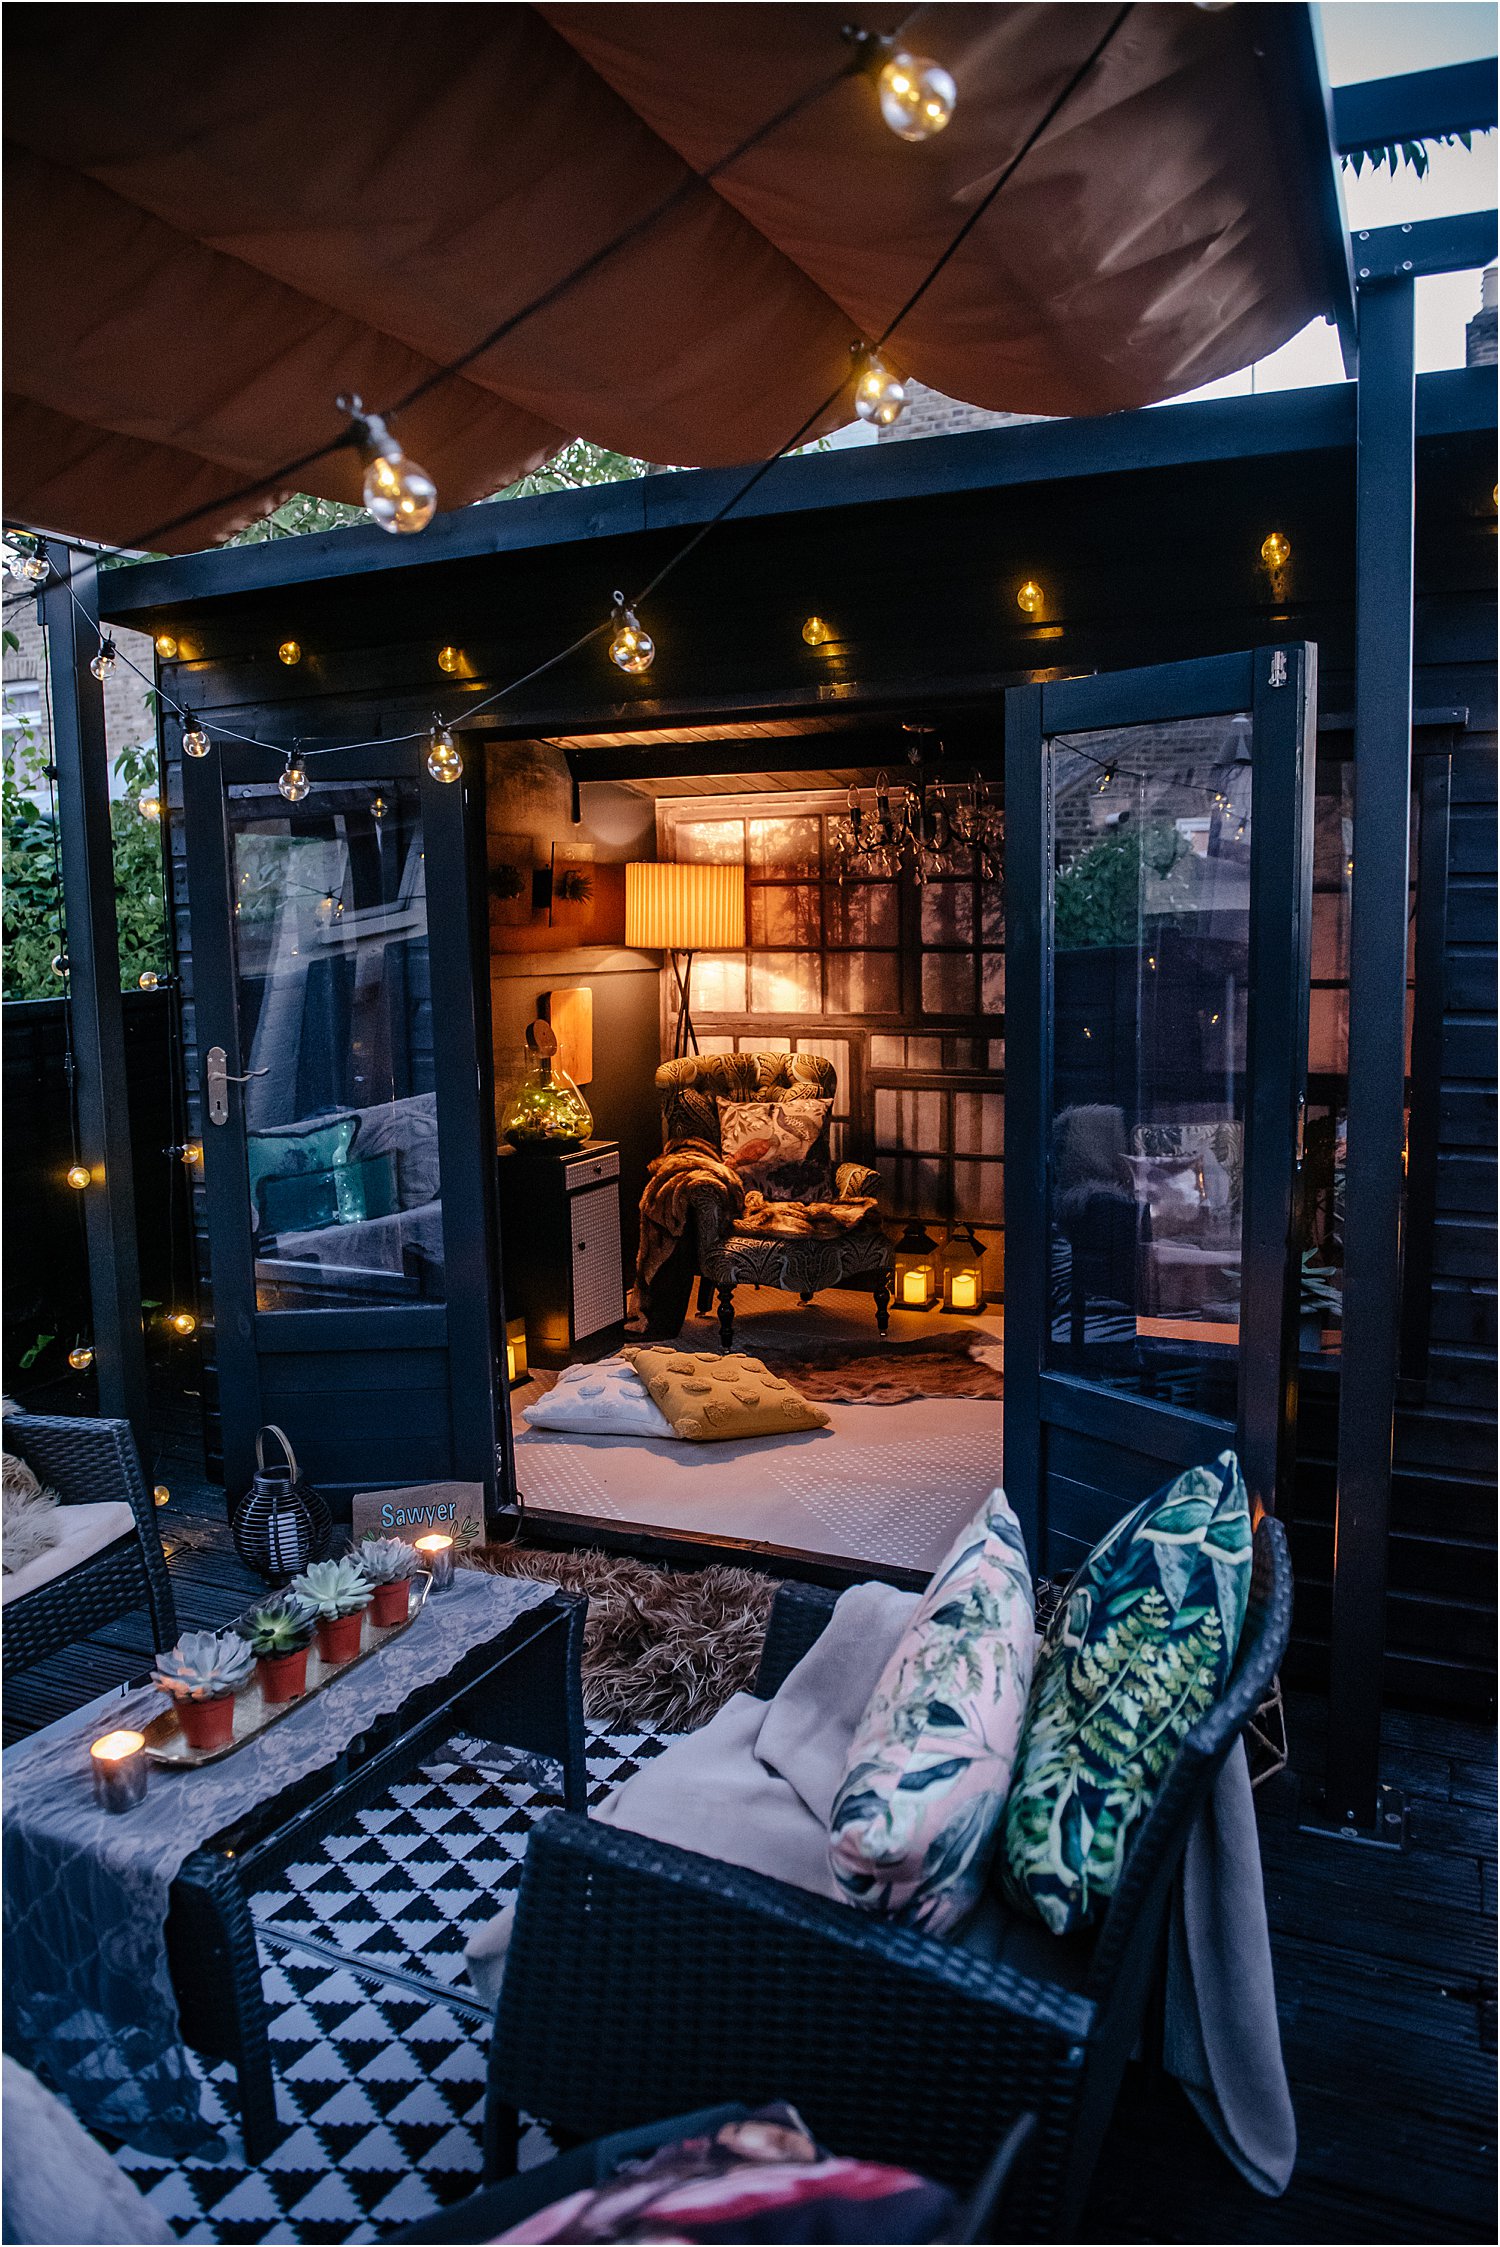
Our holidays this year have been cancelled. No surprise there due to the current coronavirus pandemic. In its place, we have decided to build a cabin in our decked garden area. It’s not a huge area and so we could only put in a 10 x 8 ft cabin. But it’s a hideaway place, somewhere to escape and feel like we are not in our home but outdoors surrounded by nature. By the way, don’t forget to download my free resources that will help you design your own interiors and grow your Instagram account!
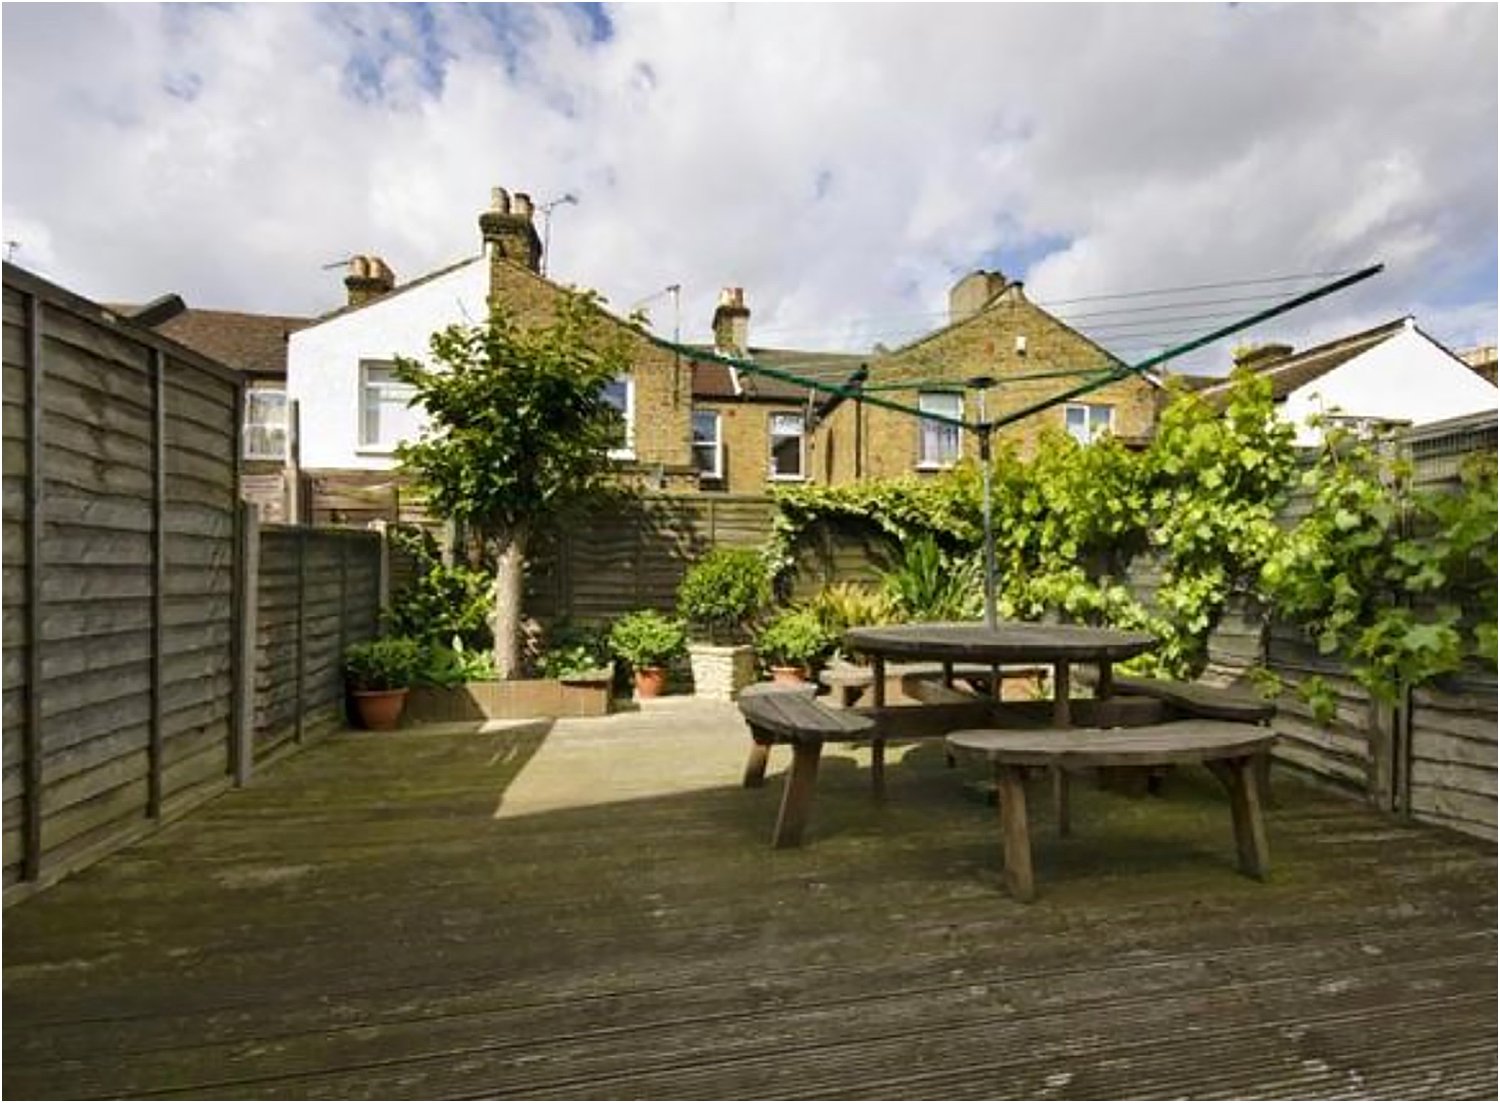
Just so you see – this was the garden when we moved in – photo courtesy of estate agents!
It took us months of planning, waiting and building to complete this cabin project as it happened right during the beginning of lockdown. Here I write about how we’ve built it and the 5 things you would need to make it the perfect nature cabin.
1. PROPER PROTECTION
First things first – protection! It’s a wooden cabin made of tongue and groove pieces and timber to hold it all together. Wood whether treated or not expands and contracts when exposed to extreme temperatures. It is crucial to apply proper protection to all wooden pieces.
Protek Wood Stain has come to the rescue for us and have supplied us with all types of wood protection we needed for the types of wood and look we required.
First we built the cabin base made of timber and painted them with Timber Eco Shield. We did the same to all the exposed pre-treated wood on the outside of the cabin with Timber Eco Shield in Black. It’s an eco water-based, plant-based stain that soaks deep into the wood giving it much needed protection at the same time a deep colour in a Matt finish. I am delighted with it.
We found that 2 coats were enough and would probably need re-coating every two years.
Inside the cabin, we insulated the walls with ply. We used Protek’s Royal Interior Finish on the walls and inside of the doors. It has a thicker texture – more paint-like, but it still a stain so it doesn’t just sit on top of the wood but seeps right into the grain.
I used Midnight Blue for the top half of the cabin and did three coats for a full coverage. I did two coats of Anthracite Grey for the lower part of the walls.
We still have to insulate the ceiling but for now, I have stained the exposed timber and tongue and groove ceiling with Timber Eco Shield.
For the floor, I used three coats of Slate Grey and sealed it with three coats of Protek Clear protect for durability.
Our decking also got the Protek touch using their Decking Stain in black. It was so easy to apply as it has a watery texture that soaked straight into the wood with minimal brushing unlike the previous years of oiling the decks which took a lot of effort.
We had a mixture of old and new fences. We had unpainted old fences and stained old fences. We decided to cover them all with Protek’s Royal Exterior Finish. This paint is so different to the Timber Eco Shield in that the texture is so much thicker, almost jelly-like. However, the pigments still soaked well into both unpainted and previously painted wood and provided a good coverage with a slight sheen finish. The finish was extremely durable even after jet-washing the fences following all the cabin work!
I am really genuinely delighted with Protek and my only regret is that we didn’t use them before! Price-wise their products are affordable with quality so high compared to the well-known brand we have been using in the past, especially the decking stain.
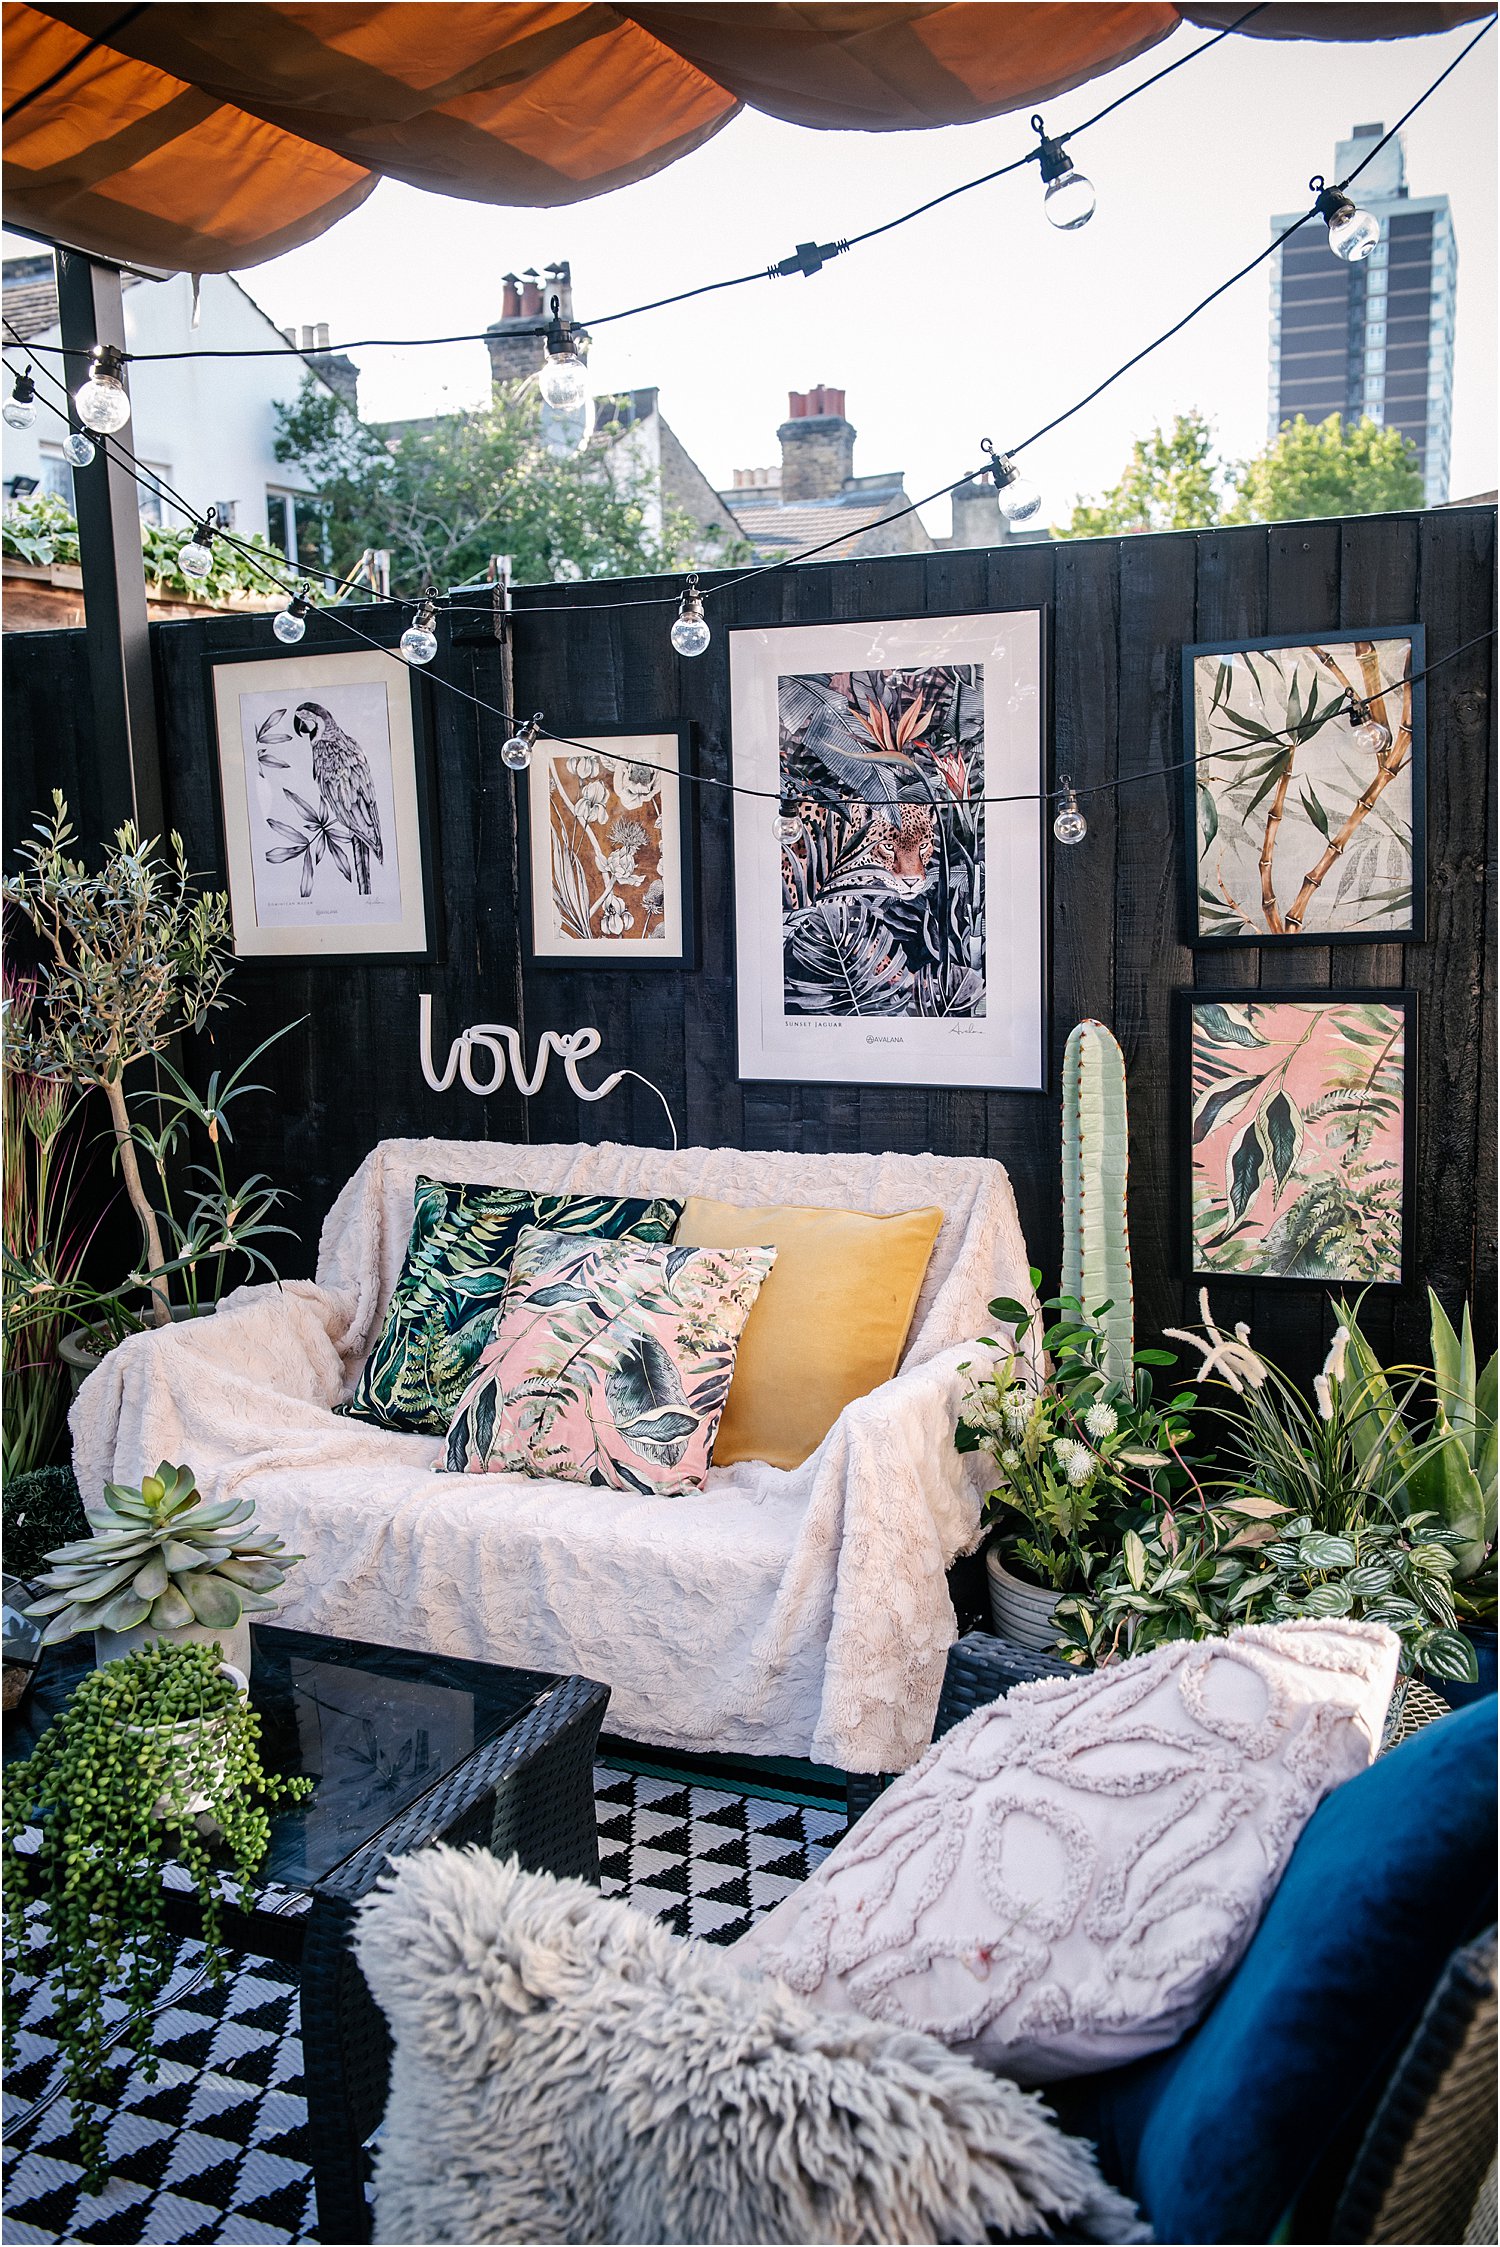
This photo below is the right side of the space under the pergola, against the black fence.
I have documented our cabin build using short video clips here and our use of Protek’s various products on here.
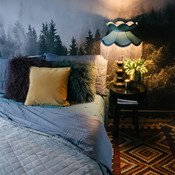
2. BRING THE OUTDOORS IN
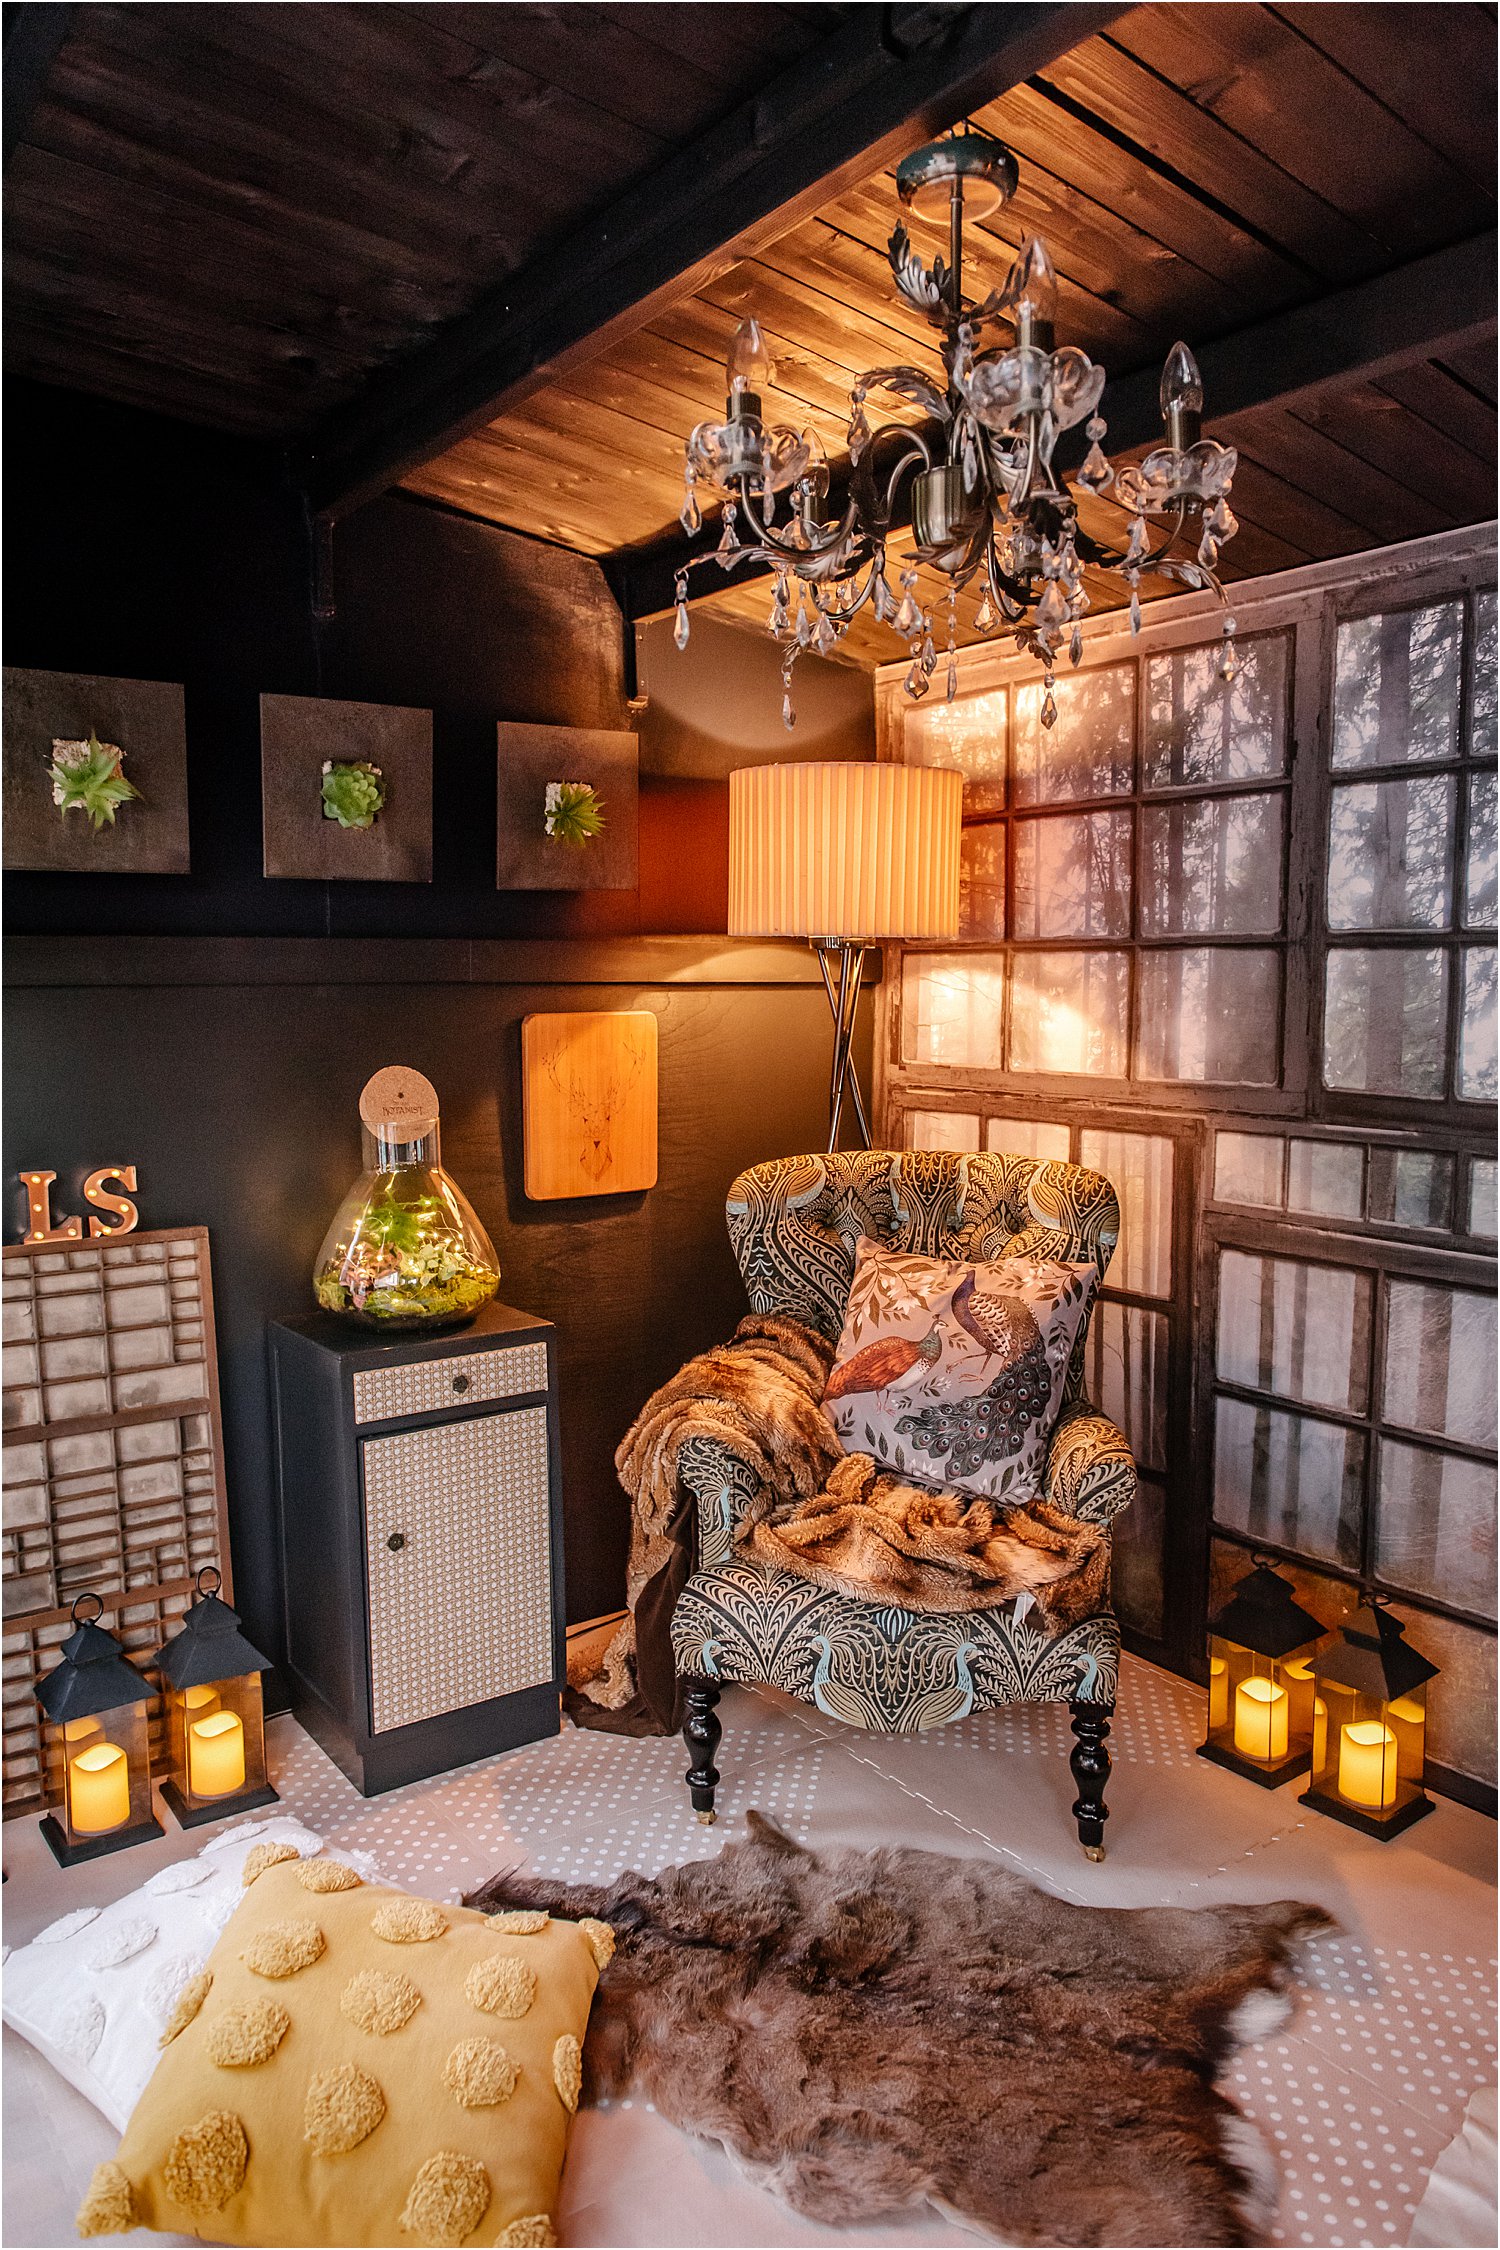
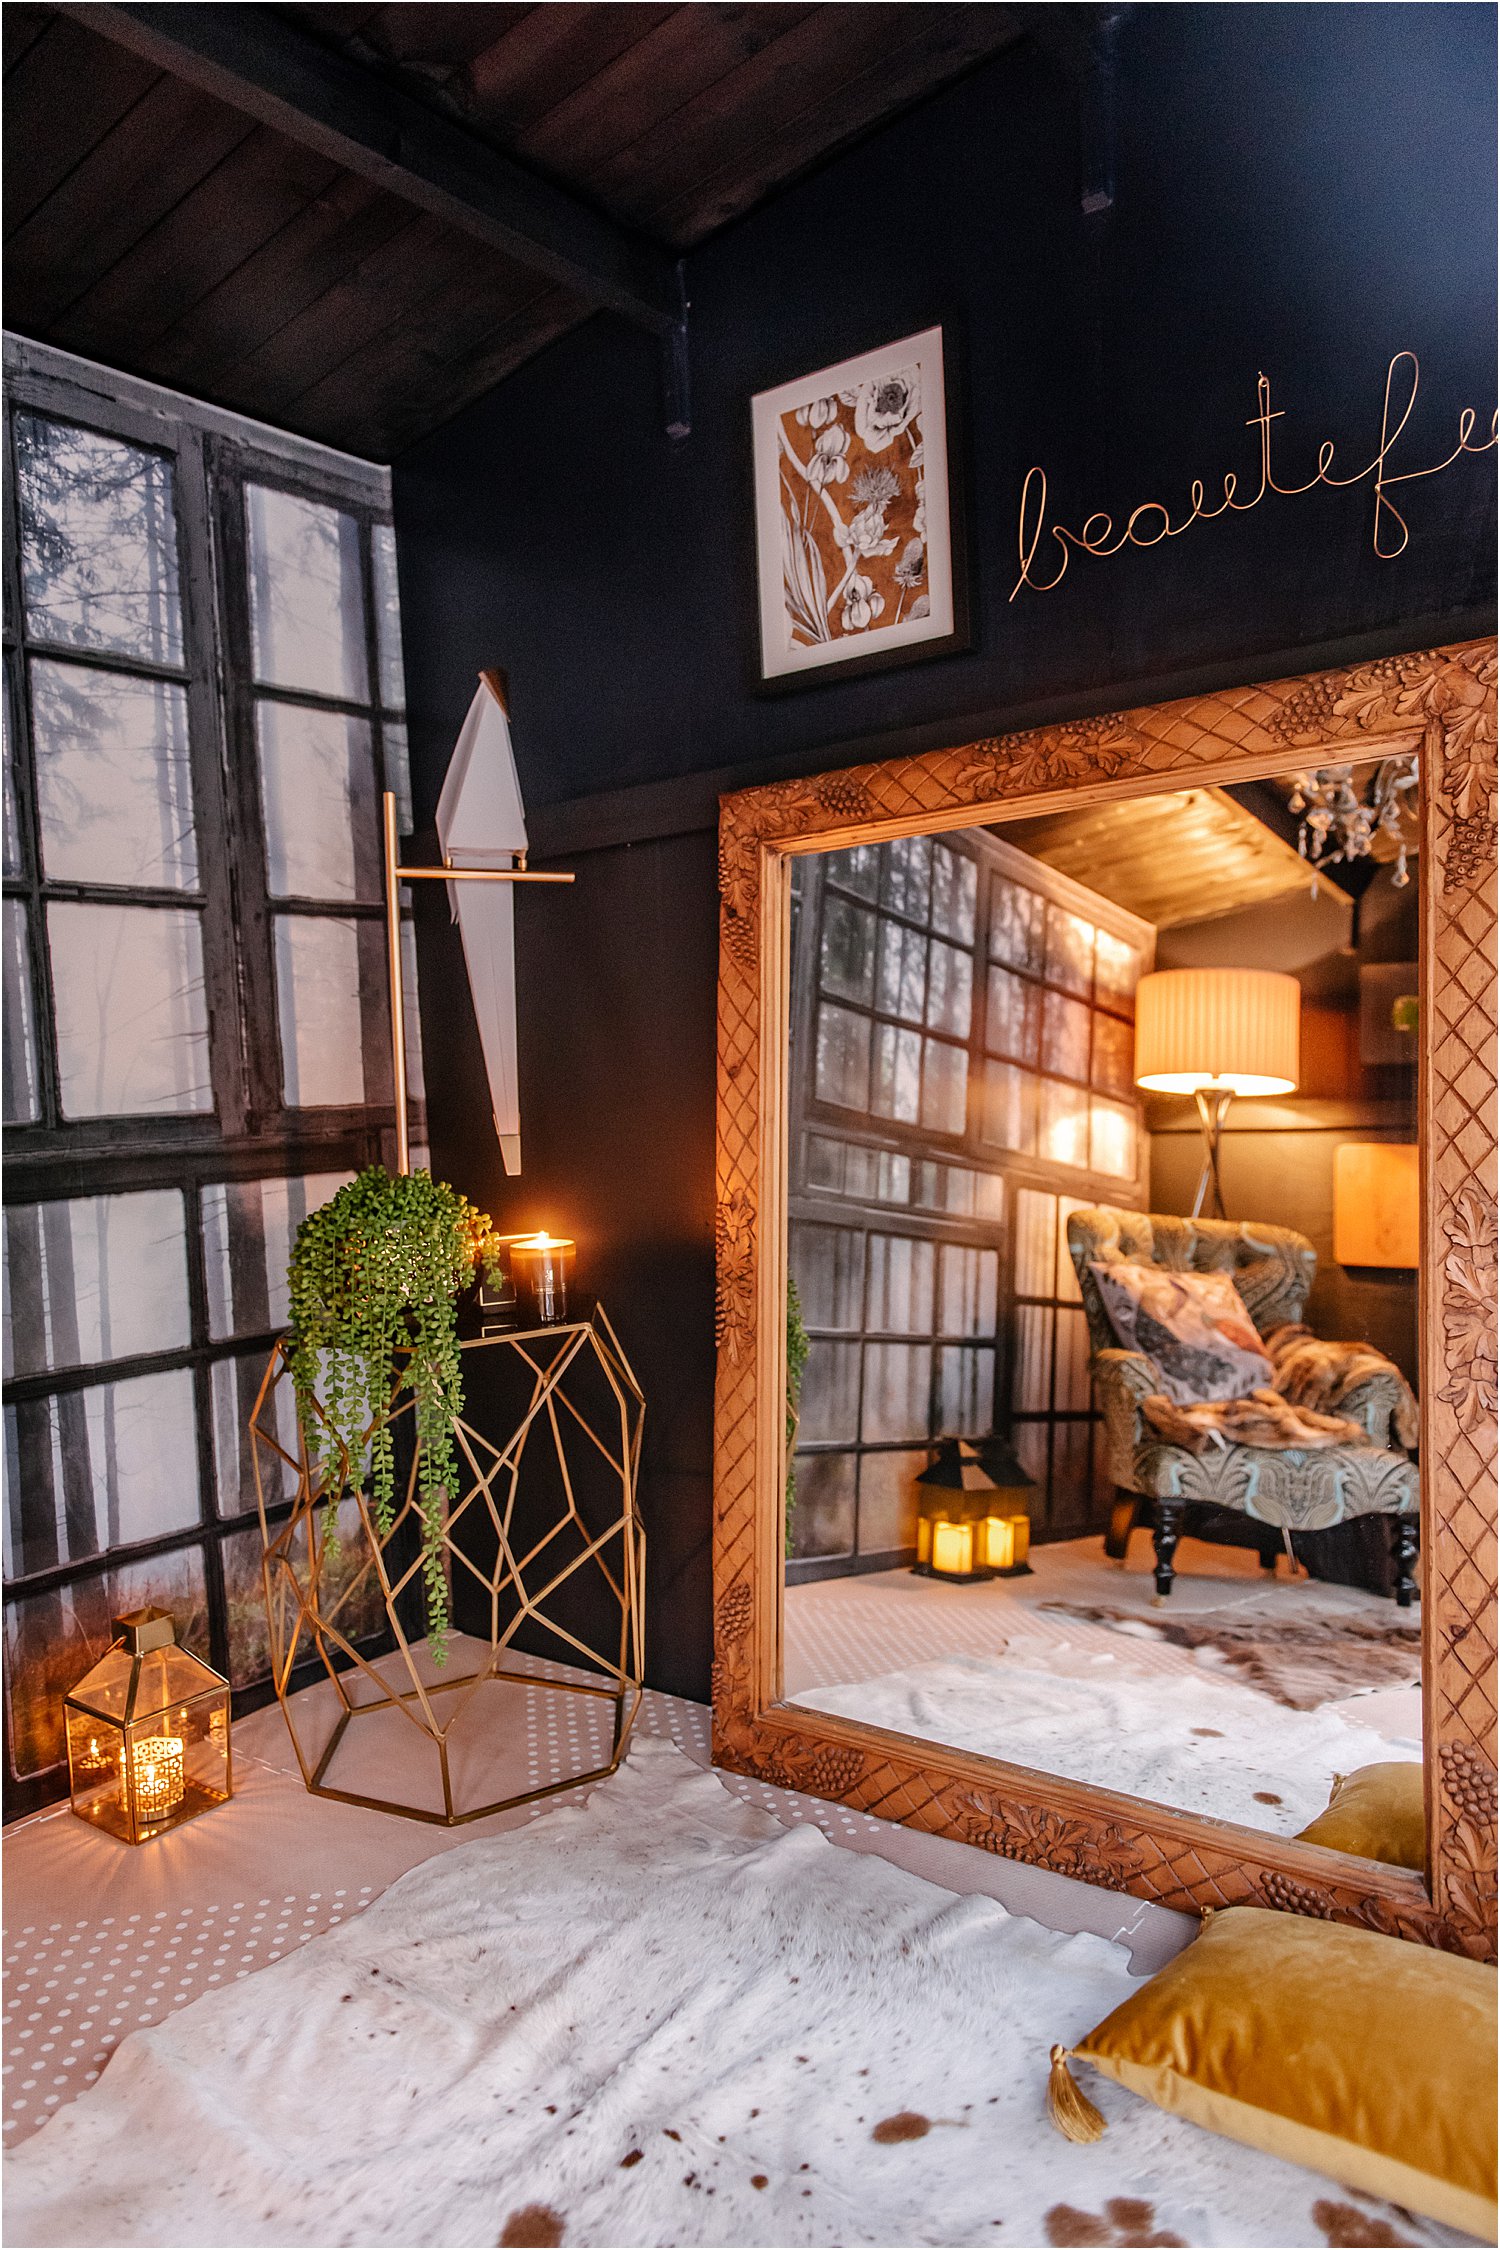
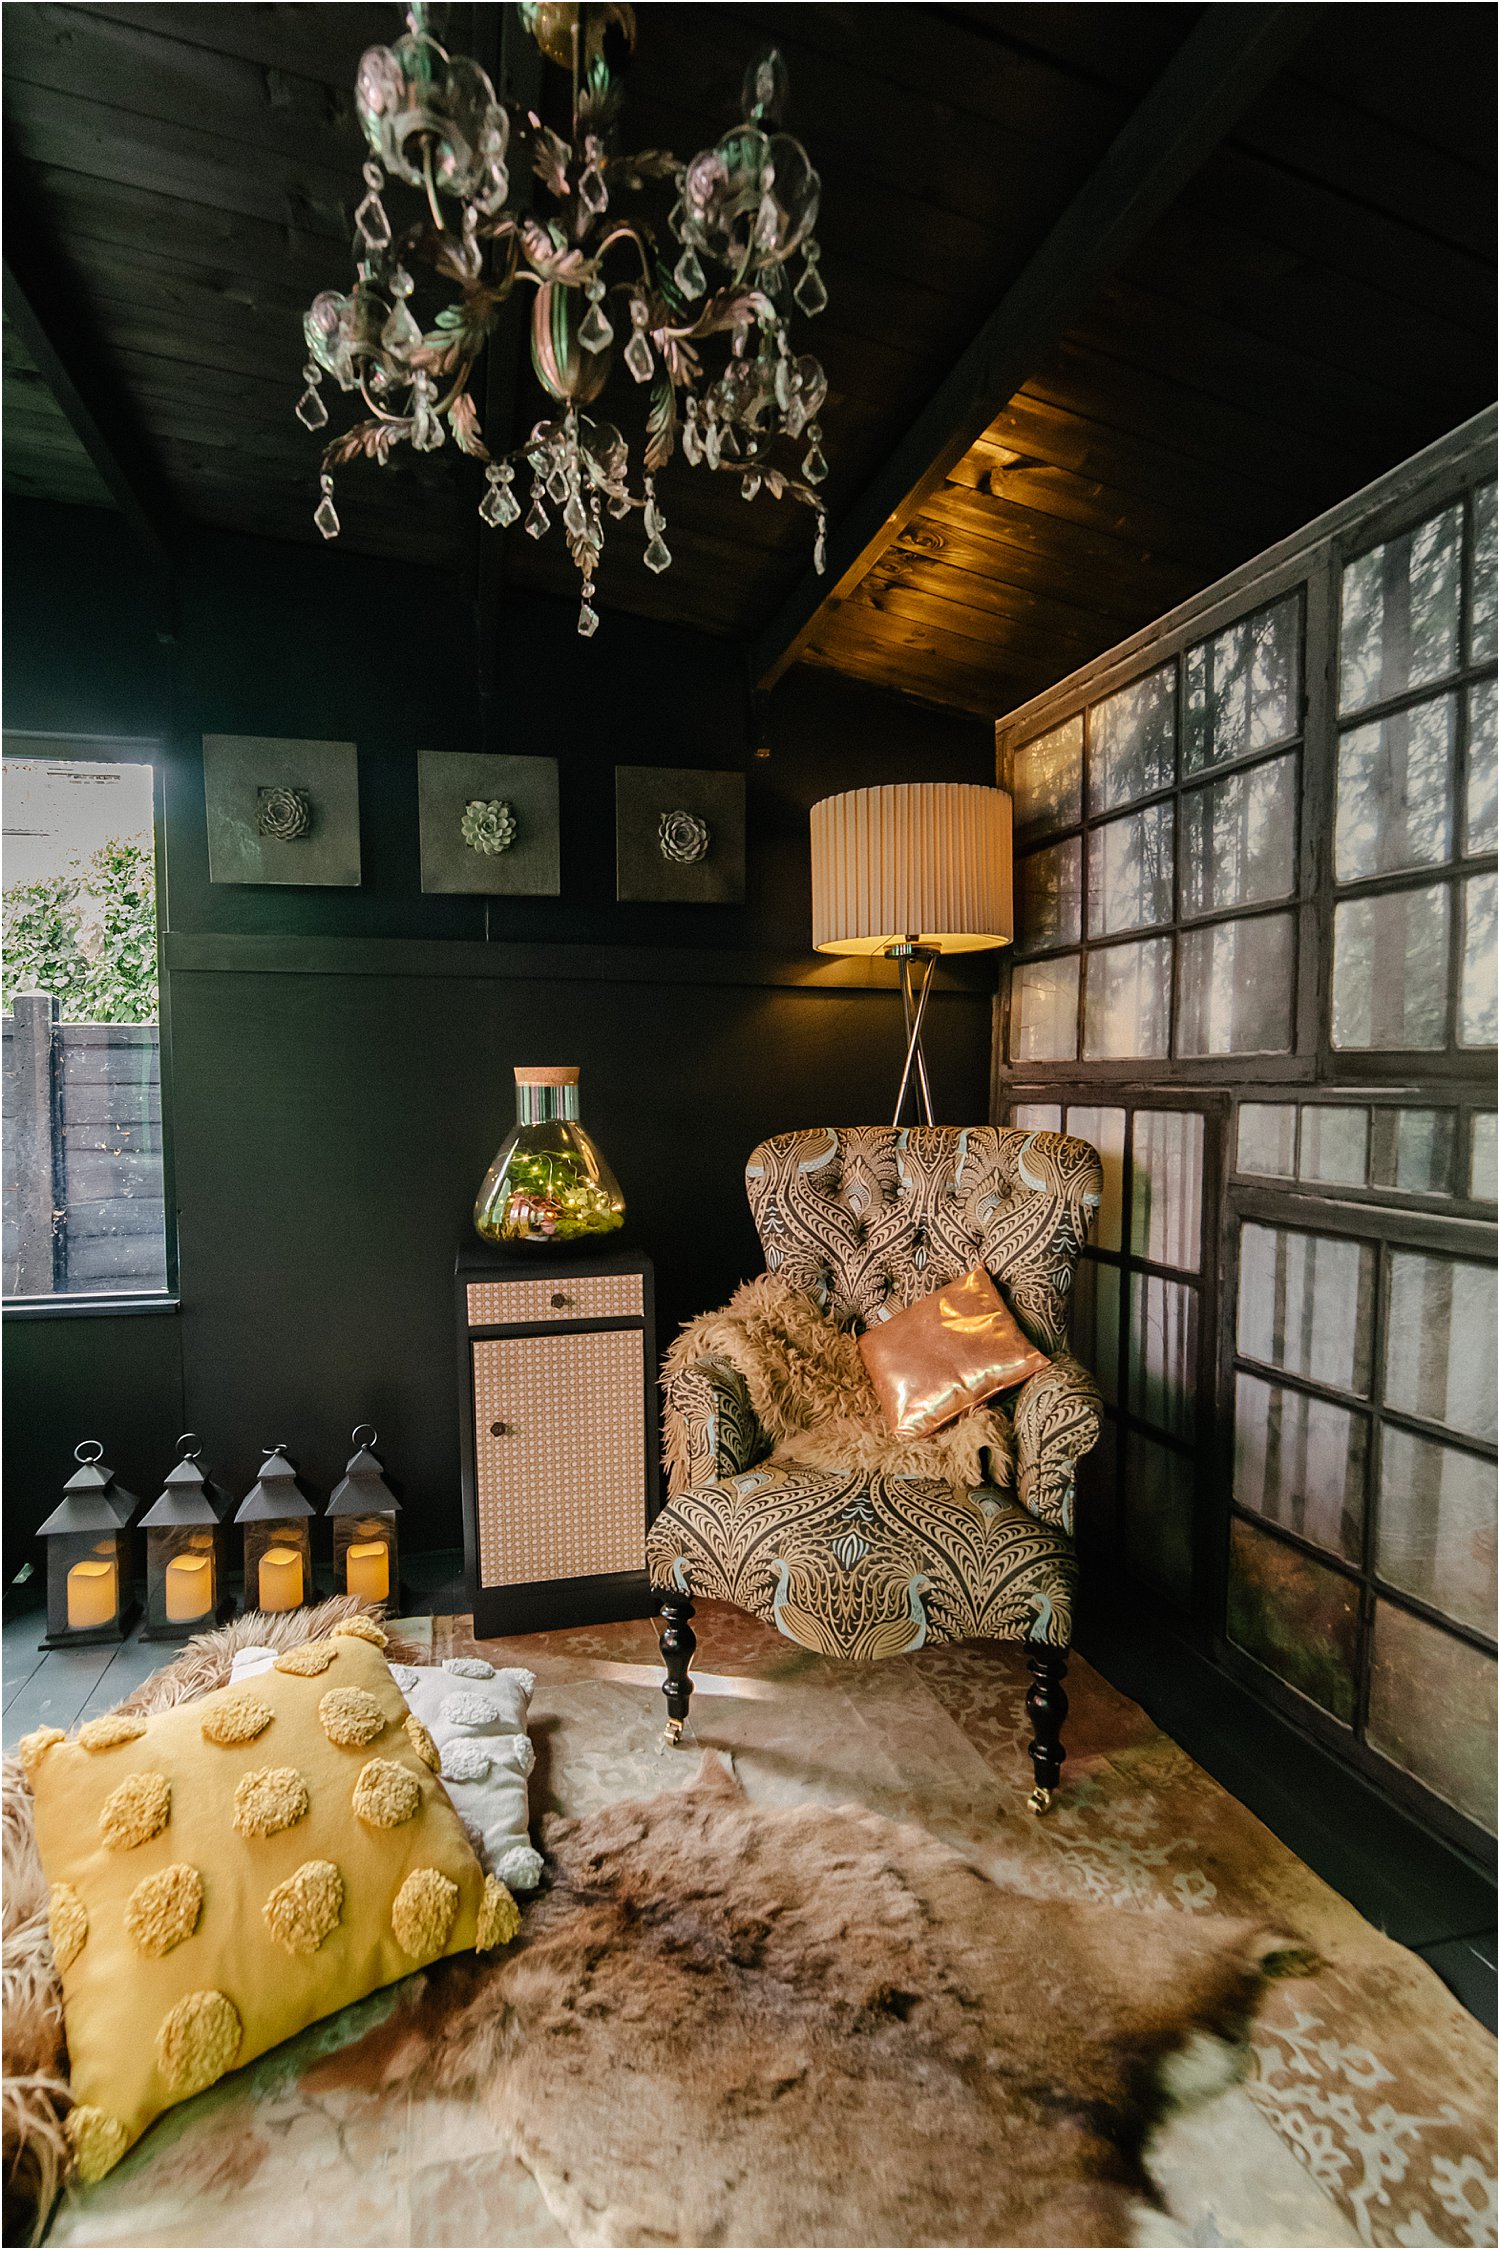
Just because it’s a cabin doesn’t mean you cannot bring nature in. Although I wanted this cabin to be like an escape nook, I didn’t want it to look like a cave. Rebel Walls have this mural called “cabin” which I thought was the perfect way of bringing the woods into the cabin giving the illusion that we are right in the middle of nowhere.
Putting it all up was so easy – I have posted several how to videos on this my Instagram story highlights. Many people have commented that I have made it look too easy. Well, the secret is, that it really was easy peasy to put up! No need to calculate where to cut as it’s all pre-lined for cutting! Even the wallpaper paste has been supplied!
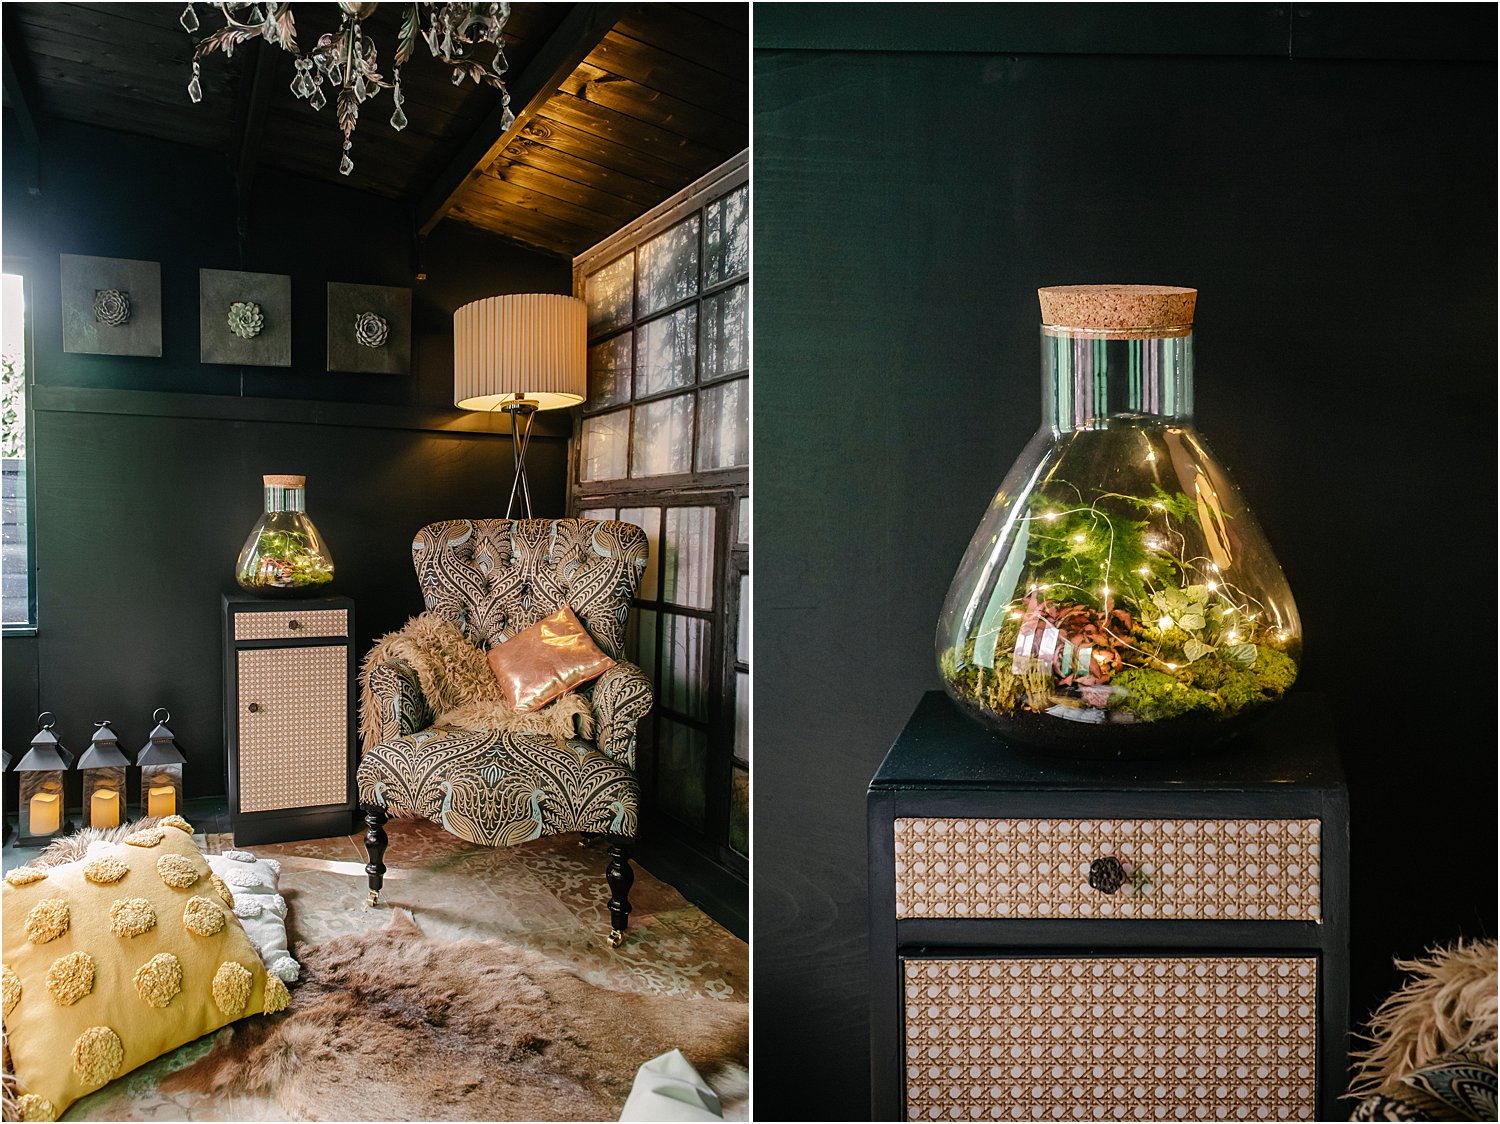
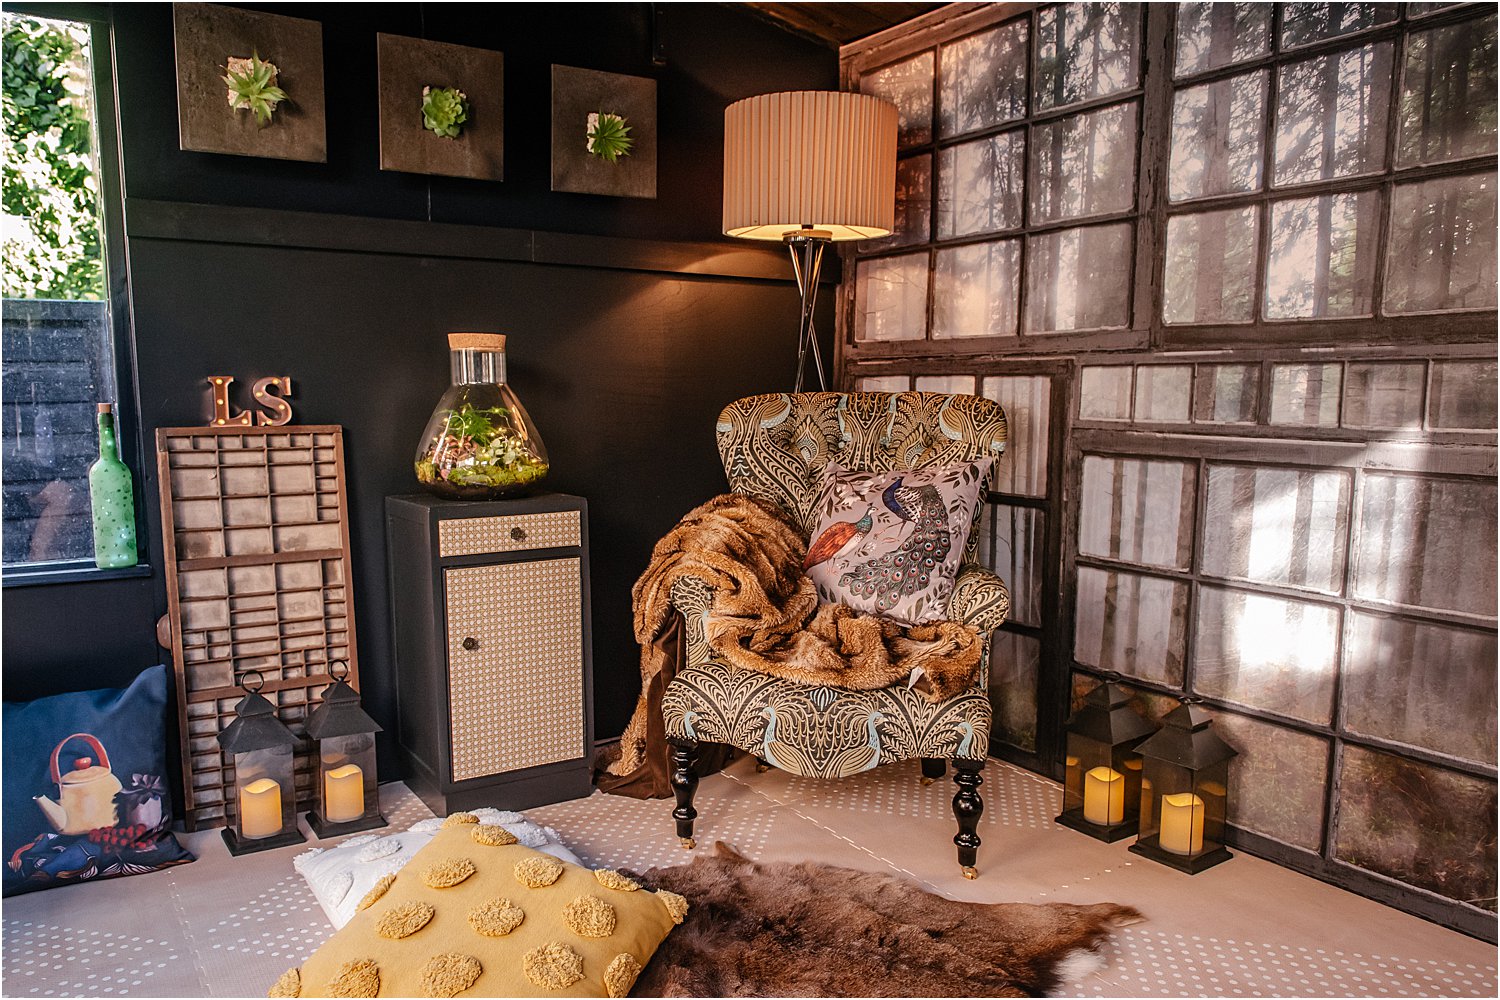
The Urban Botanist sent me this gorgeous ecosphere and wall succulent displays to bring real greenery into my space. Their ecosystems and wall art greenery are absolutely stunning. You have to check them out.
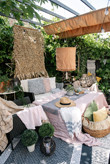
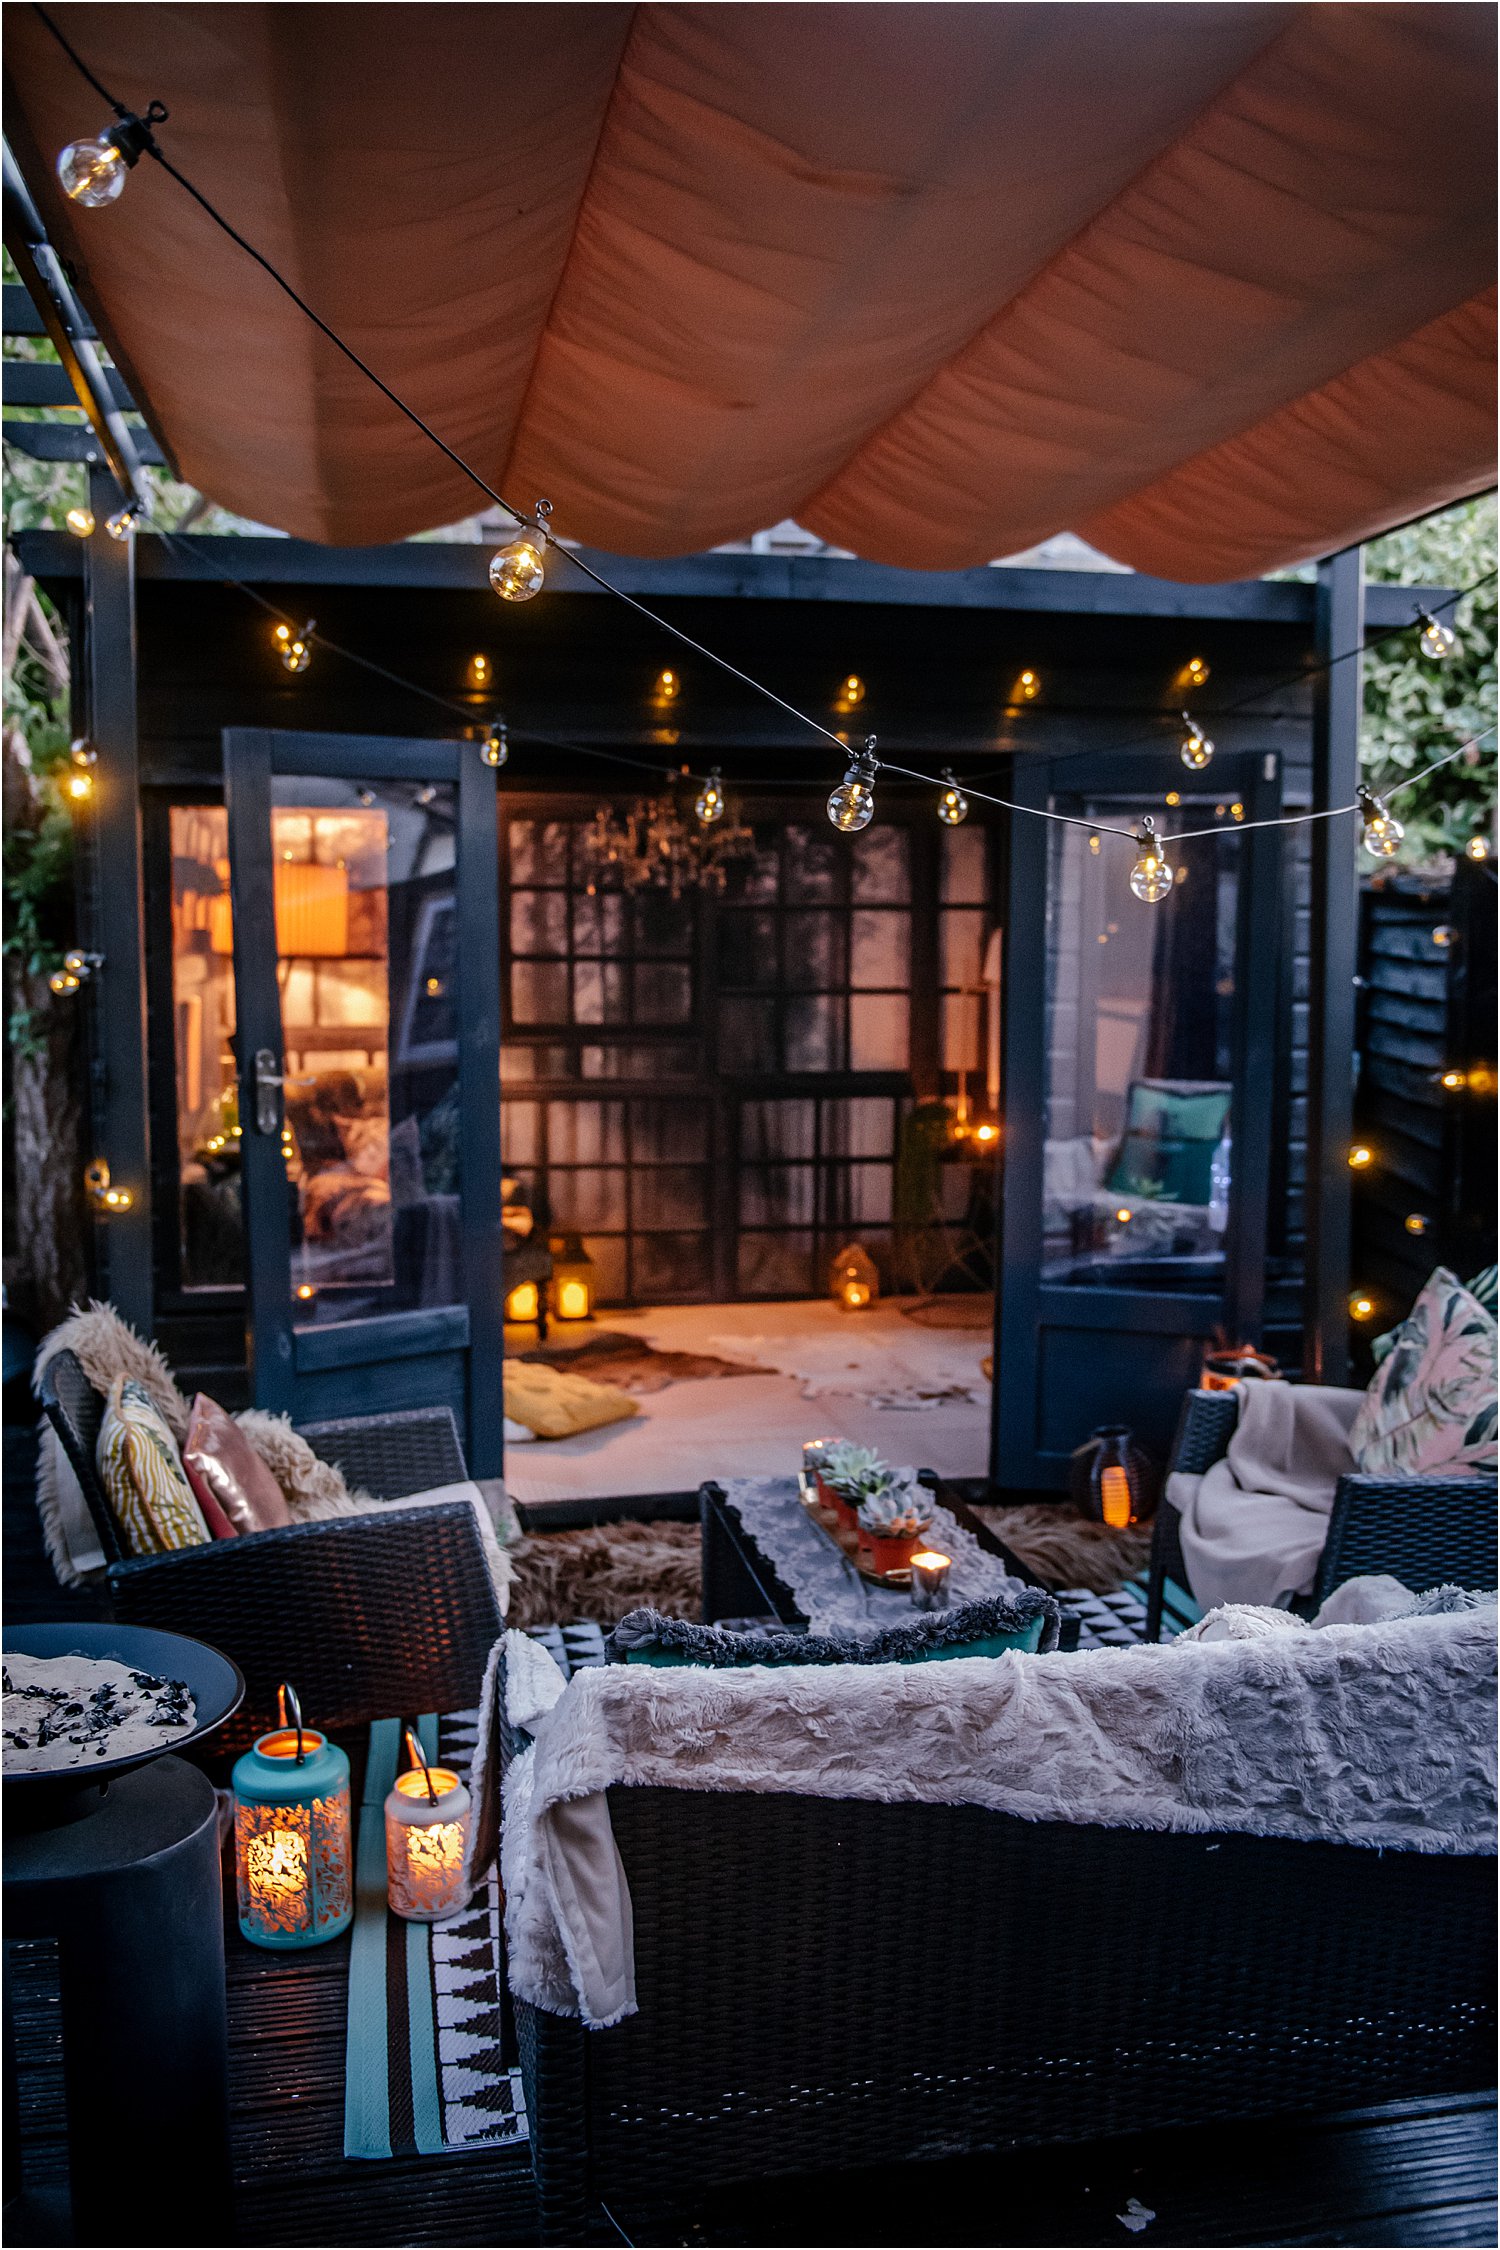
3. COSY COMFORTS
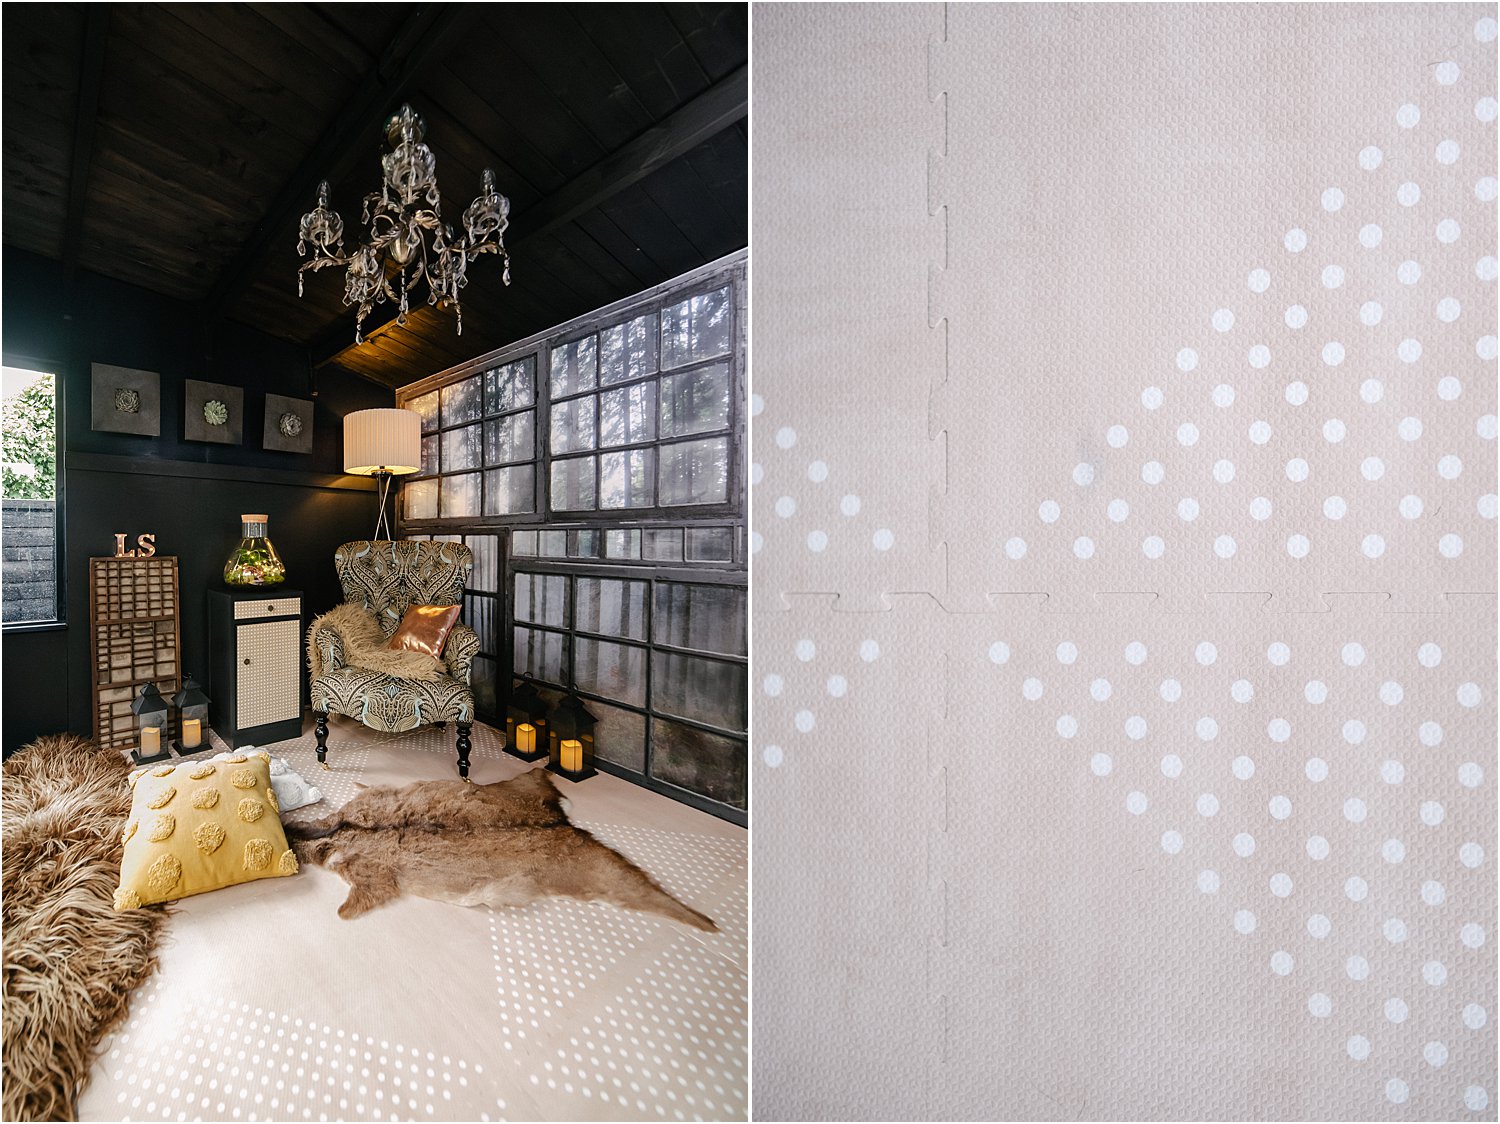
I wanted to bring in the ultimate cosy comforts in here so that it felt like a warm cushioned place to hunker down in. Toddlekind has kindly provided me with their beautifully designed floor foam mats great for kids play or exercise. They are not just extremely comfortable and kind to the feet but also doubles up as floor insulation, so it’s a double win! You can check out their amazing designs on here. These tiles are so cleverly designed that you can make=up your own patterns and they will still all fit together!
I have shown how these Toddlekind foam tiles are assembled together so easily on here.
4. DESIGN LIKE YOU WOULD AN INTERIOR SPACE
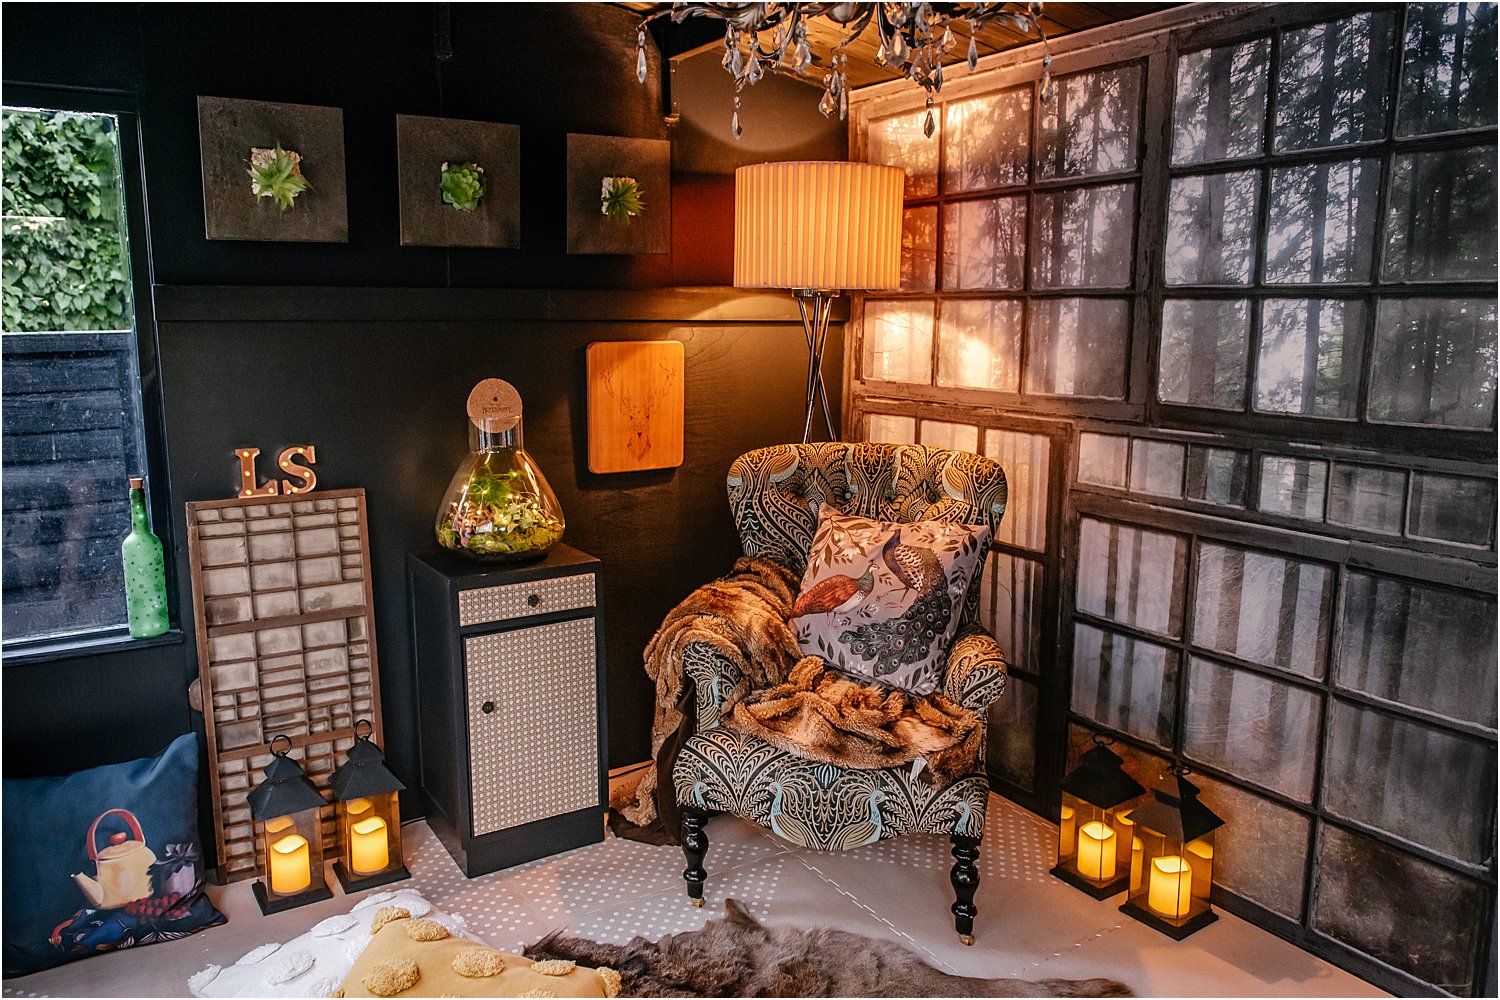
My trick in designing outdoor spaces is always to just think of it as designing an indoor space, like a living room for example. So bring in the throws, cushions, side tables, mirrors, lovely chairs like this Napoleon Rockefeller Tamsin peacock chair, blankets, rugs and skins, pouffes…whatever takes your fancy. For tips in choosing your style and colours, see here.
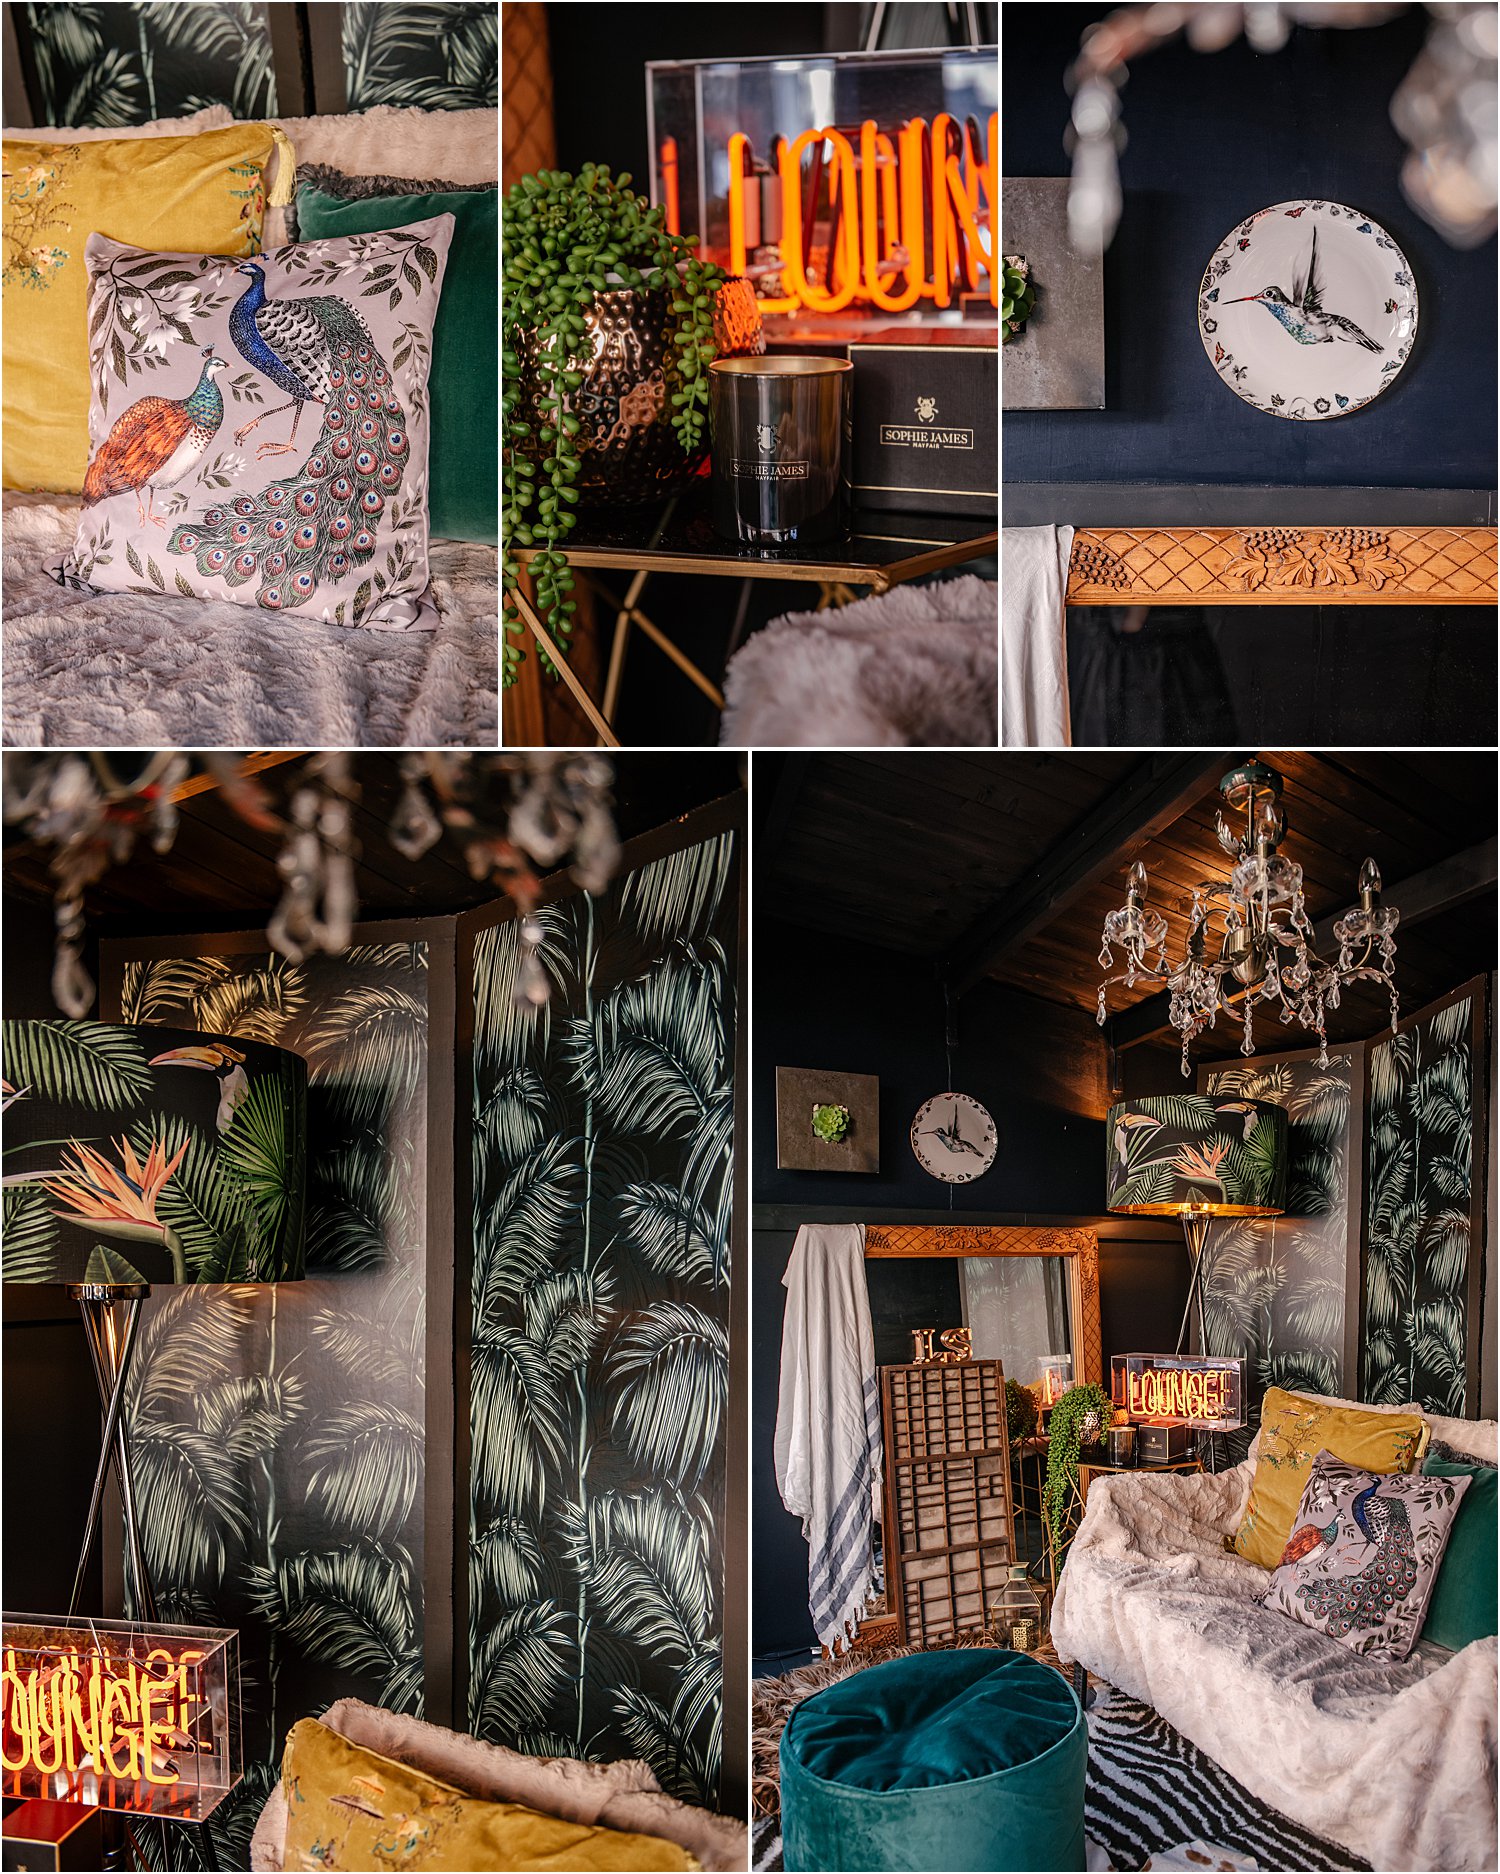
Charlton Island which represents various designers and artists, sent me accessories like cushions, candles, pots, wallpaper, lampshades, pictures and wall displays to kit this place out. For a closer look at these accessories, see here.
5. LIGHTING IS KEY
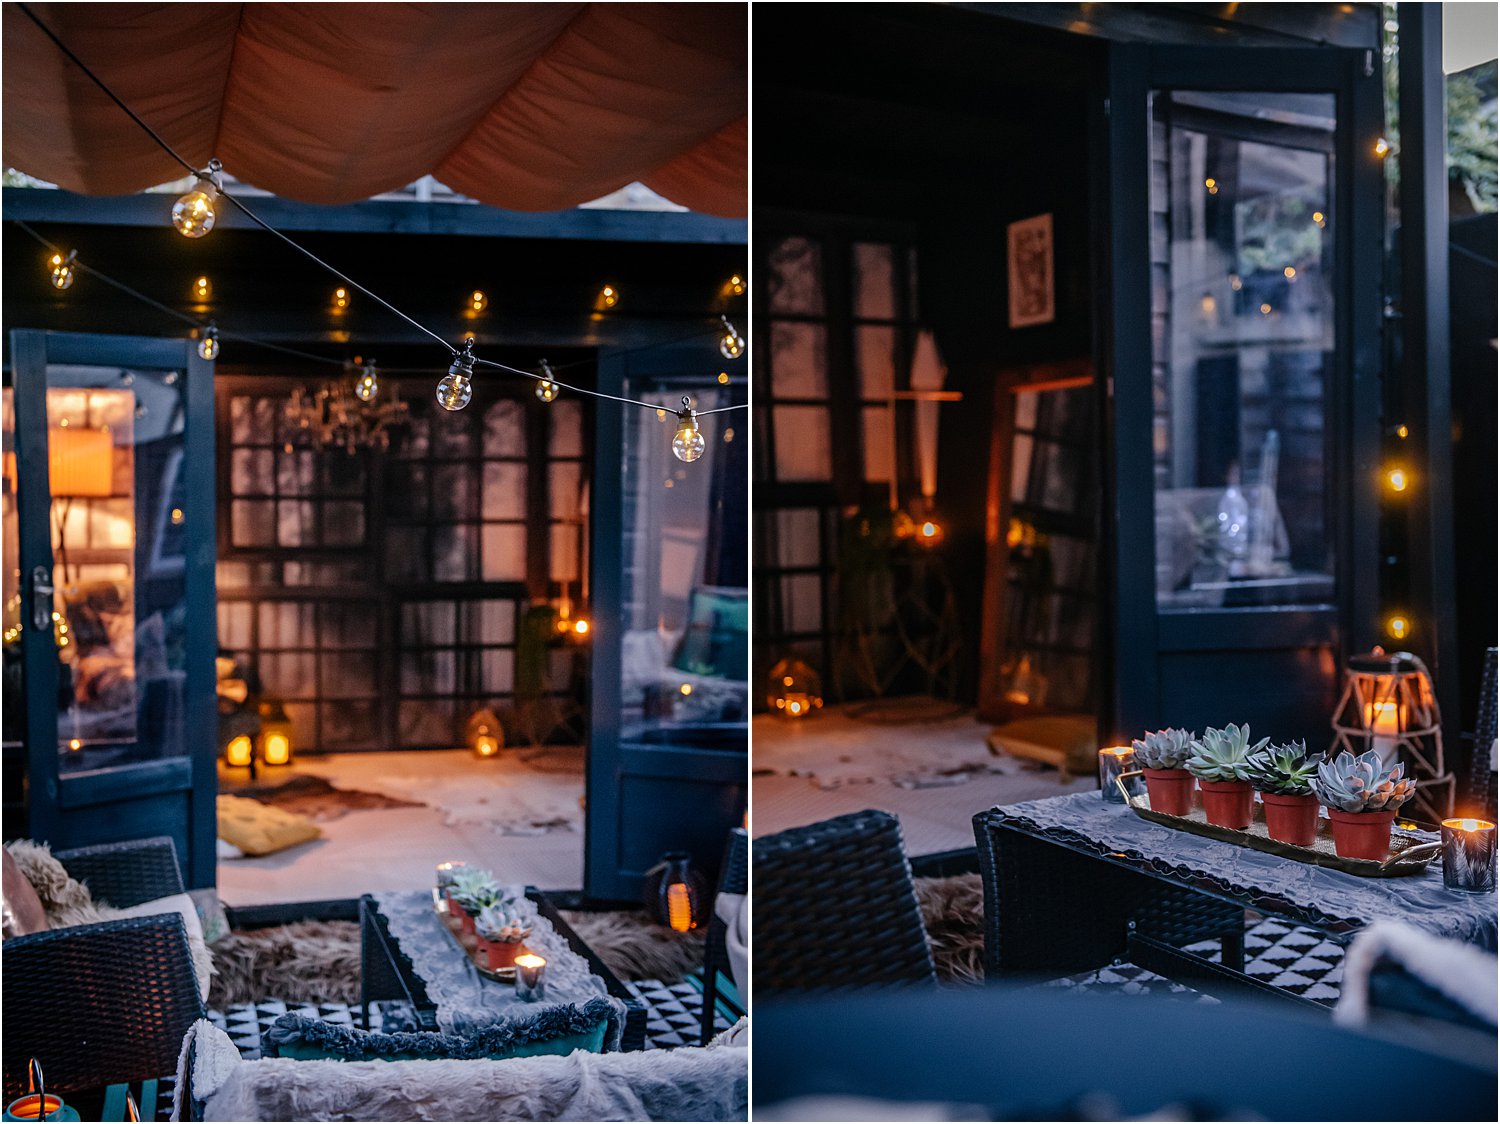
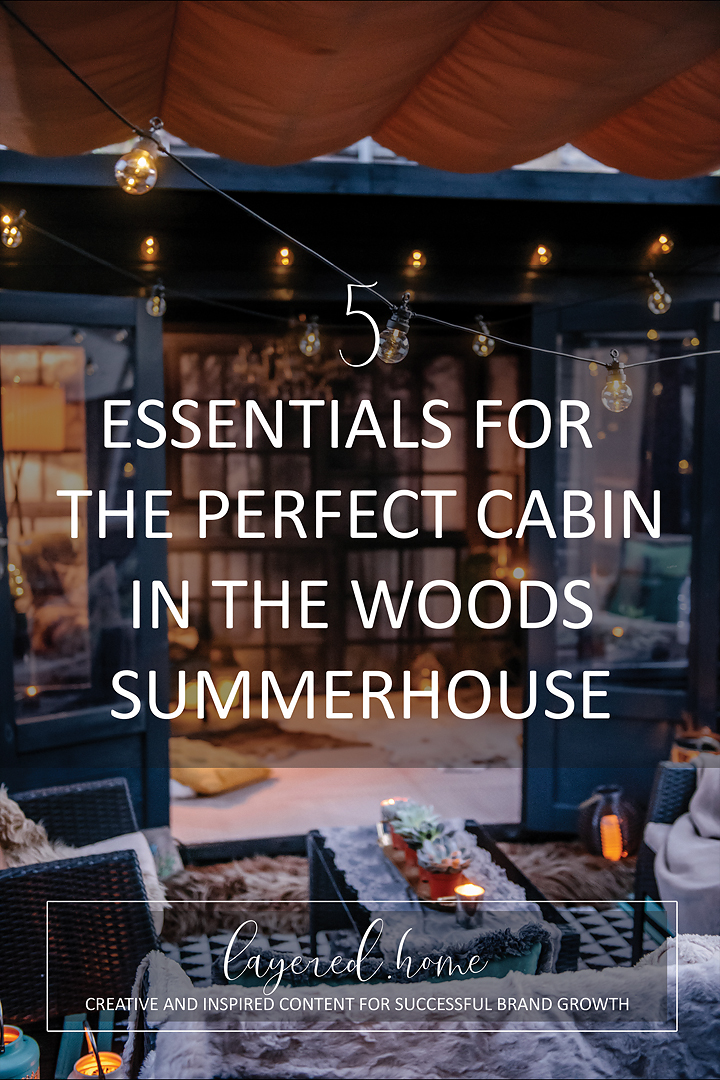
Finally, low lighting is an age-old trick in having the cosiest space. You can achieve this by using lamps instead of overhead lights, lanterns, festoons, fairy lights, tea lights and candles for that flickering atmosphere. Festive Lights sent me extensions of my festoons and some indoor / outdoor lanterns for my cabin space.
My cabin in the woods is now ready to enjoy and, knowing myself, will be restyled from time to time. The next project here is to try and set-up a cosy outdoor cinema!
I hope you found this article on 5 Essentials for the Perfect Cabin in the Woods Summerhouse useful.
Don’t forget to download my free resources that will help you design your own interiors and grow your Instagram account! Let’s chat on Instagram and follow me on layered.home for more inspiration.
This post has been sponsored by Protek . Gifted items featured here are Charlton Island Toddlekind Urban Botanist Rebel Walls Festive Lights Napoleon Rockefeller