Here’s my “How to tile a dining table DIY tutorial using blue and white porcelain tiles” that you asked for!
A little backstory: I bought this wooden table from Ebay for £164 including 4 chairs (which I have since given away). The table is perfect in size, solid and has beautiful legs. Perfect except for the top which was varnished in dark gloopy stain hence I always covered it with a tablecloth.
I stripped it a couple of years ago and waxed it with a whitewash wax. It looked good but unfortunately the paint stripper ruined parts of the wood on top so that they cracked and peeled. And so the tablecloths went on it again.
I’ve been wanting to tile this table for the longest time but always thought it would be a huge job and expense so I opted for patch up measures for the time being.
Last year I painted this table black. It looked good with the sturdy black paint that didn’t chip at all. I used Frenchic Black Jack which is waterproof. But whilst it was durable and easy to wipe clean, a lighter colour was needed to lift the light in this room. It’s a dark space even with the skylights and window. My house gets very little light overall.
My kids did a lot of painting in the summer and I underestimated the mess and paint splashes that showed up against the black – yet another impetus for tiling this table.
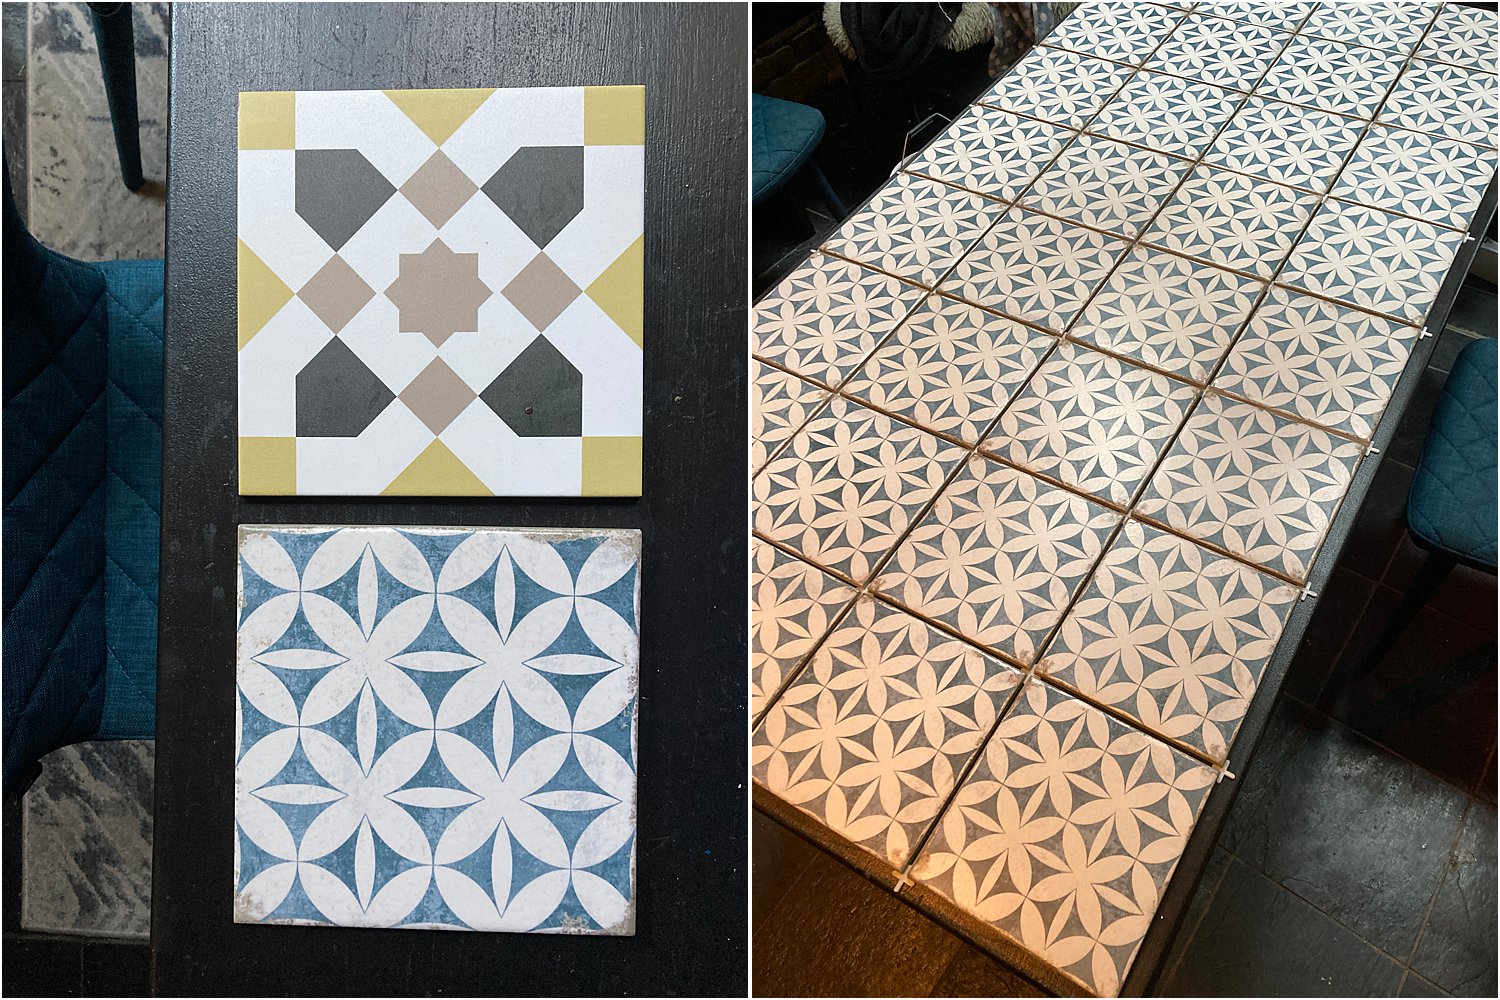
A paid partnership with Tile Giant was perfectly timed to achieve this project. They asked me to choose any tile from their range and I ordered about a dozen samples. These were the two tiles that I had difficulty deciding on.
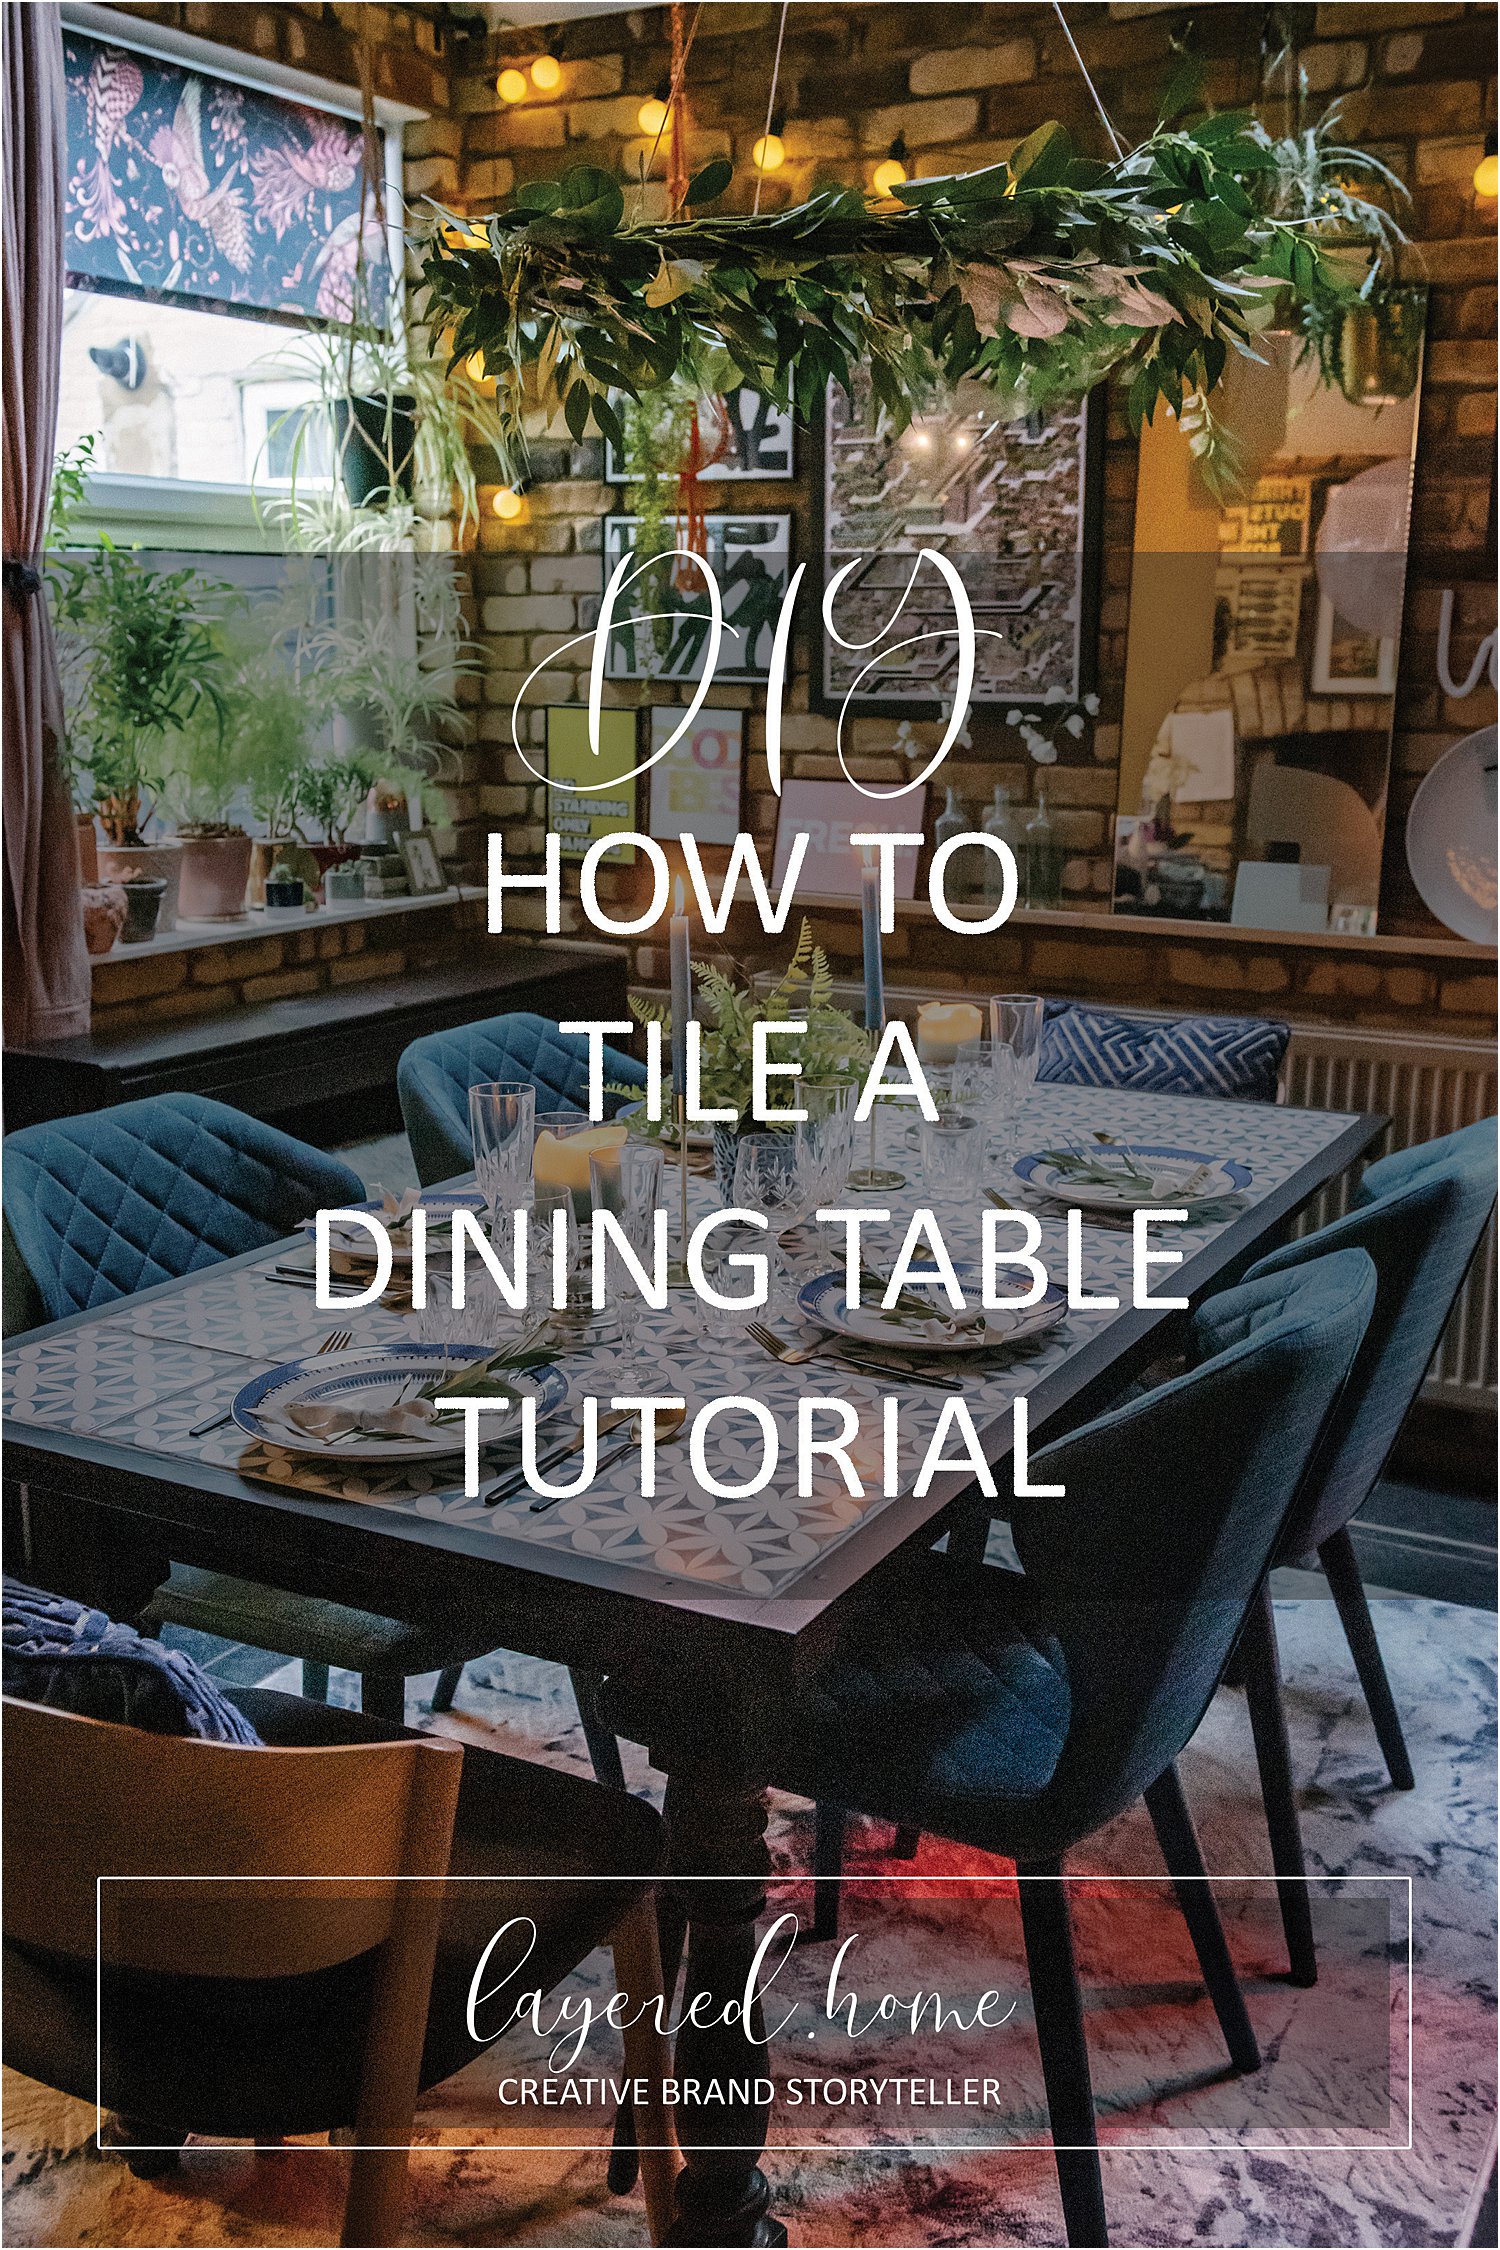
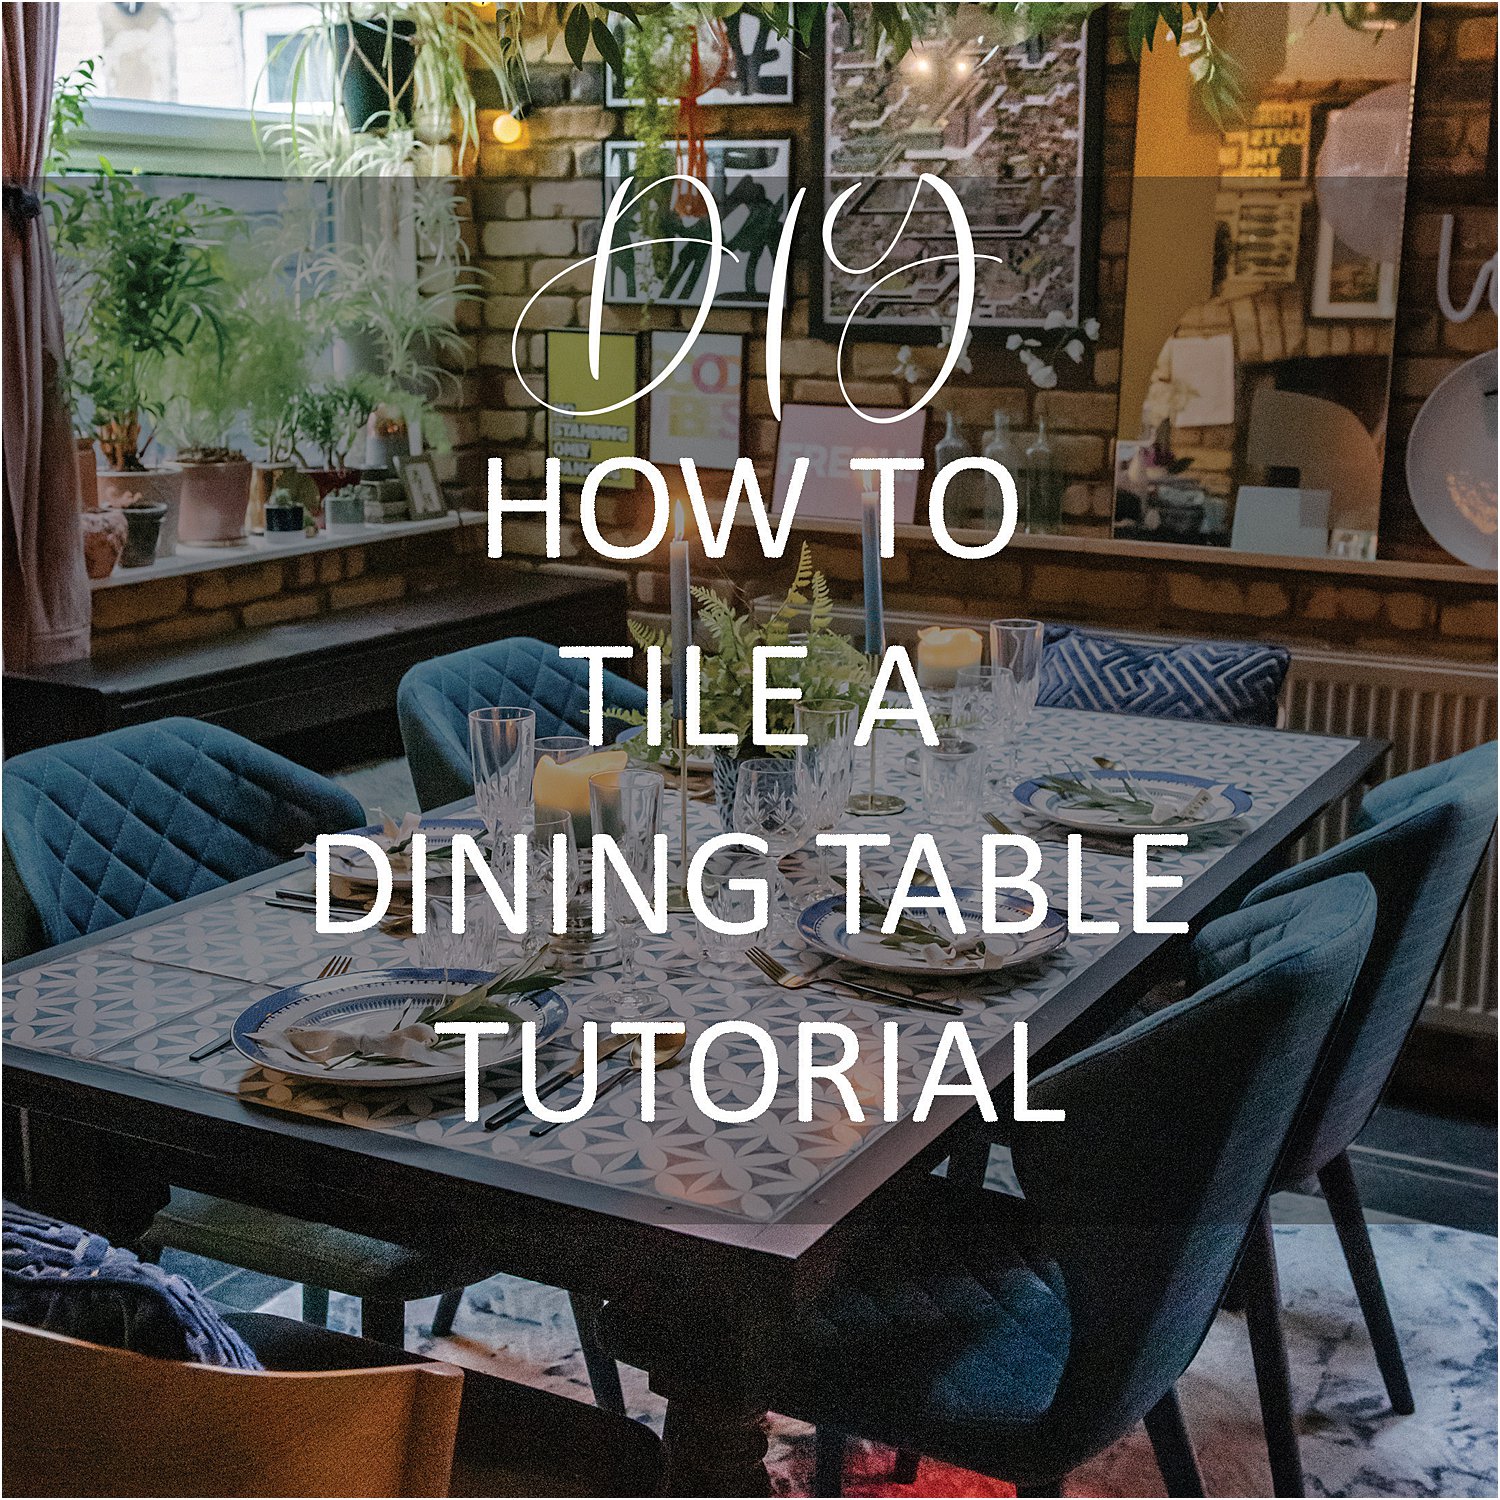
So here’s how we tiled our dining table DIY style using blue and white porcelain tiles in 10 easy steps.
1. Order full size tile samples
Cut samples are often provided by retailers for free. I think it’s hard to visualise and make the right decision with cut tiles which are often 1/4 of the full size tile or smaller.
I had this yellow and black Adorne Santiago tile as a cut sample which looked magnificent on my black table background. But to be sure I made the right choice, I paid for a full size sample. It’s worth it in my opinion and they are not that expensive at all, often costing just a couple of pounds.
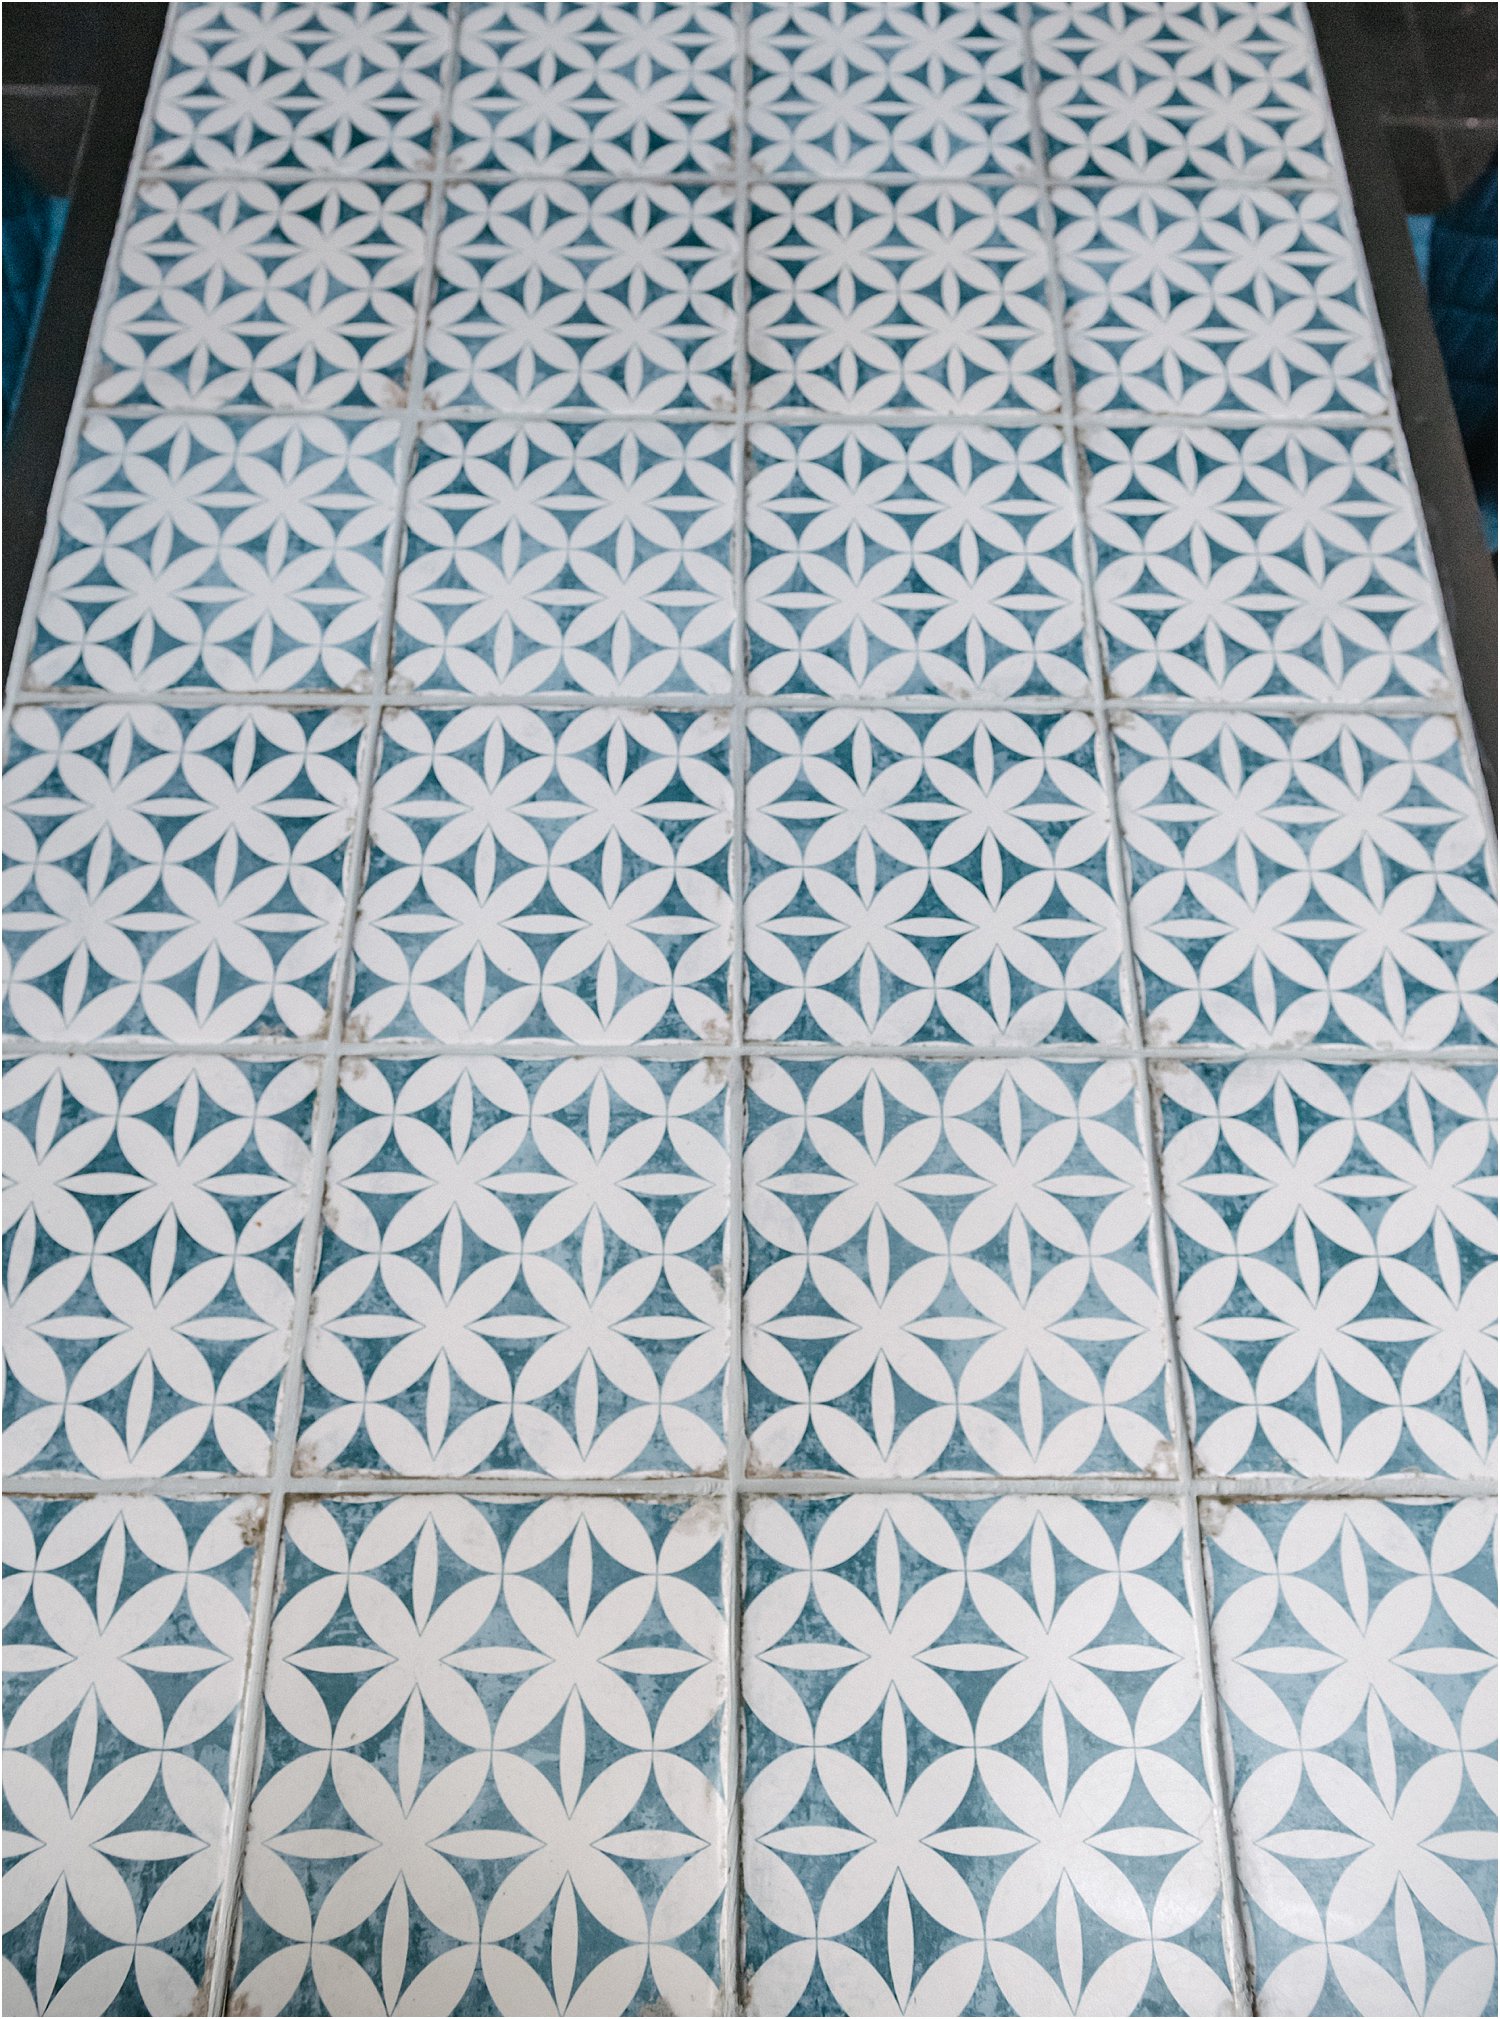
When the full size yellow and black tile sample came, I completely changed my mind about it and went for the Geo Blue Formentera porcelain tile. (Photos below are phone snaps.)
2. Think about the surface of the tile whether it’s flat or curved
This was something I had not thought of before and probably would have influenced my decision. The surface of your tile will impact the overall look of the table top.
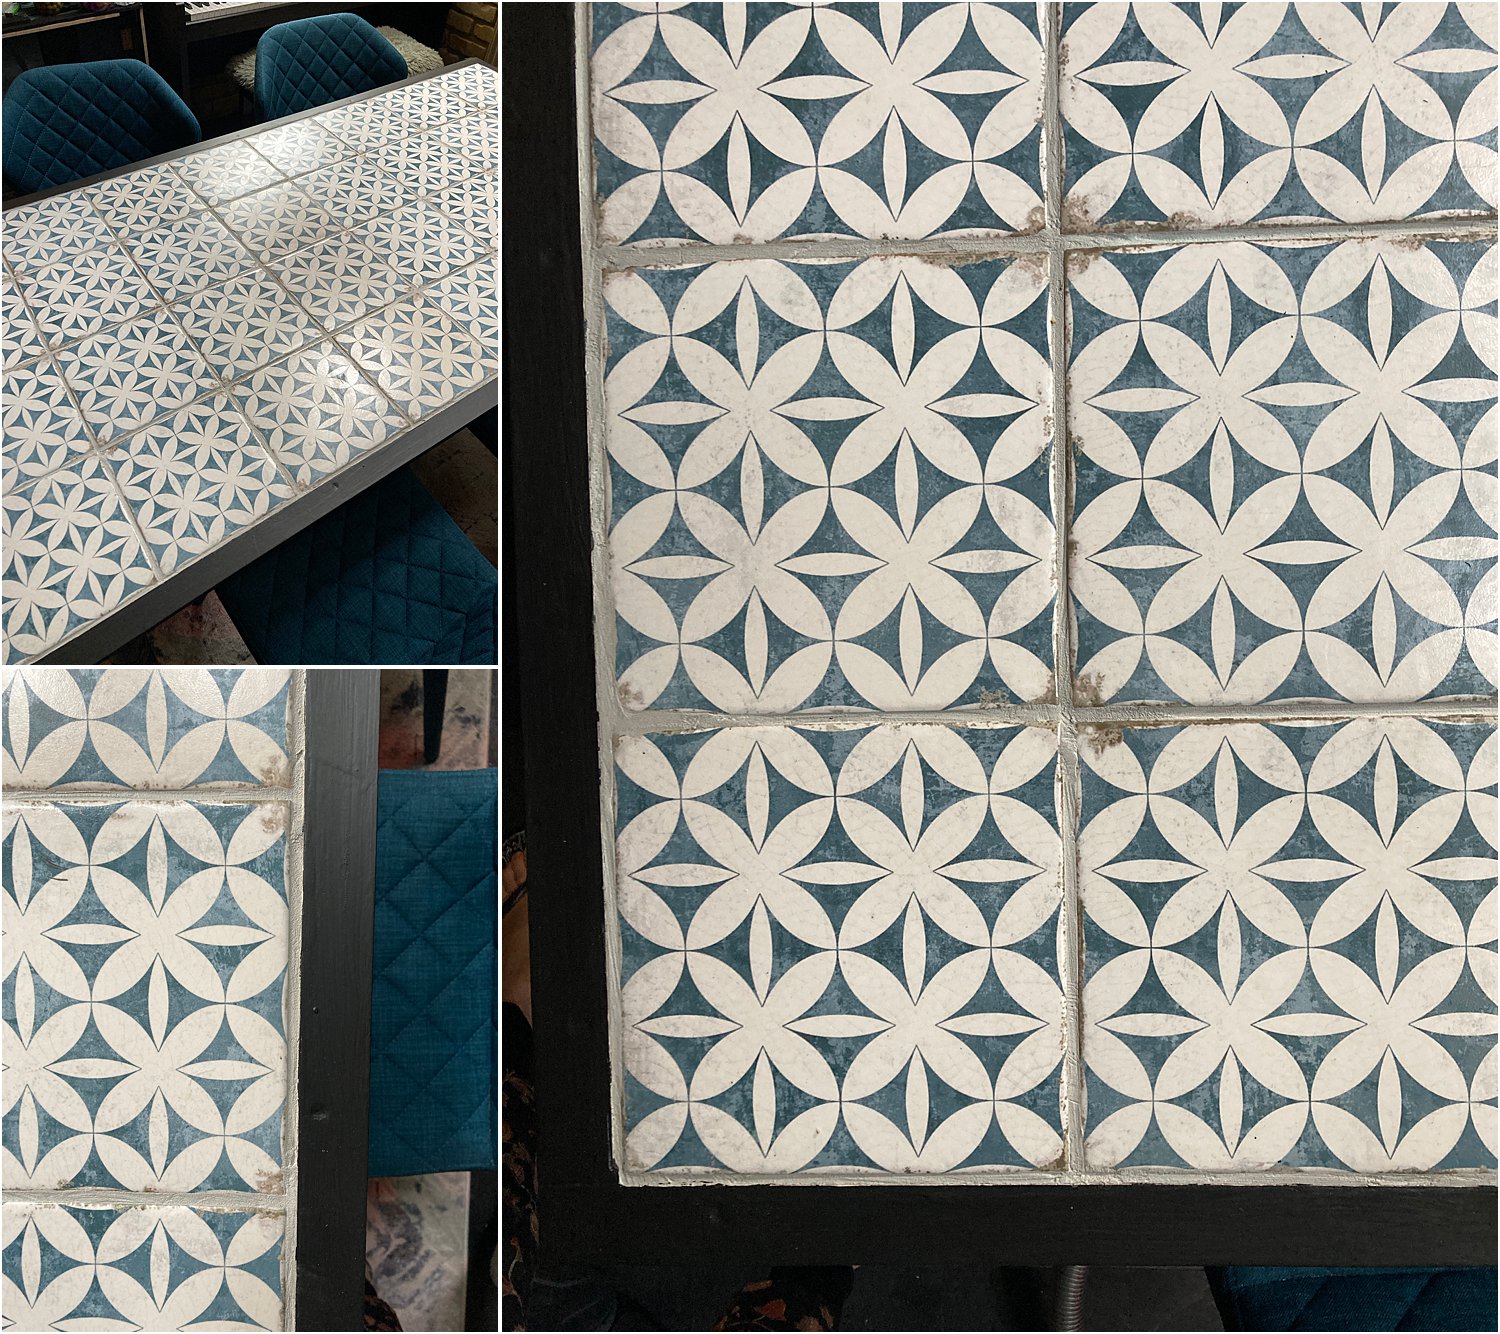
The yellow and black tile is flat all the way to the edges. In contrast, the blue tile slopes down at the edges which makes it impossible to even out the grout lines.
The curves on the edges are also shallower than the corner curves so with this tile, it’s really tricky to get an even level grout line throughout.
The yellow and black line also has a clean geometric look whereas the blue tile has antiqued weathered corners and edges. This also changed the overall look and feel of the table top.
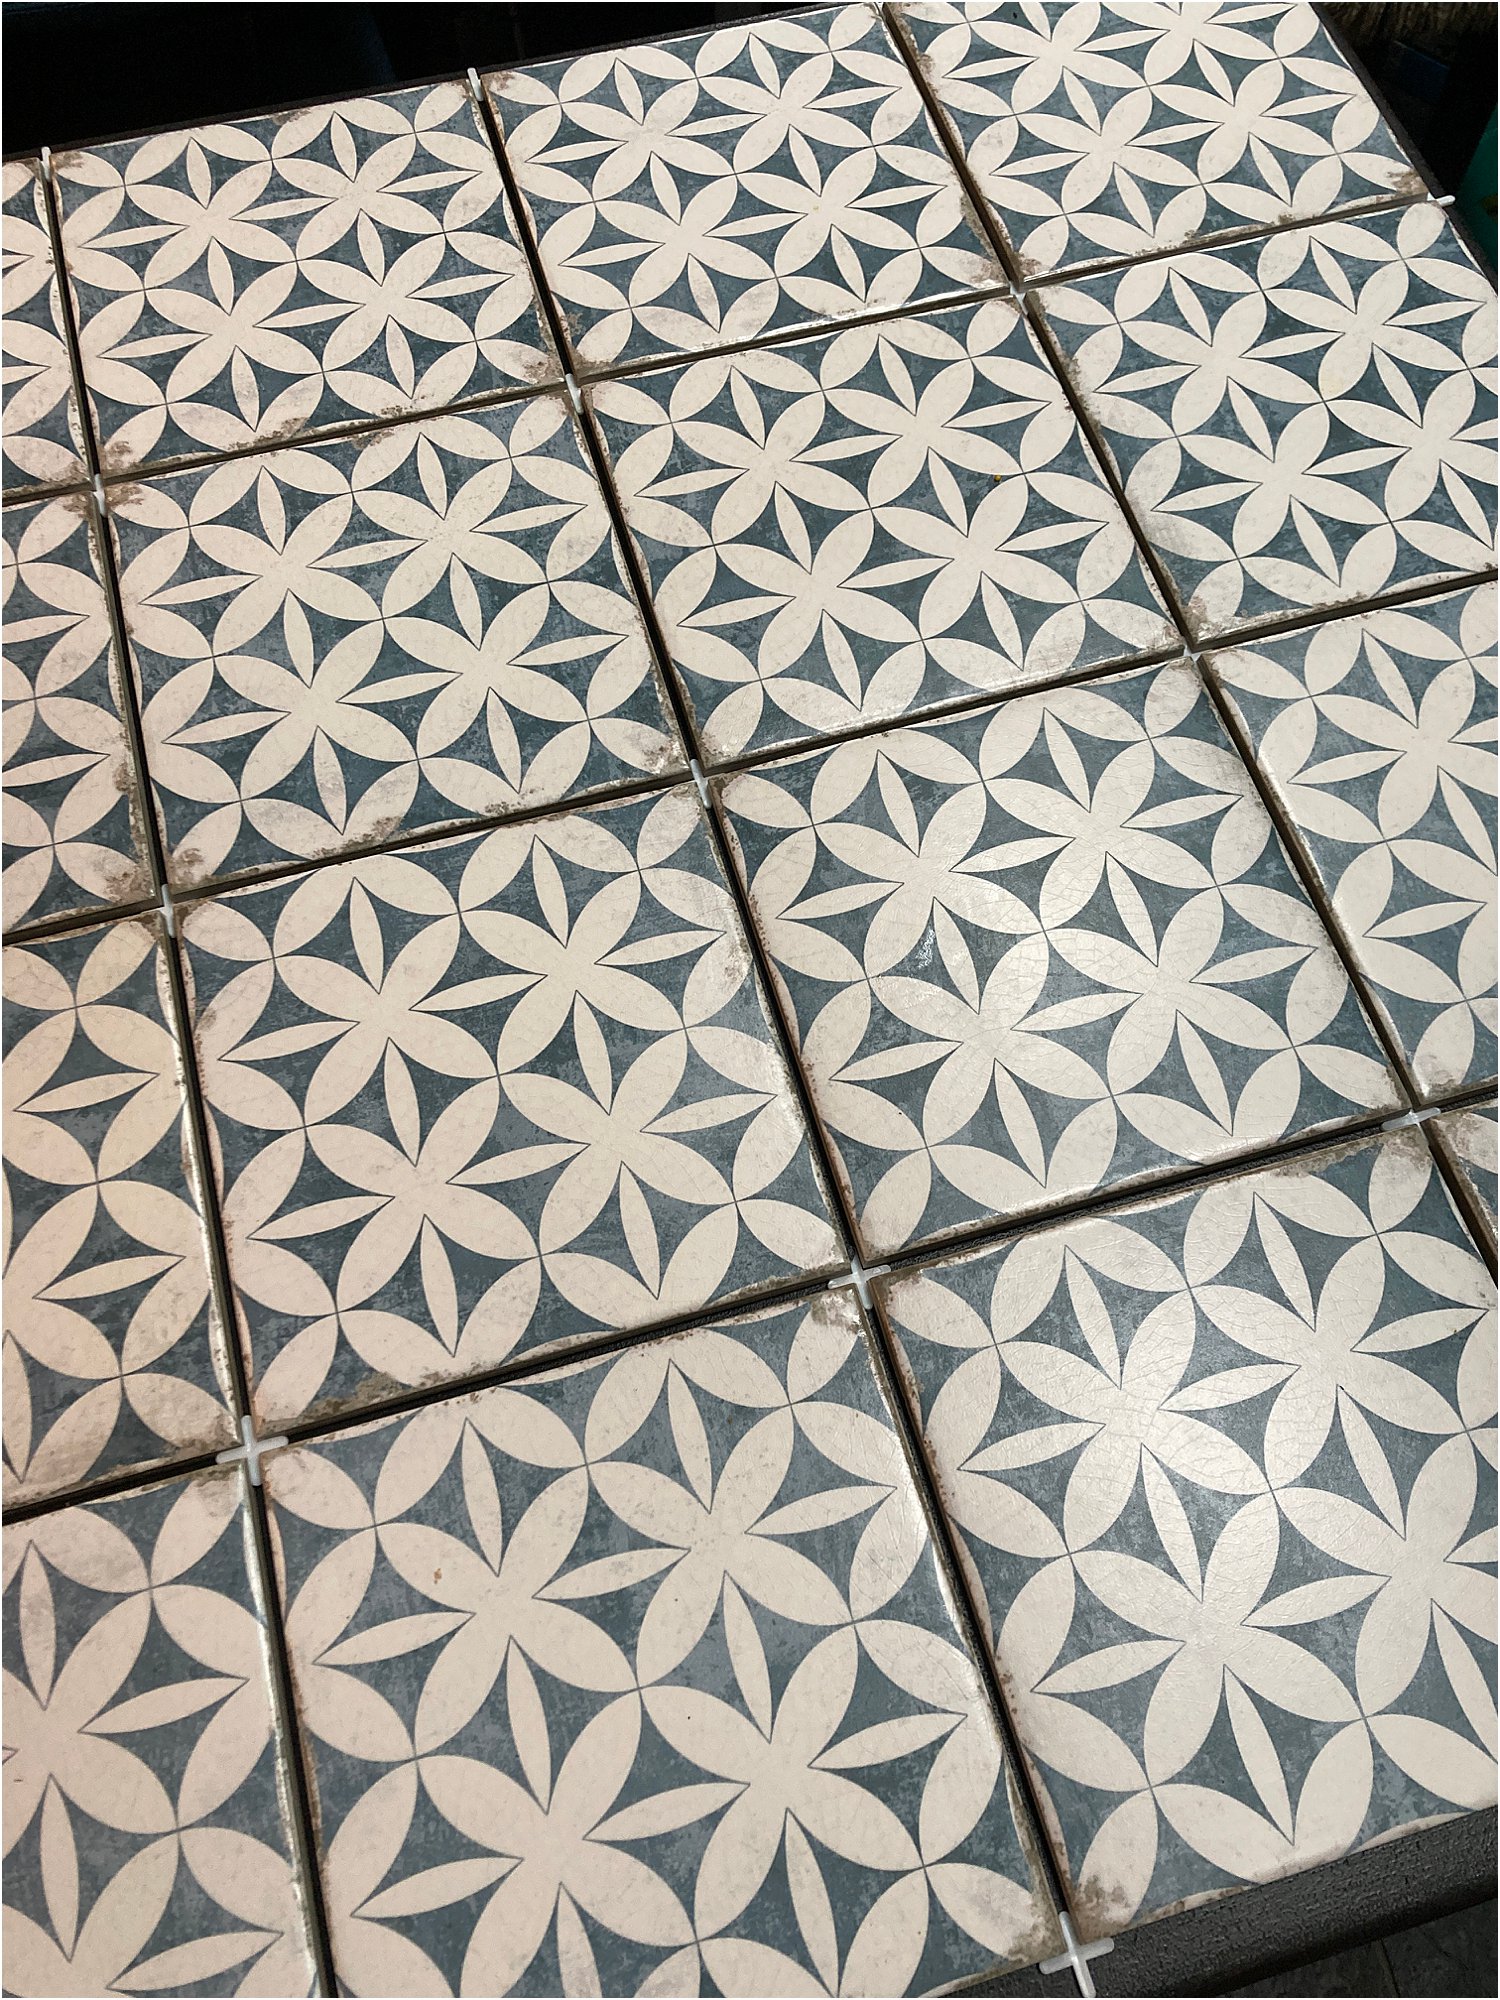
3. Use the correct size tile spacers
These tiles are 9.5cm square and thick so we opted for a 5mm spacer.
We tried two options with the 5mm spacer: full tiles and cut tiles. With full tiles, there’s an inch of of untiled table around the tile which would be too big to grout over. With cut tiles, we won’t be able to do it symmetrically but will have to contend with asymmetrical cuts on two edges of the table.
We decided to go for no cutting and went with the full tiles laid from the centre in a symmetrical fashion.
4. Use ready-mixed adhesive to stick the tiles on the table
You can buy ready mixed tile adhesive to stick your tiles on the surface. We applied the adhesive to the back of the table and placed it in position using the grout spacers as guides.
We also decided to leave the tile spacers underneath – which is a no-no if you were doing this on the floor because the wear and tear on the grout would eventually create and probably expose the spacers. But as this was a table and no one would be walking on it, we decided this would be fine.
We used this wall adhesive for this table project. If you are tiling a floor, you need to use a floor adhesive. (Photos below are phone snaps.)
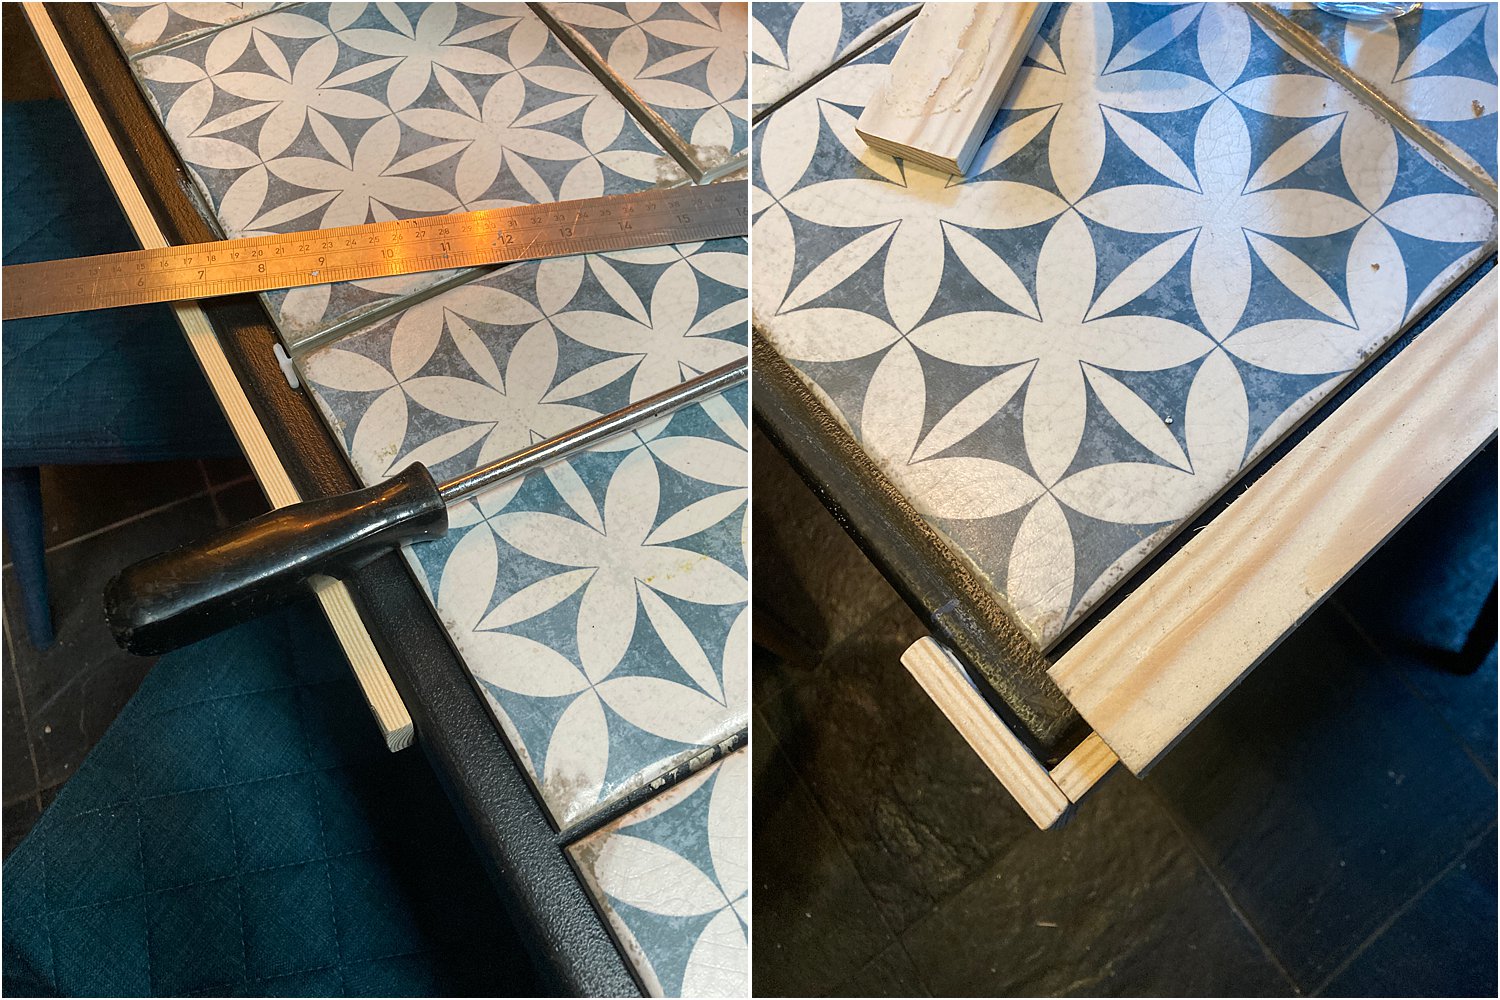
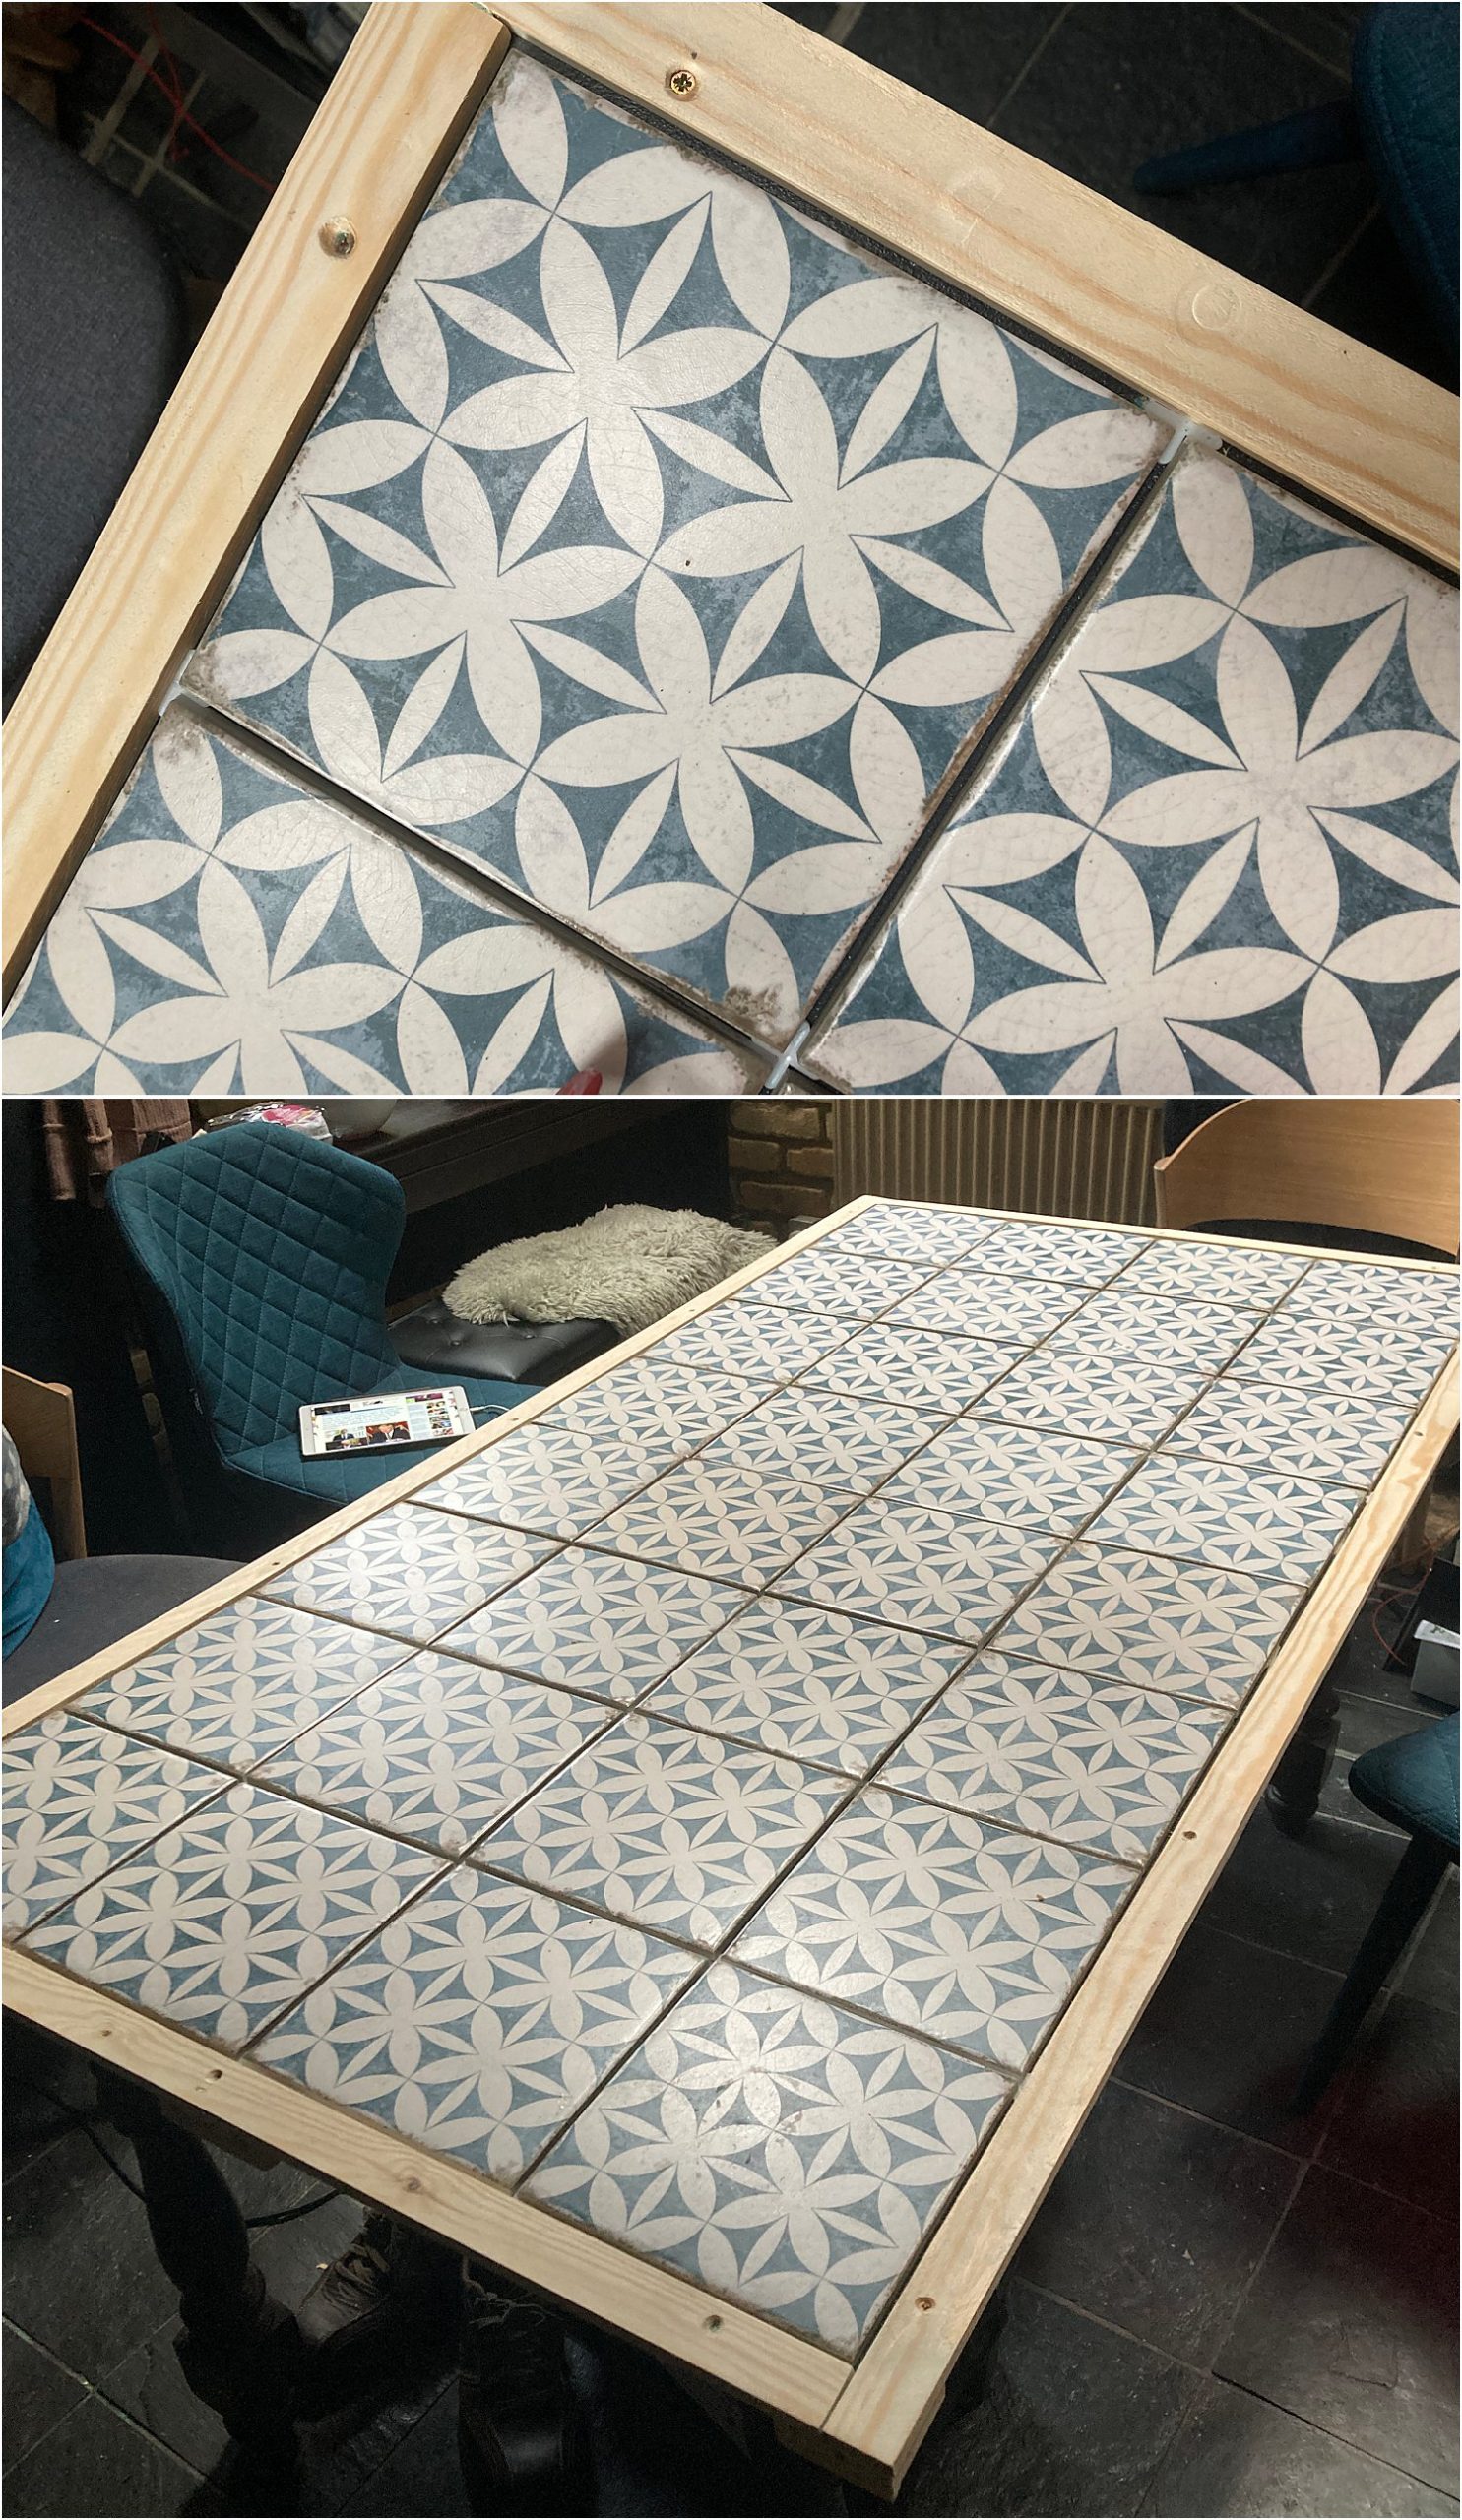
5. Frame the table
To deal with the extra edges showing all the way around the table, we created a frame instead. So off to B&Q I went and purchased these 9mm x 34mm strips of timber to create this frame.
We screwed them securely on the table all the way around. To do this safely, drill a pilot hole first to make sure the wood doesn’t break or crack. Then use a countersink to create dips in the timber where the screws would go on. You can then easily fill this later with wood filler to flatten the sink holes.
When attached to the table, the frame is at a similar level to the tiles to create the “flat” surface. You can use a mitre for the corners but we didn’t do this.
About 20cmm of this wooden strip overhangs from the edge which makes this a weak part especially when weighted with elbows. To strengthen this we attached strips of the same timber on the underside and around the corners to support the overhang.
Please note that if you are tiling an outdoors table, you would need to use timber suitable for outdoors (hardwood as opposed to soft wood or pine) and protect it with an outdoor stain or paint.
6. Ready to grout
With the tiles and frame securely in place, we are ready to grout. I didn’t want the grout to be black or white. We got a grey grout which was too dark a grey so we also got a white grout to create a lighter grey.
If you are mixing grout colours, make sure you mix them when they are still in powder form and not when they are already mixed with water! We mixed this Mapei Keracolor White with Mapei Keracolor Grey
7. Fill the gaps
Use wood filler to cover the screws and even out the timber corners. Don’t use polyfilla because it will just disintegrate into powder and you’re back with exposed screws.
You can also use caulk but remember that caulk is best for filling gaps, cracks and where two edges meet. Caulk can’t be sanded whereas wood filler can. Eventually caulk might also sink in causing a divot.
8. Paint the frame
Once the grout was fully dry, it was time to paint the timber frame. I used the same Frenchic Paint in Black Jack as it required no prep and priming. Just paint it over with two coats and you are done. It’s also an Al Fresco paint, suitable for outdoors and waterproof.
(The photos below were taken with a better camera so the colours are more accurate. The photos above were taken with my phone and in mixed lighting that’s why they look more yellow.)
9. Seal it
Before you can show off your table, seal it with a spray sealer. Mask off the timber frame to protect it from sealer residue. We used this LTP sealer. The sealer protects your tiles and grout from spillages especially if they are of the strong coloured type like tomato sauce and curries!
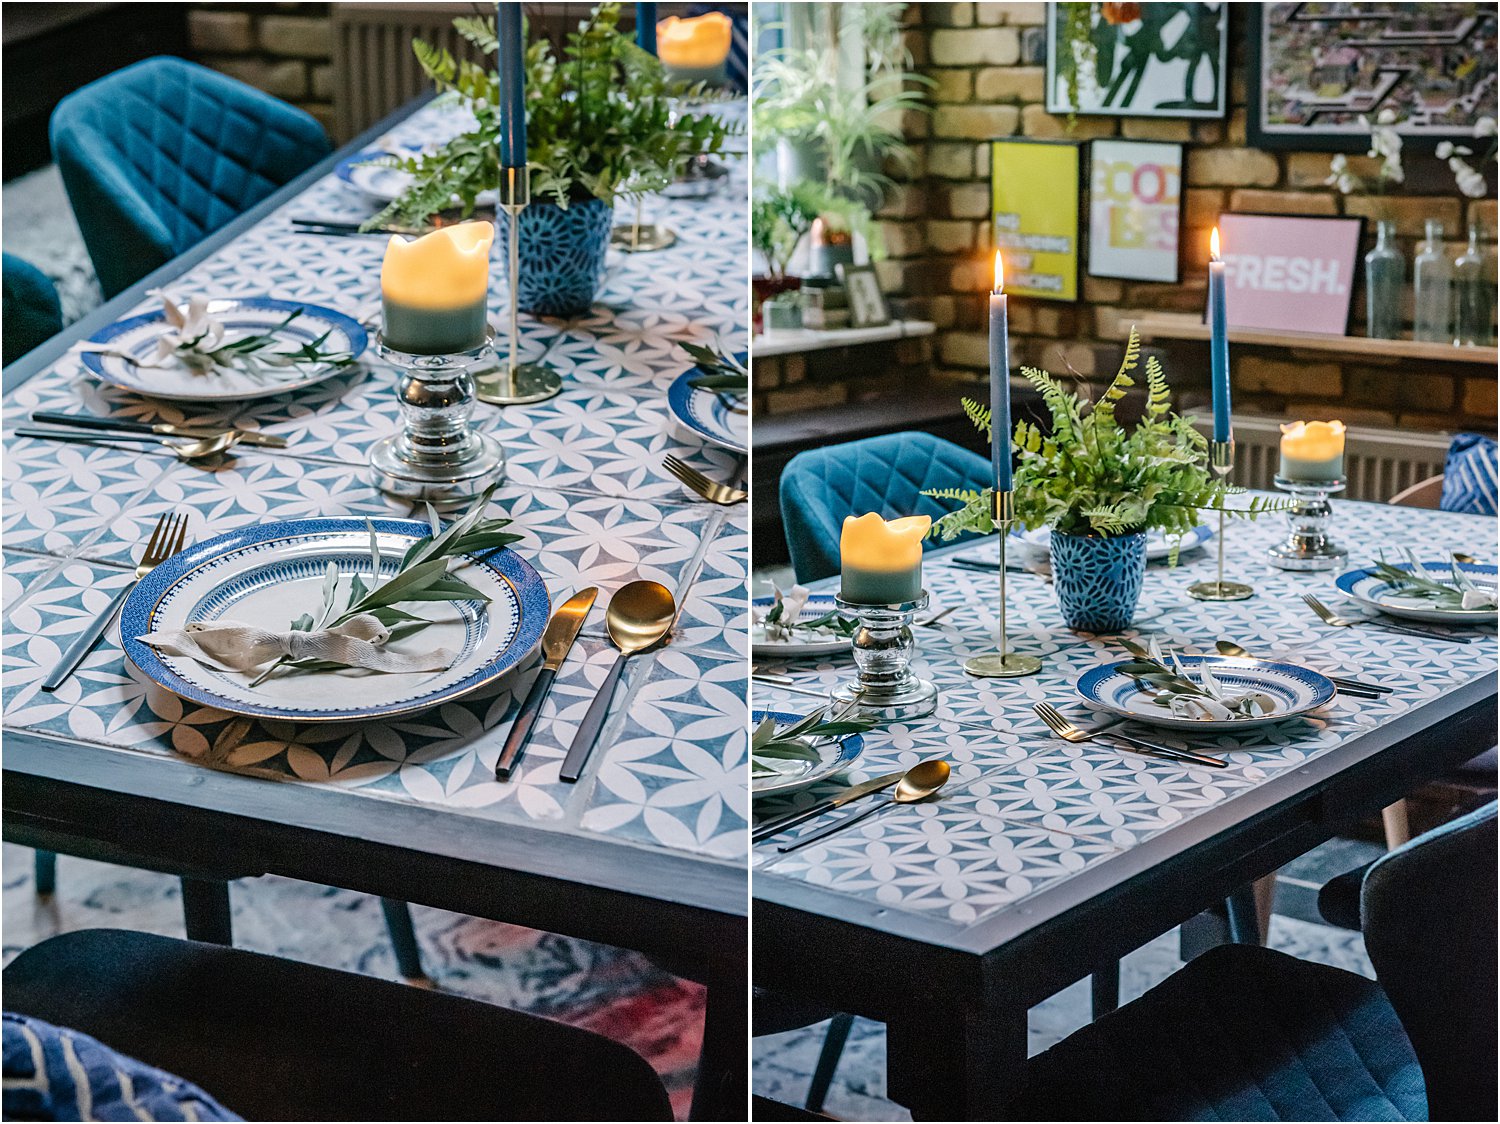
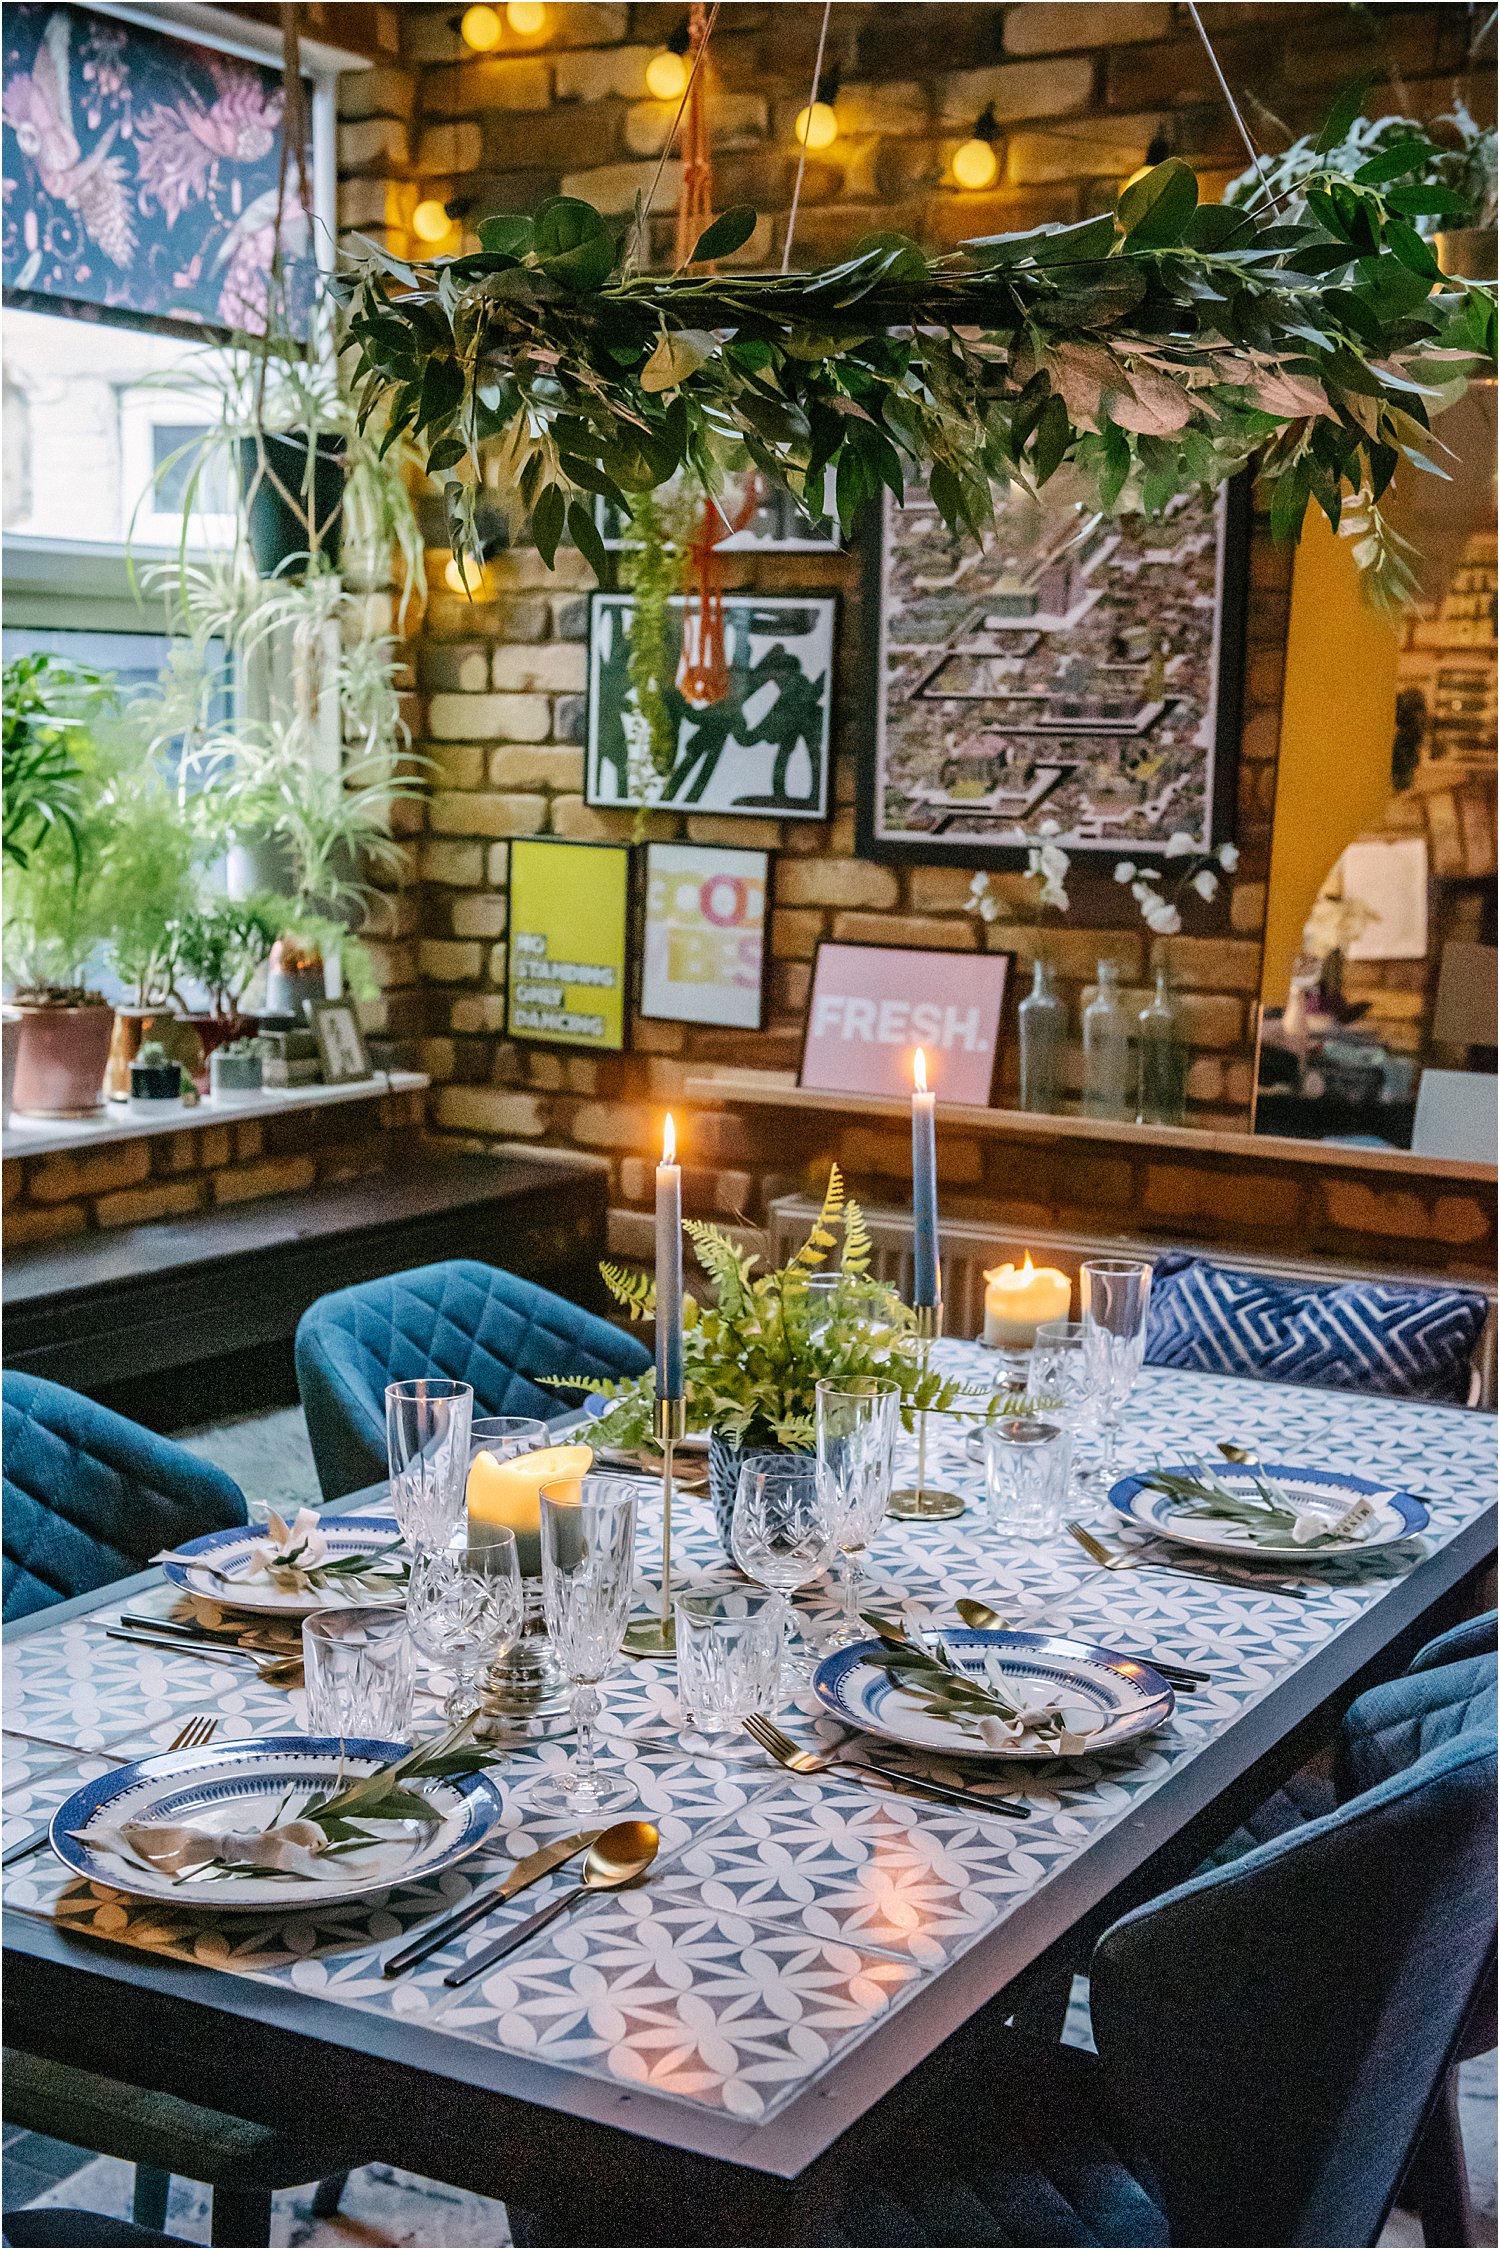
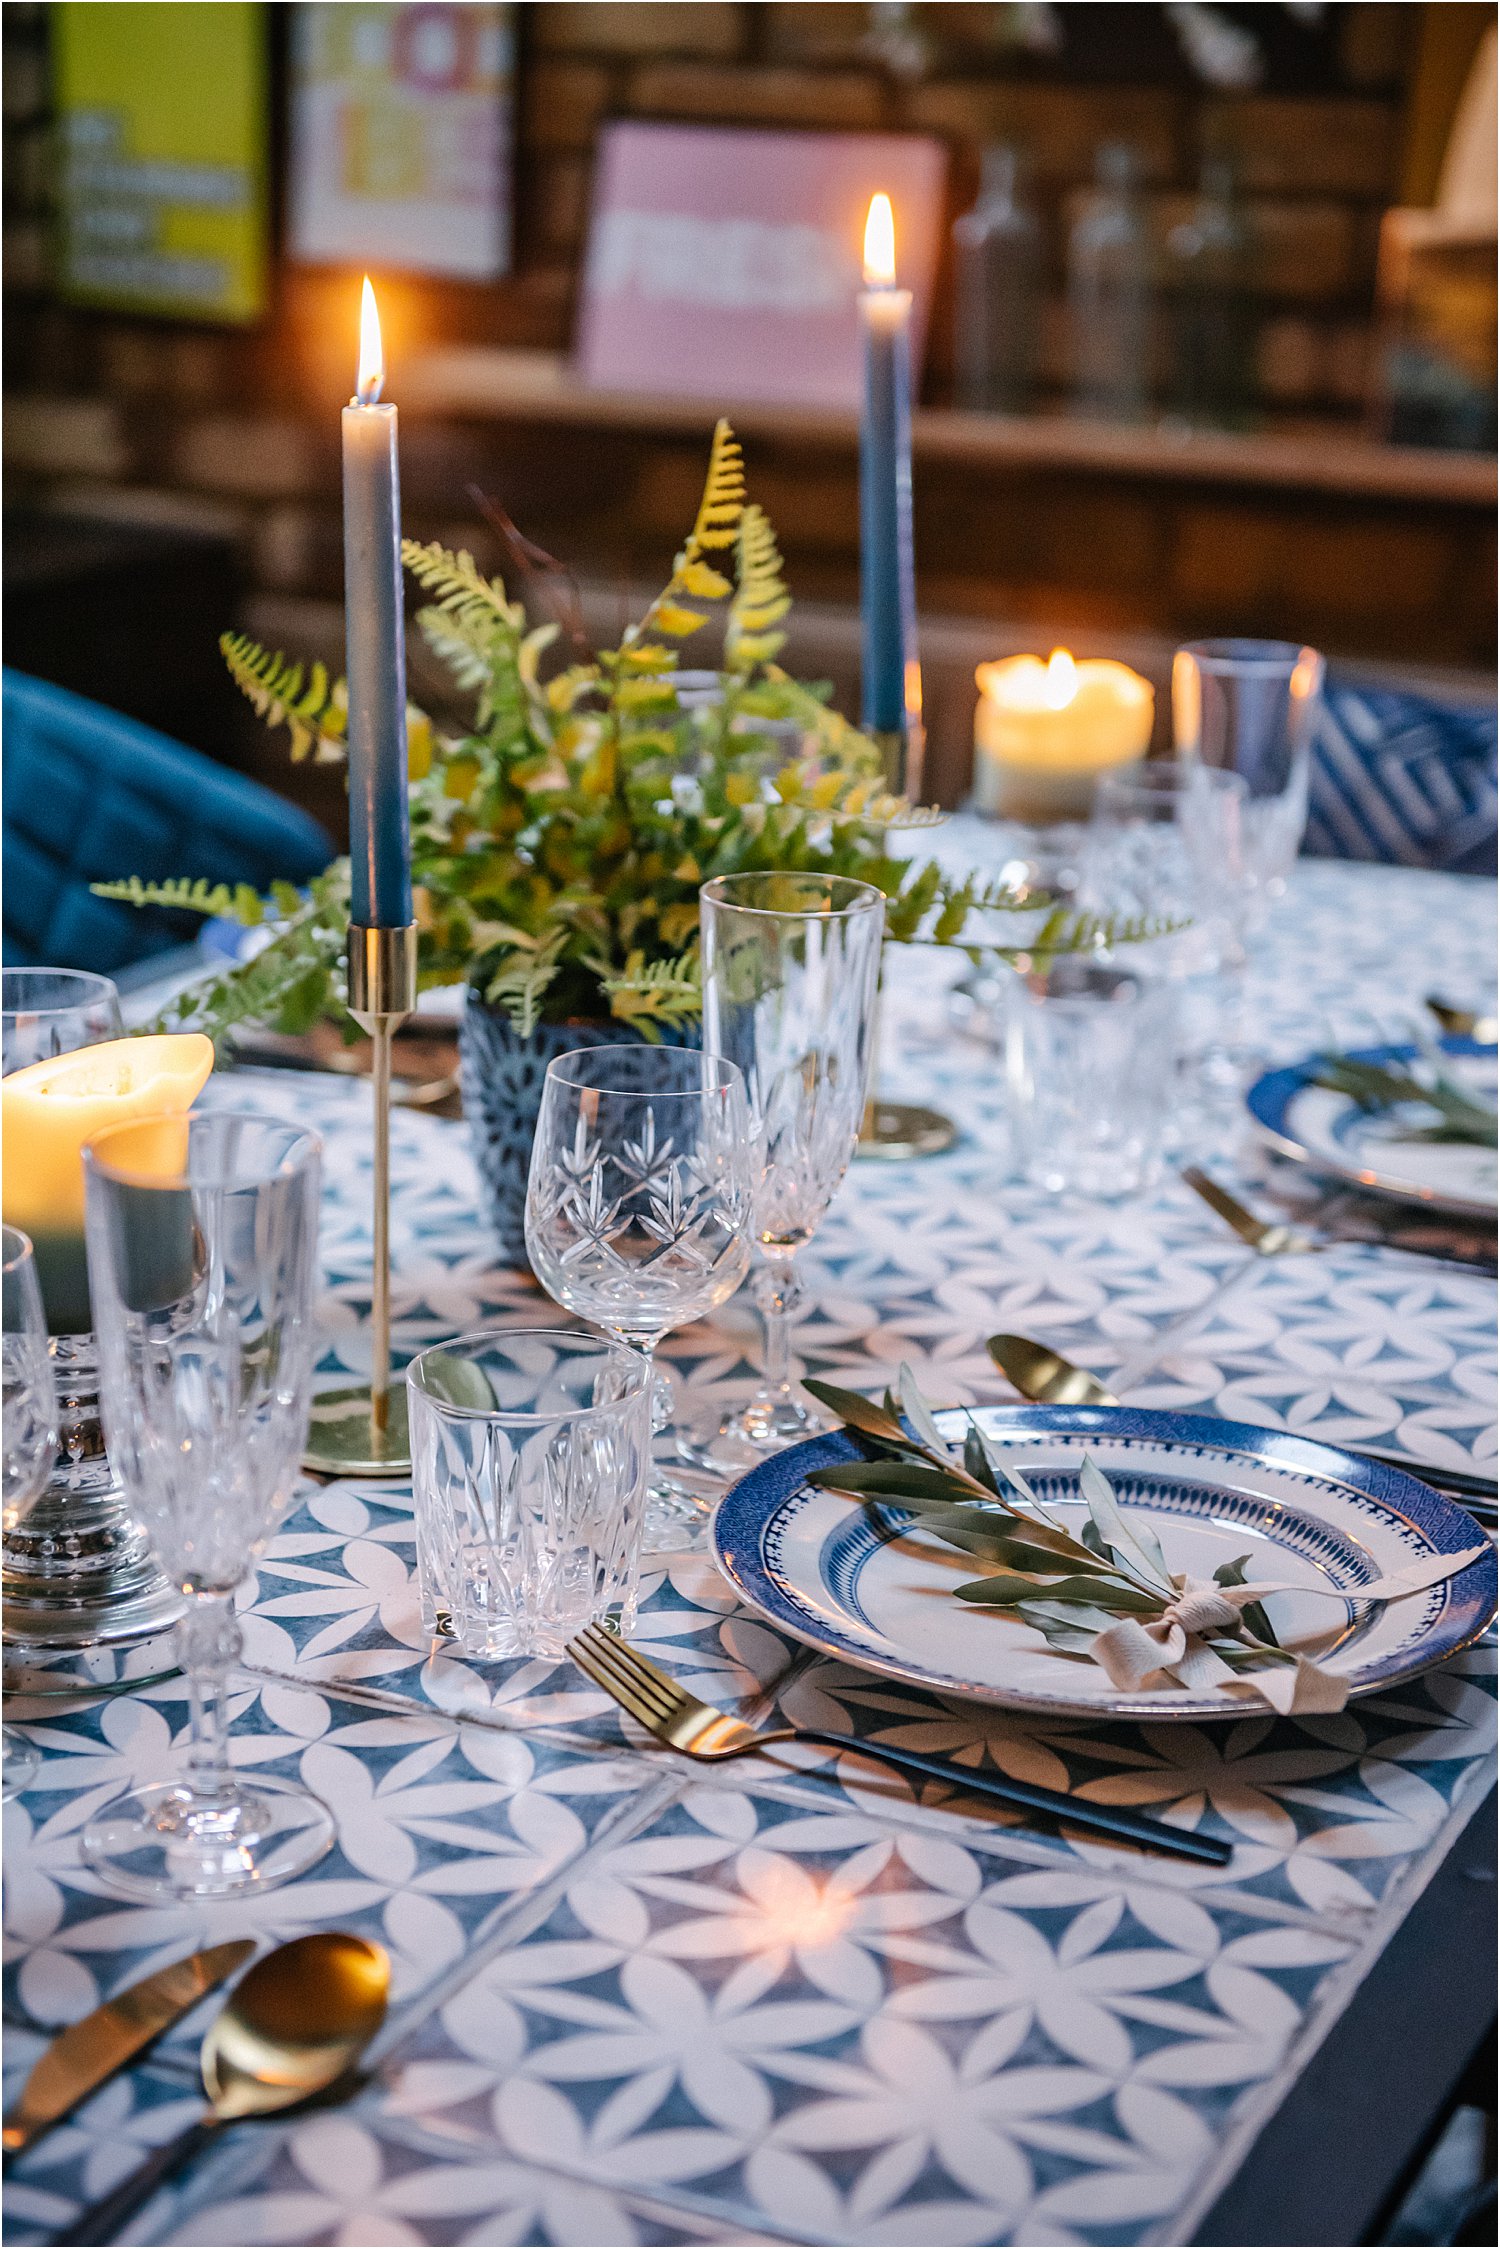
10. Style and show
It’s time to style and show off your new tiled dining table! Styling is always the most exciting part for me and I had so much fun doing this.
I bought these vintage plates from a quaint old shop on Columbia Road a while back. The crystal glasses were inherited. The olive leaves were snipped from my little olive tree.
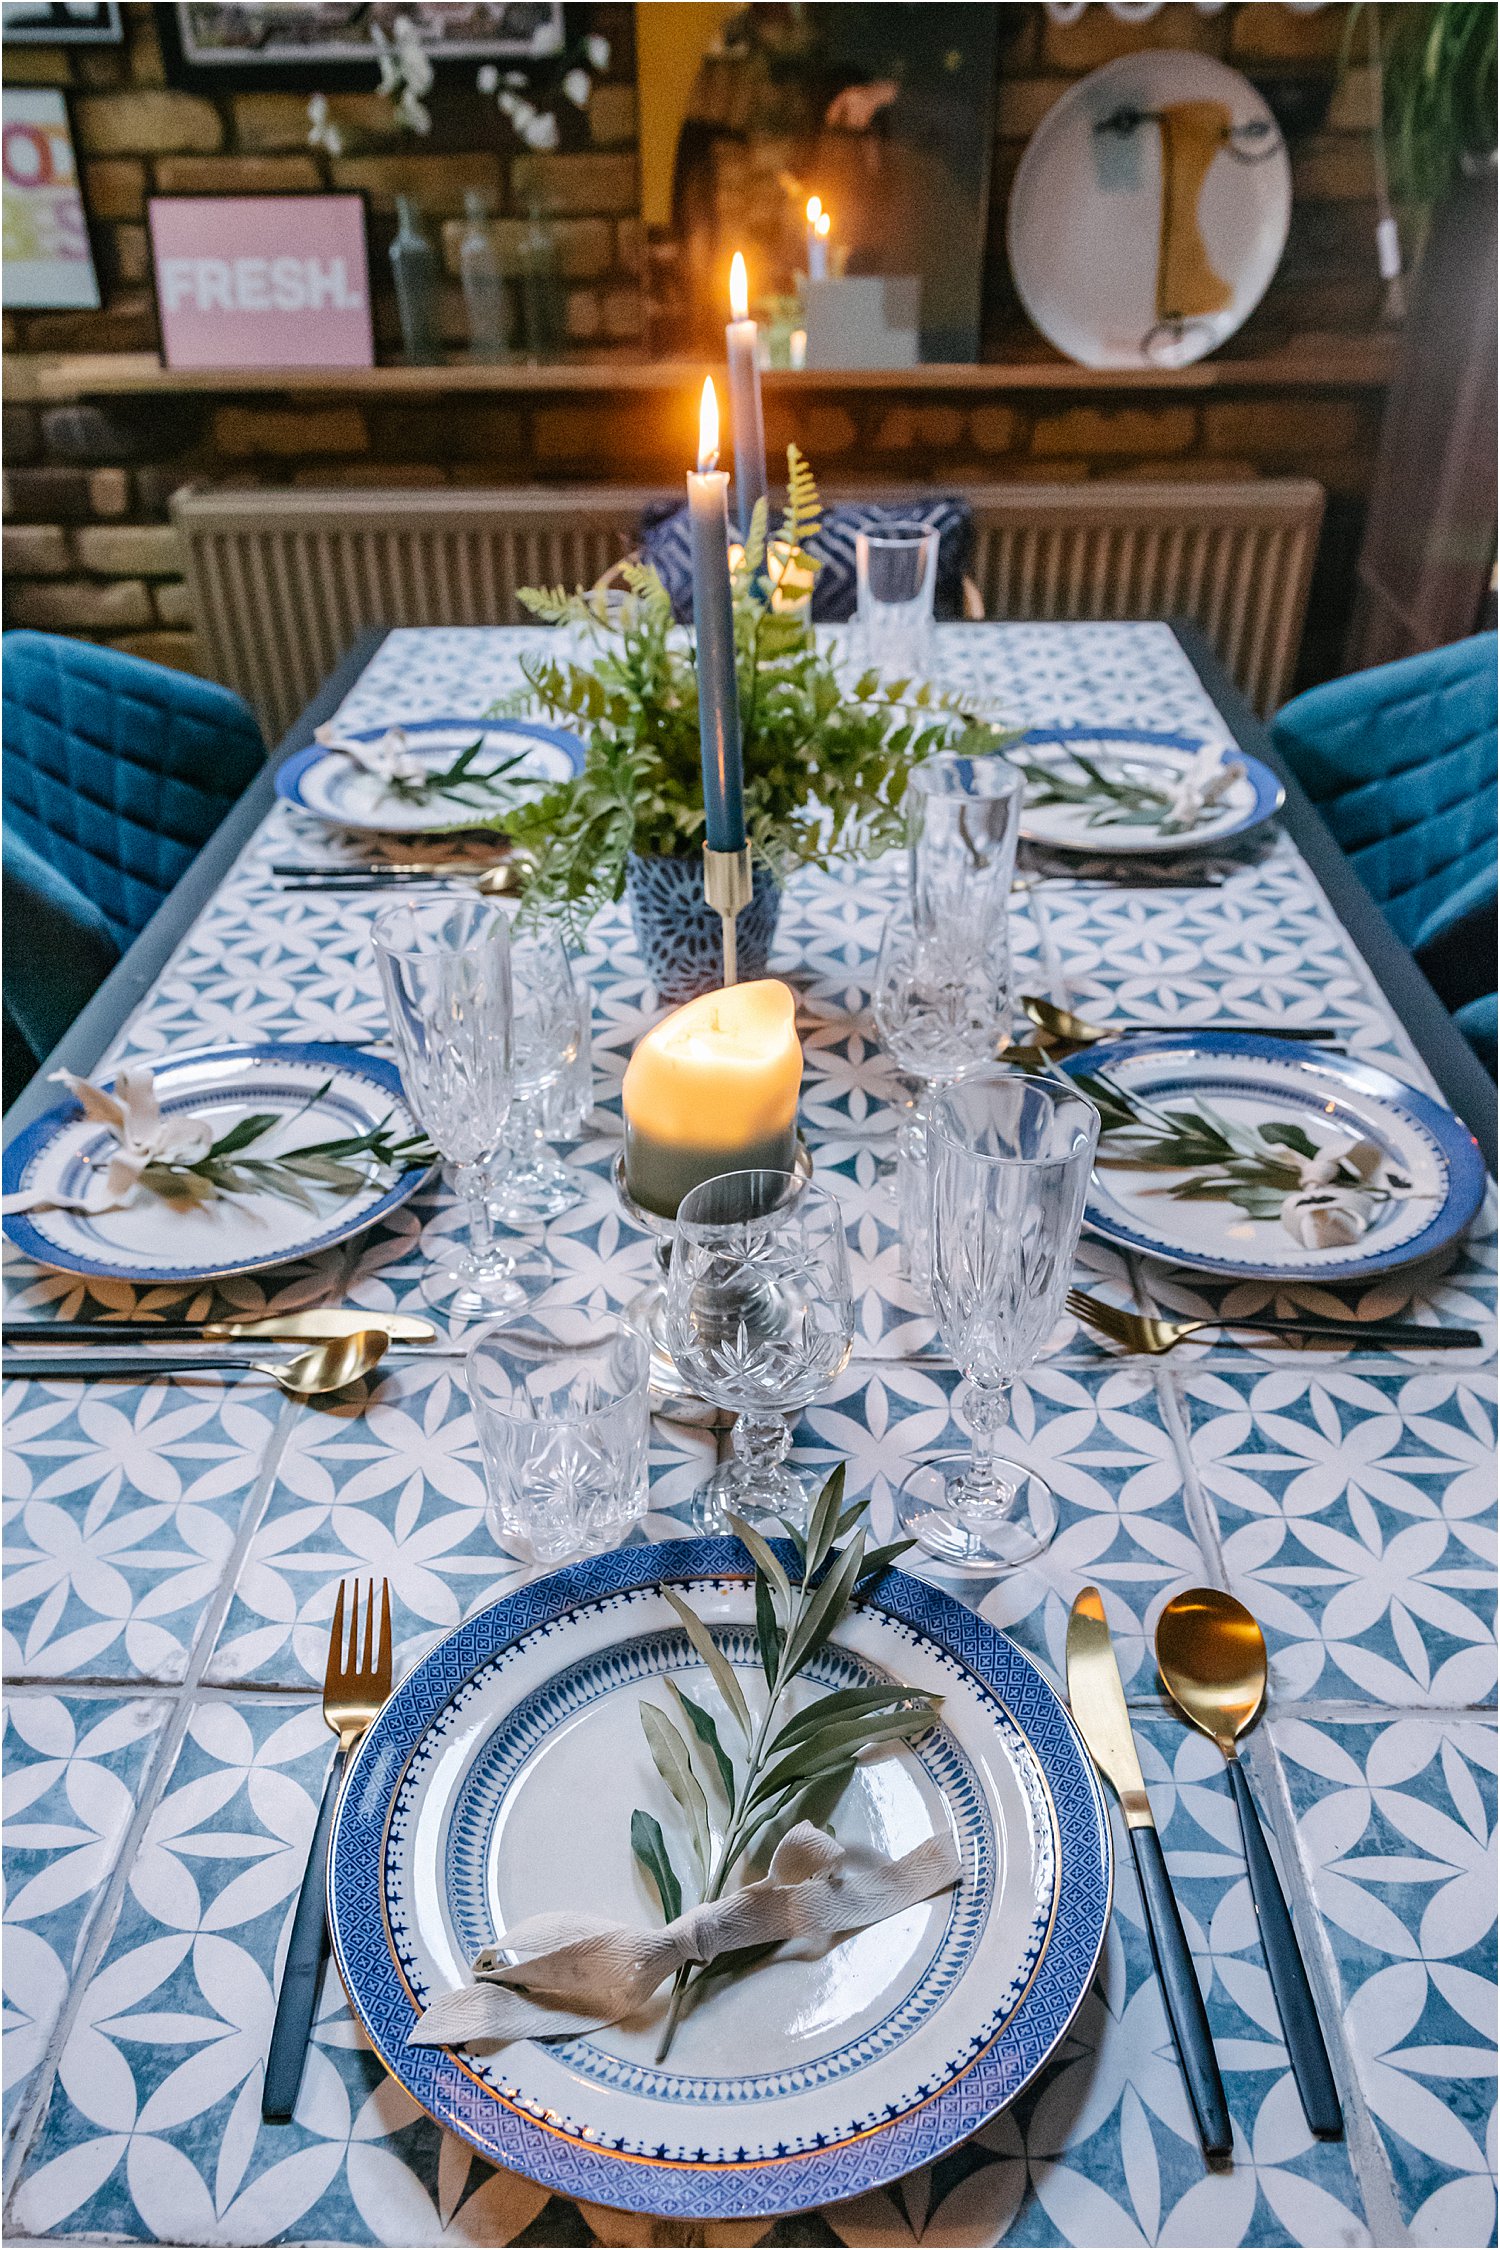
We’re delighted with the result. It’s brought light into our dining space and also a much missed Mediterranean ambience. One of the best bits is the ease of cleaning. It’s so easy to wipe clean and tends to stay and look clean for longer too.
Overall this project cost £125 for the tiles, grout, adhesive, sealer and timber with leftover tiles spare. Not much after all!
Would you try making one? I hope this tiled dining table tutorial using blue and white porcelain tiles help you. Tag me on Instagram Layered.Home if you do – I’d love to see it.
I hope you founf this article on how to tile a dining table DIY tutorial using blue and white porcelain tiles helpful.
The materials were provided by Tile Giant on a paid partnership project.
I had great feedback and responses about this DIY so I wanted to share the process of how to tile a dining table DIY using blue and white porcelain tiles as a step-by-step blog post. The Frenchic links are affiliate links. Other previously gifted items shown are are chairs from Sotti & Co, rug from Amazon and cushions from Tess Daly.
Don’t forget to download my free resources that will help you design your own interiors and grow your Instagram account! Let’s chat on Instagram and follow me on layered.home for more inspiration.