Here’s the DIY wall panelling step-by-step tutorial I’ve promised.
I like simplifying things. Yes I know my interiors might be maximalist but when it comes to processes, I’m all for simplicity. This stems from having a teaching background – making things easy for my students to grasp, understand and apply.
This means all the DIY projects I do at home are very simple, can be done by myself or wth the help of a family member. And this DIY wall panelling is no exception. I’ve broken this down for you step-by-step so you can follow the process and create your own.
Step 1
Measure the dimensions of your wall – height and width – where you want the battens to go on.
My wall is 180cm wide and 190cm high.
If you have a skirting board at the bottom of the wall, you can use that instead of putting a batten above it going across the width of the wall. Alternatively, you can also decide to add a horizontal batten just above the skirting board.
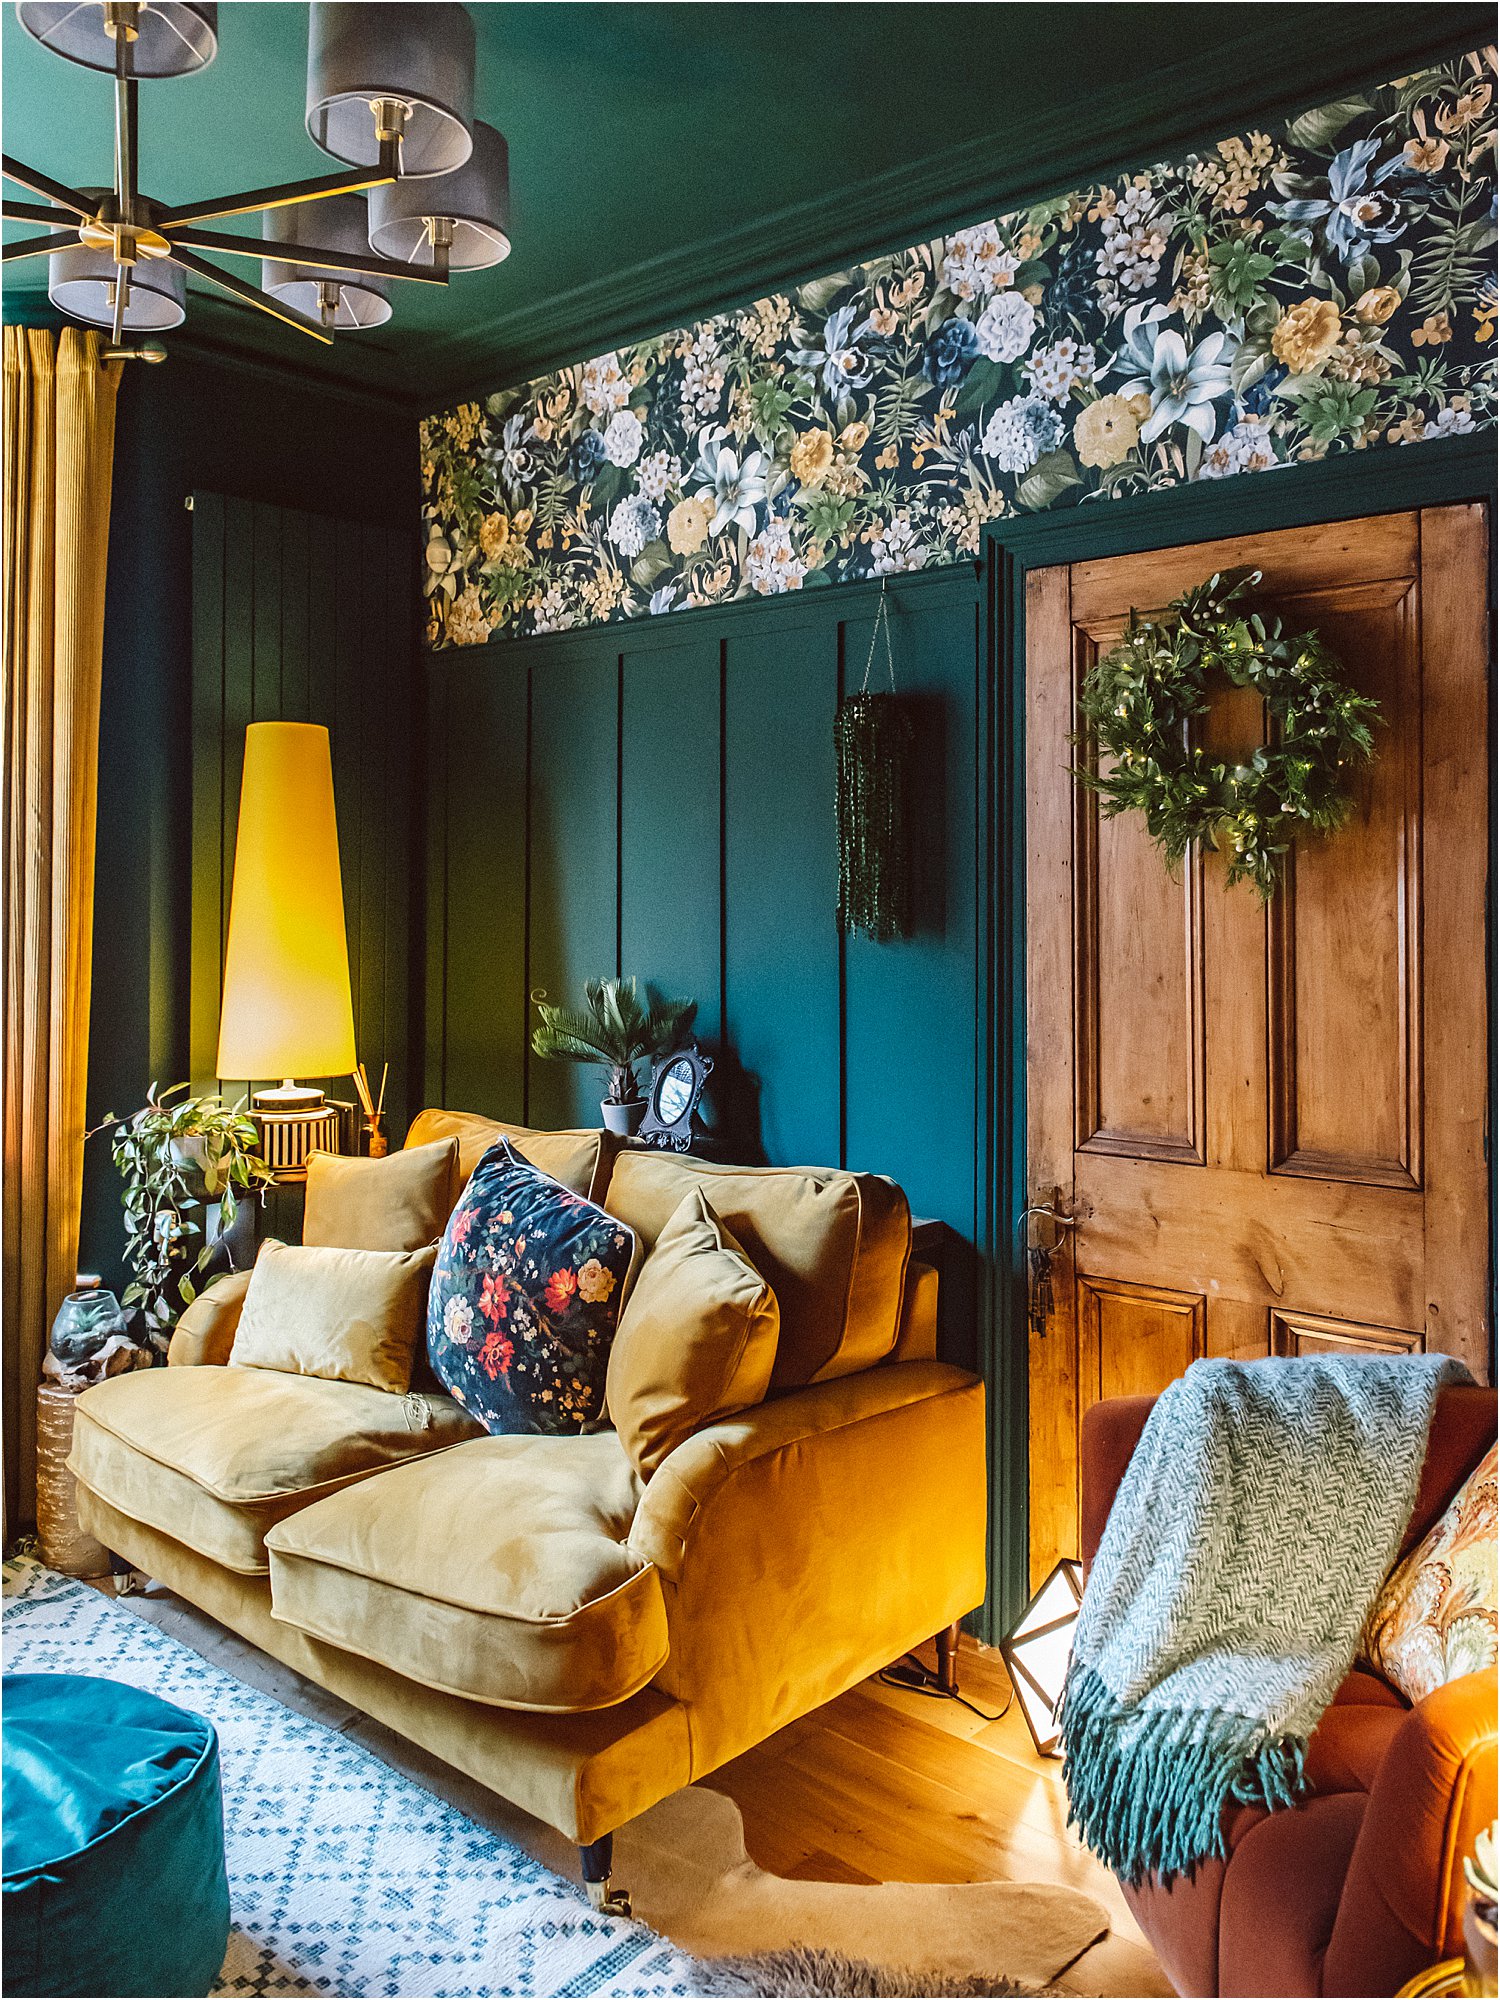
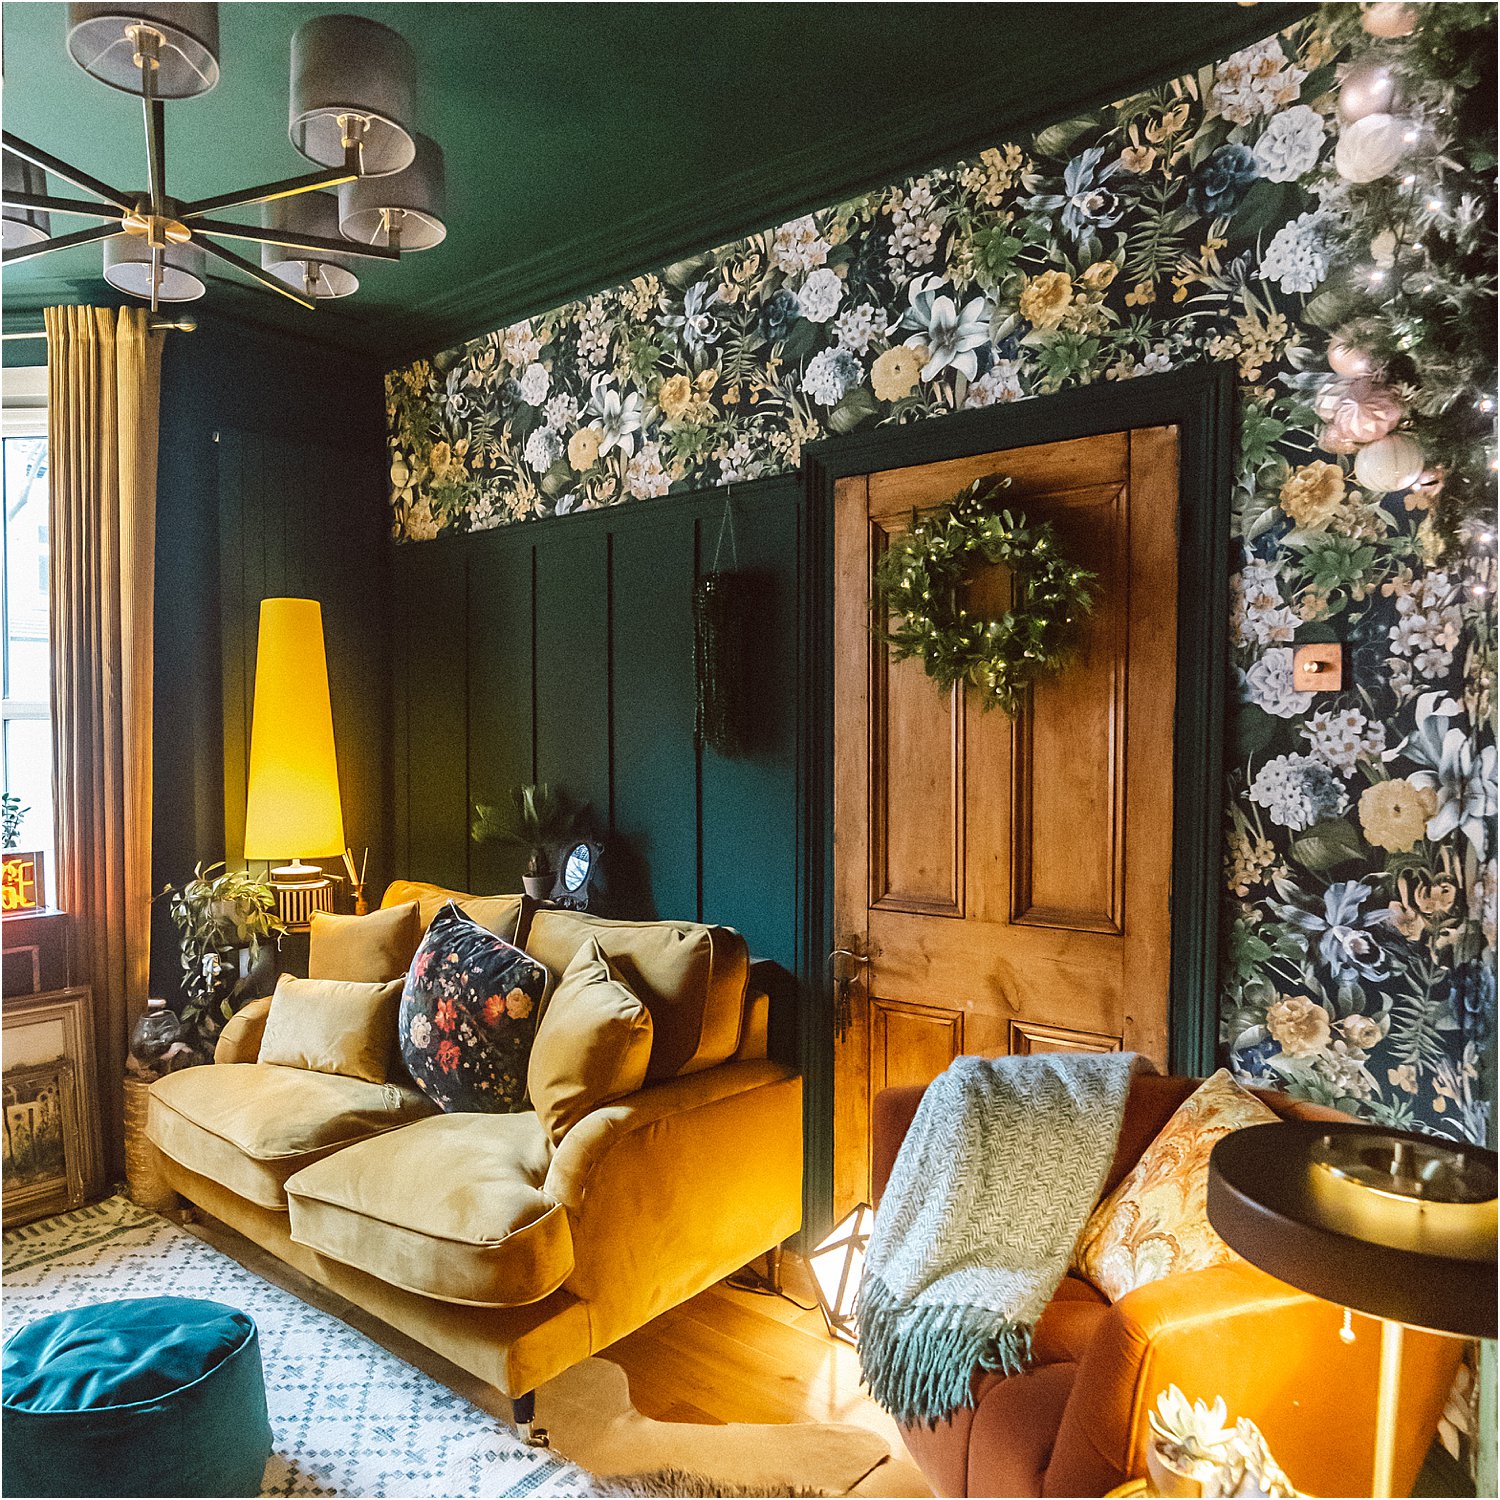
Because my sofa would cover this bottom part of the wall anyway, I decided not to have a batten here but to use the skirting board as the bottom panel instead. This meant that my wall measurements start just above the skirting board.
Step 2
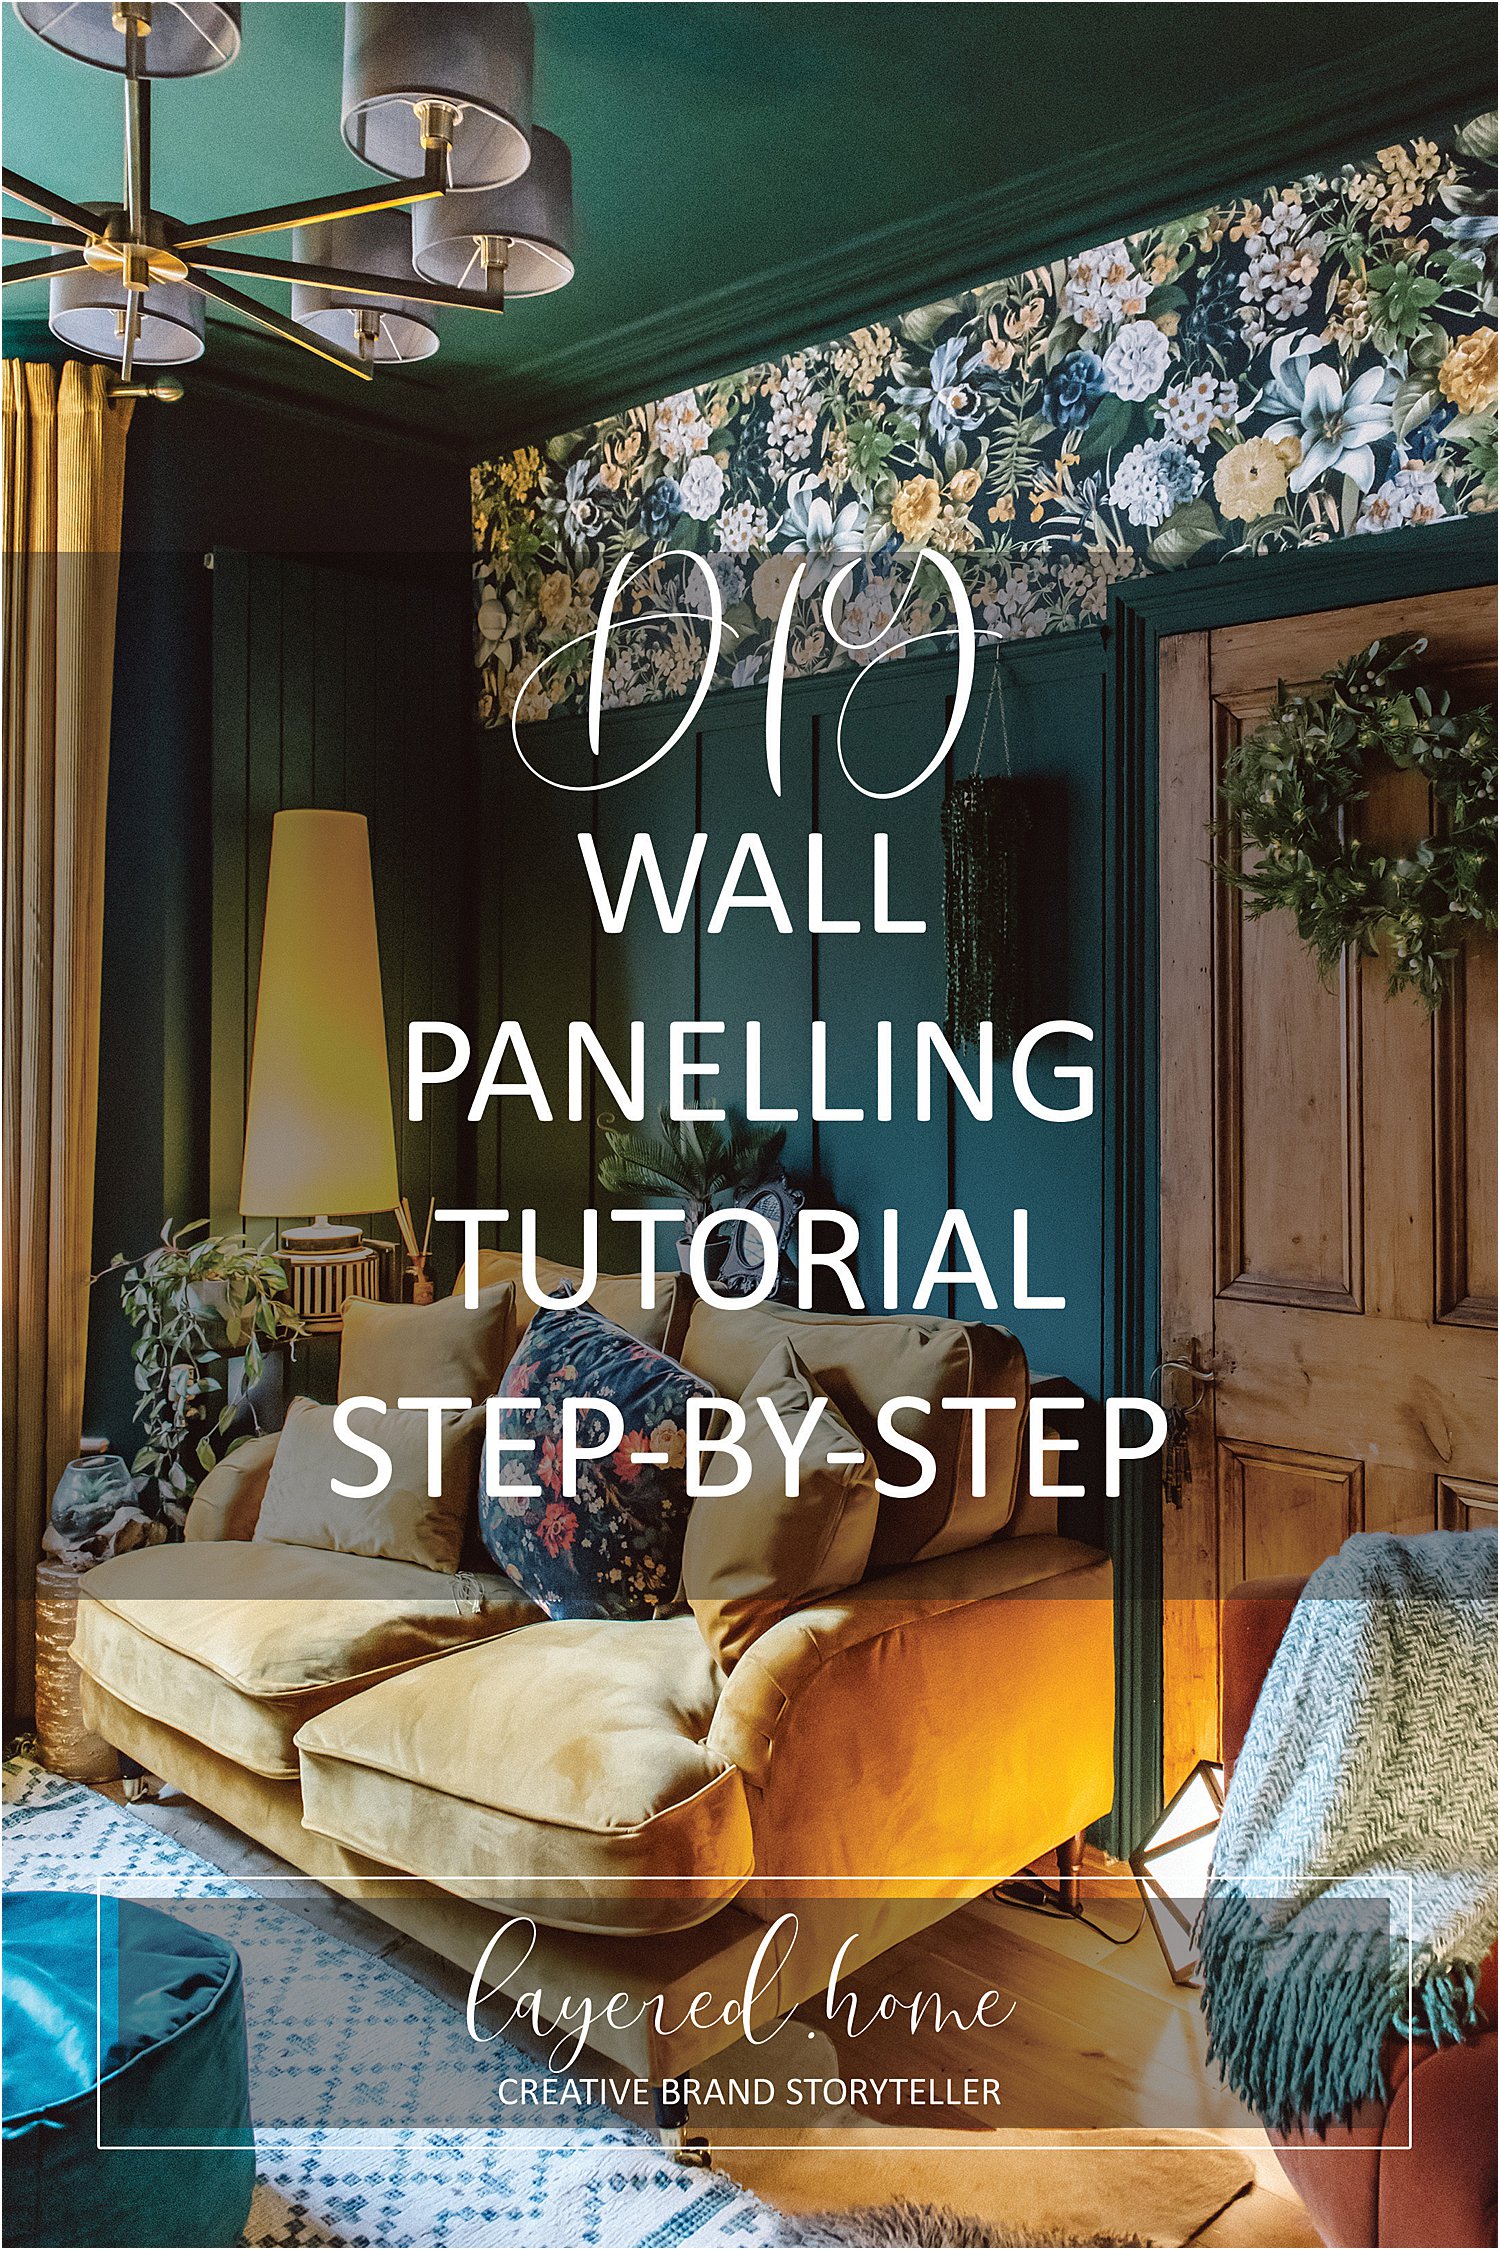
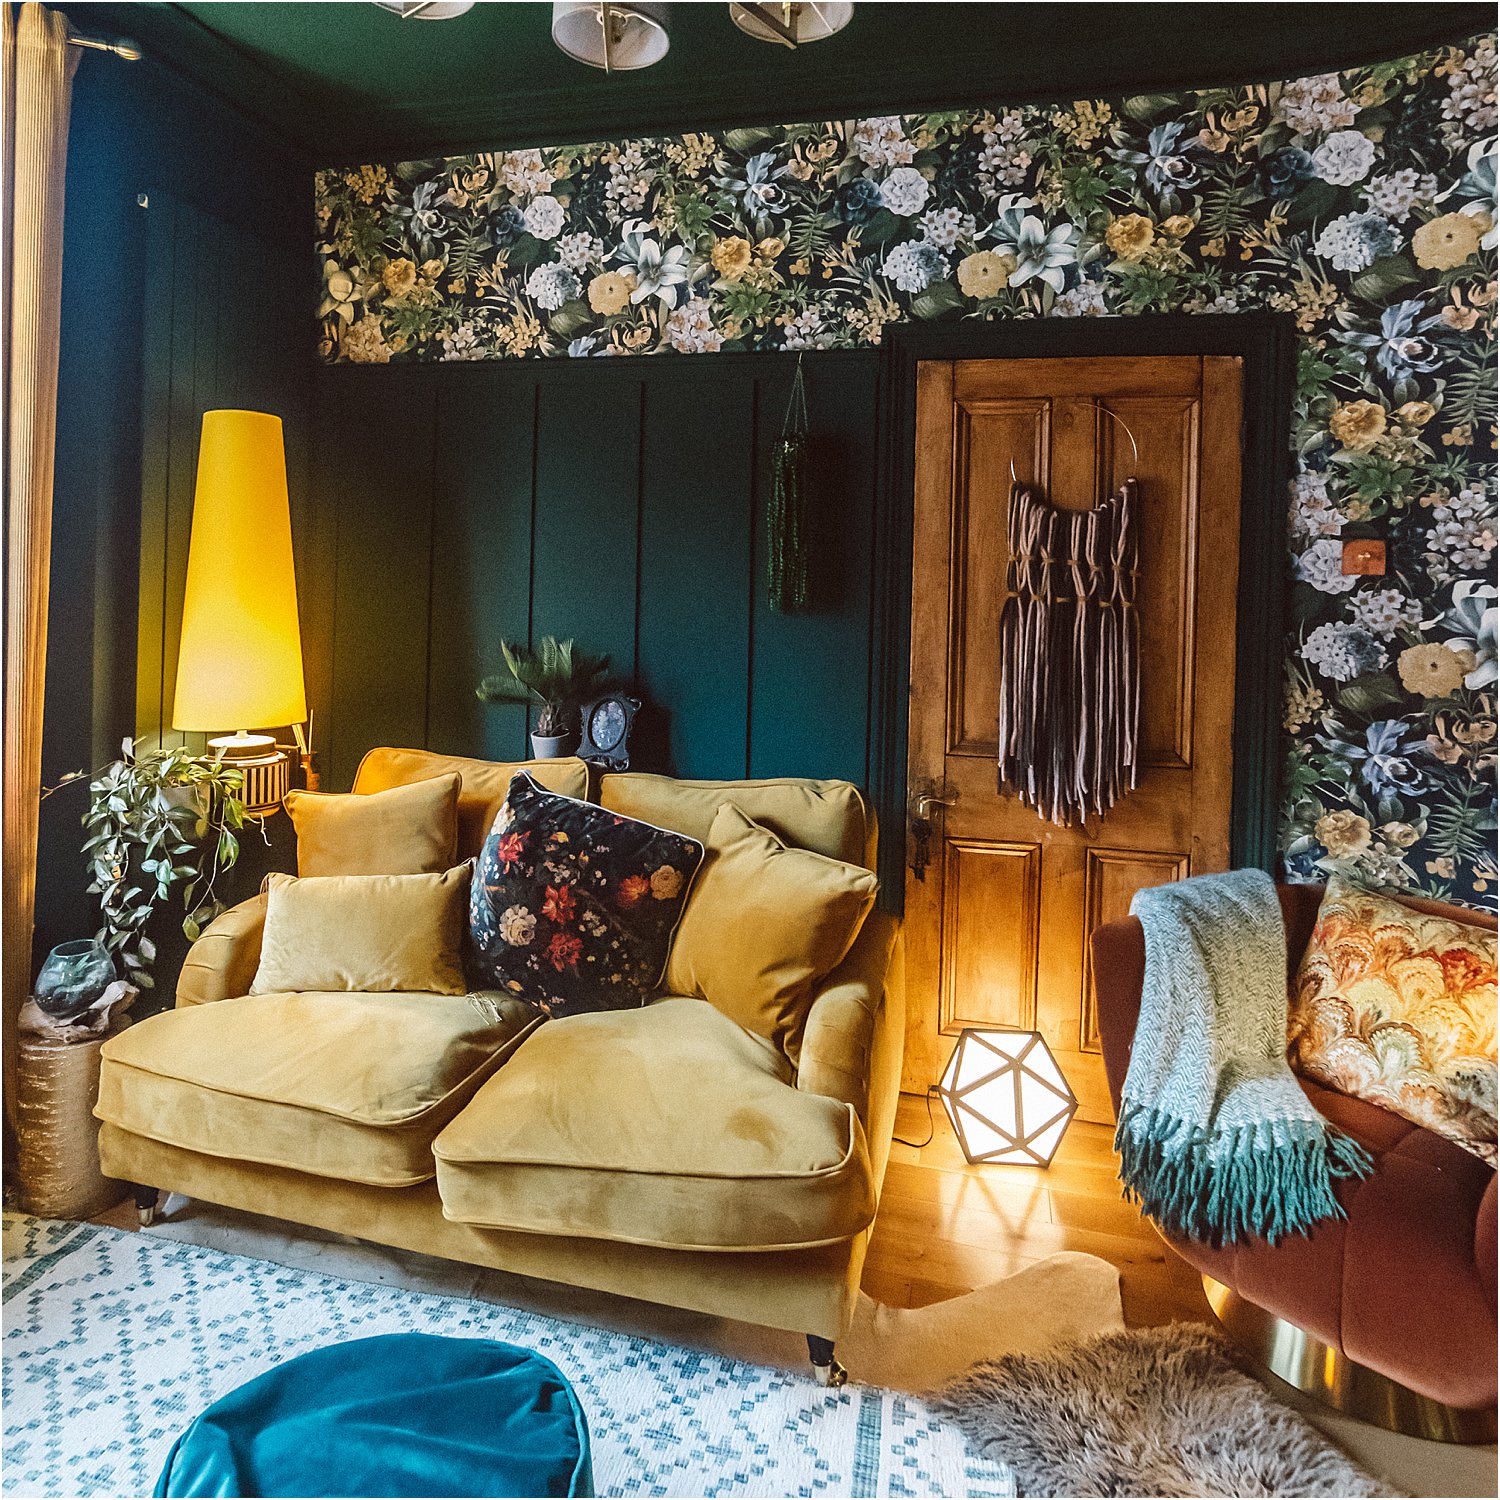
Decide on the width and thickness of your battens. I went for 7cm wide and 9mm thickness to match the wall panelled cupboards on the opposite side of the room which I’d installed 6 years ago as you can see on this photo below. The difference here is that the new panelling will only have vertical battens.
Step 3
Use My Daily Renovation’s Wall panelling calculator to get an idea of the spaces between the battens (these are the MDF strips).
I tapped in my wall dimensions and batten width and tried different numbers of battens. 6 battens would give me 27.6cm gaps in between battens whilst 5 battens 36.2cm gaps.
I decided to go for the narrower gaps so went for 6 battens.
Step 4
Determine the number of battens you need altogether.
So now I have my batten list:
1 x 180cm horizontal batten for the top of the wall panelling
6 x 183cm vertical battens to go across the wall (I got the 183cm by subtracting the 7cm top batten width from the total height of 190cm) Remember to adjust this height if you wanted to put a shelf or a picture rail above the top batten.
All of the above are 7cm in width and 9mm thickness as already decided in step 2.
Step 5
Order them already pre-cut! I googled “mdf cut to size” and went for One Stop DIY from the various suppliers that came up. Including delivery, everything came to a total of £51.
Step 6
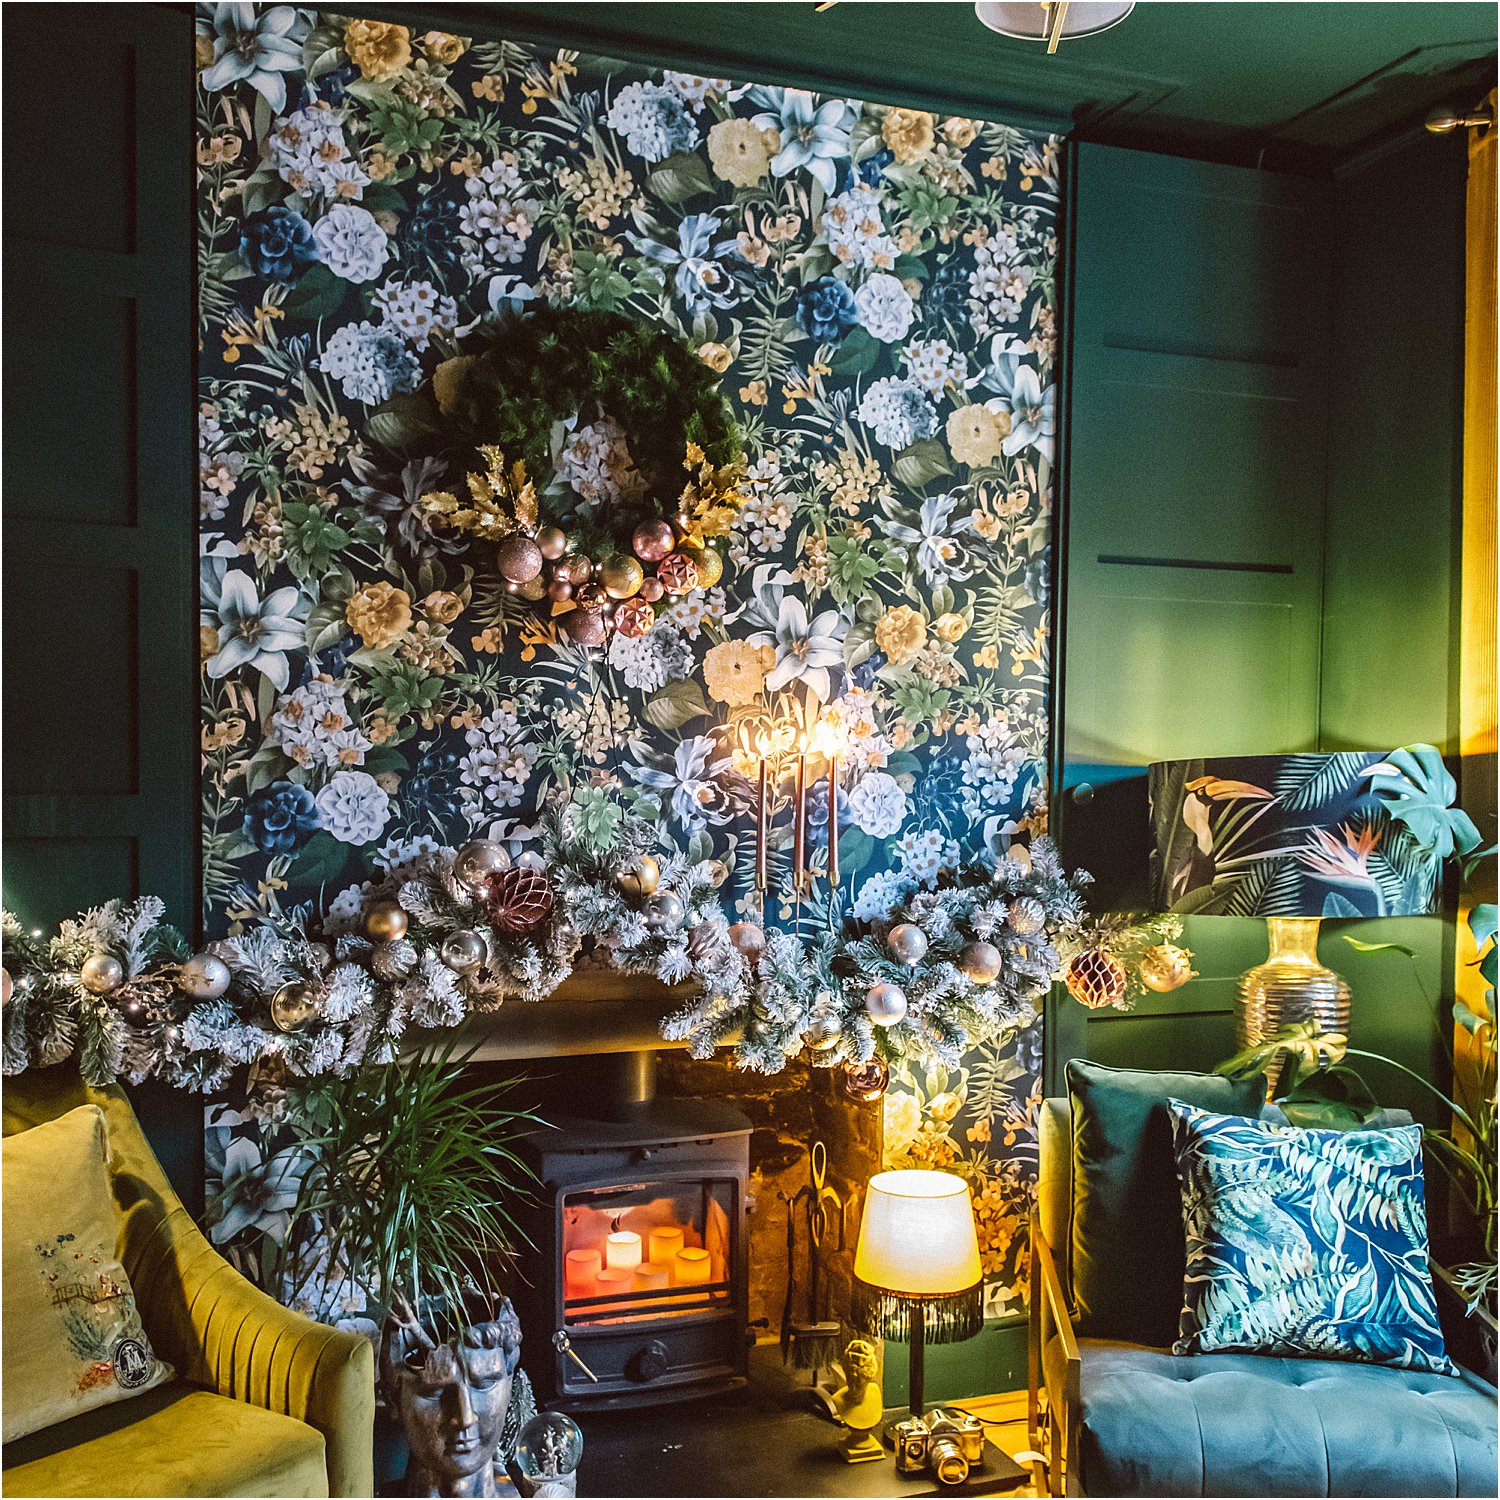
I wanted to put a picture rail at the top of the wood panelling and bought a primed MDF 58mm rail from B&Q for under £6. I then cut it the same length as the top horizontal batten which is 180cm.
Step 7
Prime the MDF first. I decided to prime the battens first when they arrived – only painting the visible sides that don’t stick to the wall. You can also attach them on the walls before priming. I used Frenchic chalk paint for priming – I chose Victory Lane Al Fresco which is the closest shade to my wall colour. (previously gifted paint / affiliate link). Just one coat was enough for priming and doesn’t need any more prep like sanding etc. It’s also waterproof which seals the MDF.
Step 8
Attach the battens on the wall using Unibond No More Nails I already have and applied it in a zigzag pattern to the side that sticks to the wall. I then nailed the battens on each end using tiny round wire nails to strengthen the hold. If you have a nail gun you can use it too.
First I attached the two end vertical battens making sure they are straight using a spirit level. My old victorian wall is far from straight nor is it flat!
Then I attached the top horizontal batten. They sit on these two end vertical battens and I made sure they are straight, again using a spirit level. You can use a laser spirit level too if you have one.
Then, going back to my calculator in step 3, I knew that the gaps between batten were roughly 27.6cm so I leaned the remaining battens to position them correctly on the wall. I was careful measuring each gap in between so that they are even.
You can also tape them in position using Frog Tape but I didn’t bother doing this.
I worked each batten one at a time carefully measuring the spaces, using a spirit level to ensure straightness, glued and nailed each batten.
Step 9
Attach the picture rail above the top batten in the same way. I decided to position the picture rail on the batten itself as I wanted it lower than the door frame otherwise it would have been level with.
Step 10
Fill any gaps using decorator’s caulk.
Step 11
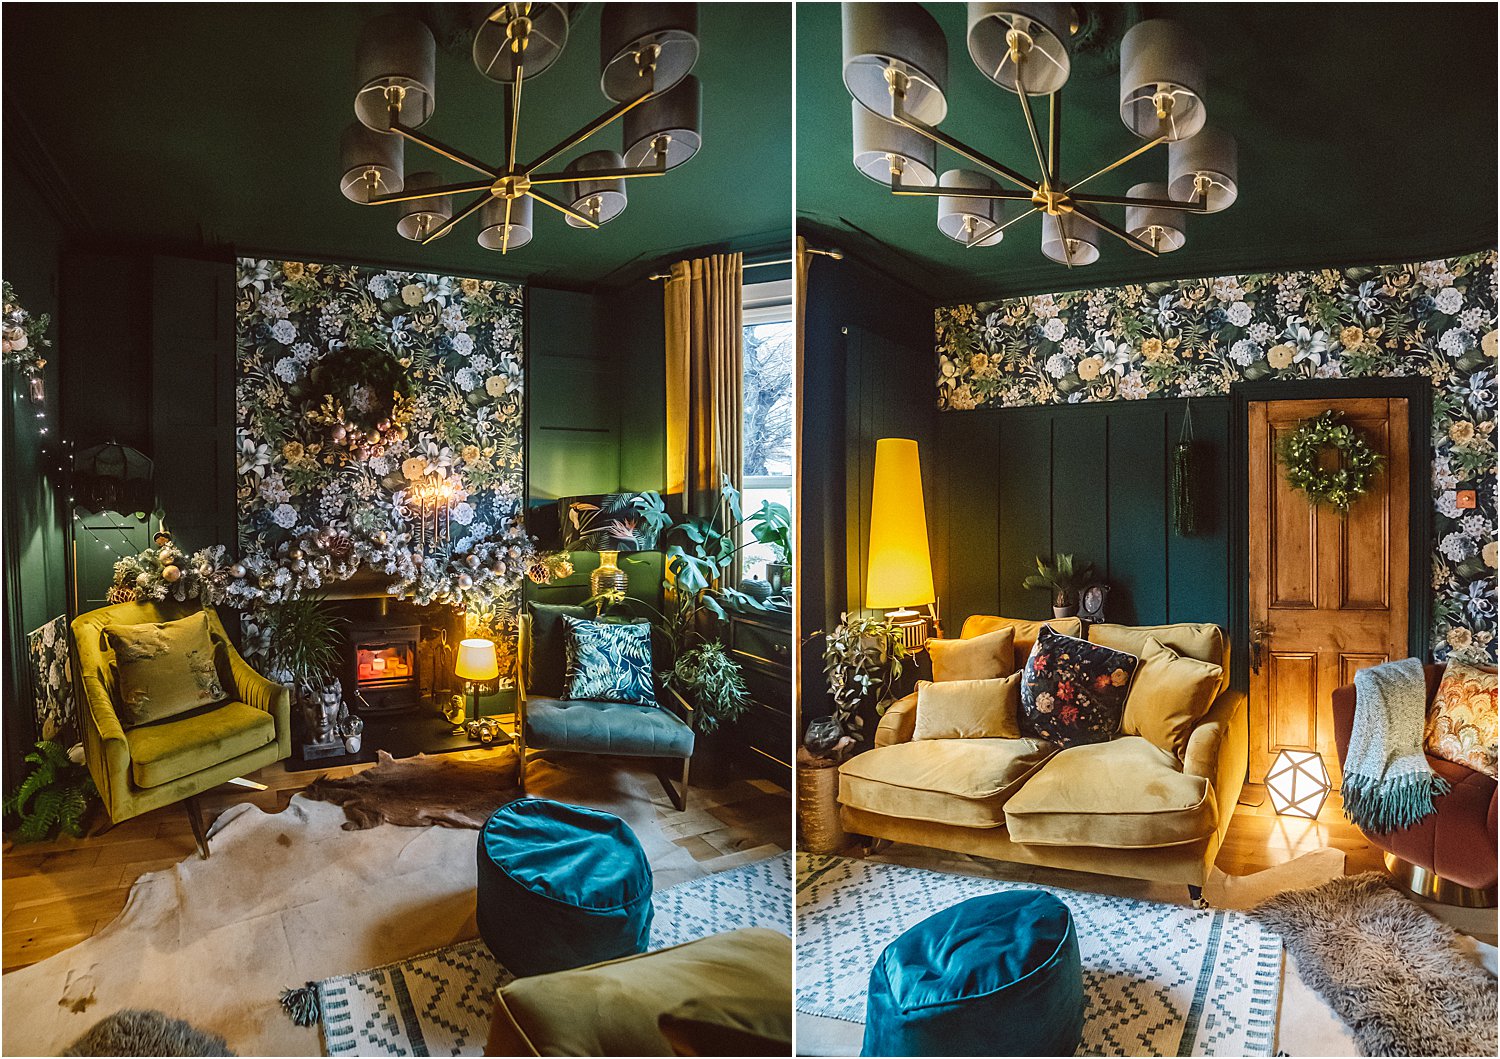
Paint the entire area the same colour as the wall. Using Graham and Brown Adeline, I repainted the entire wall and wood panelling with 2 coats on the battens. This was leftover paint from my previous paid partnership with Graham and Brown.
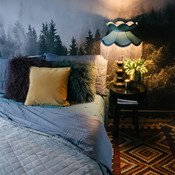
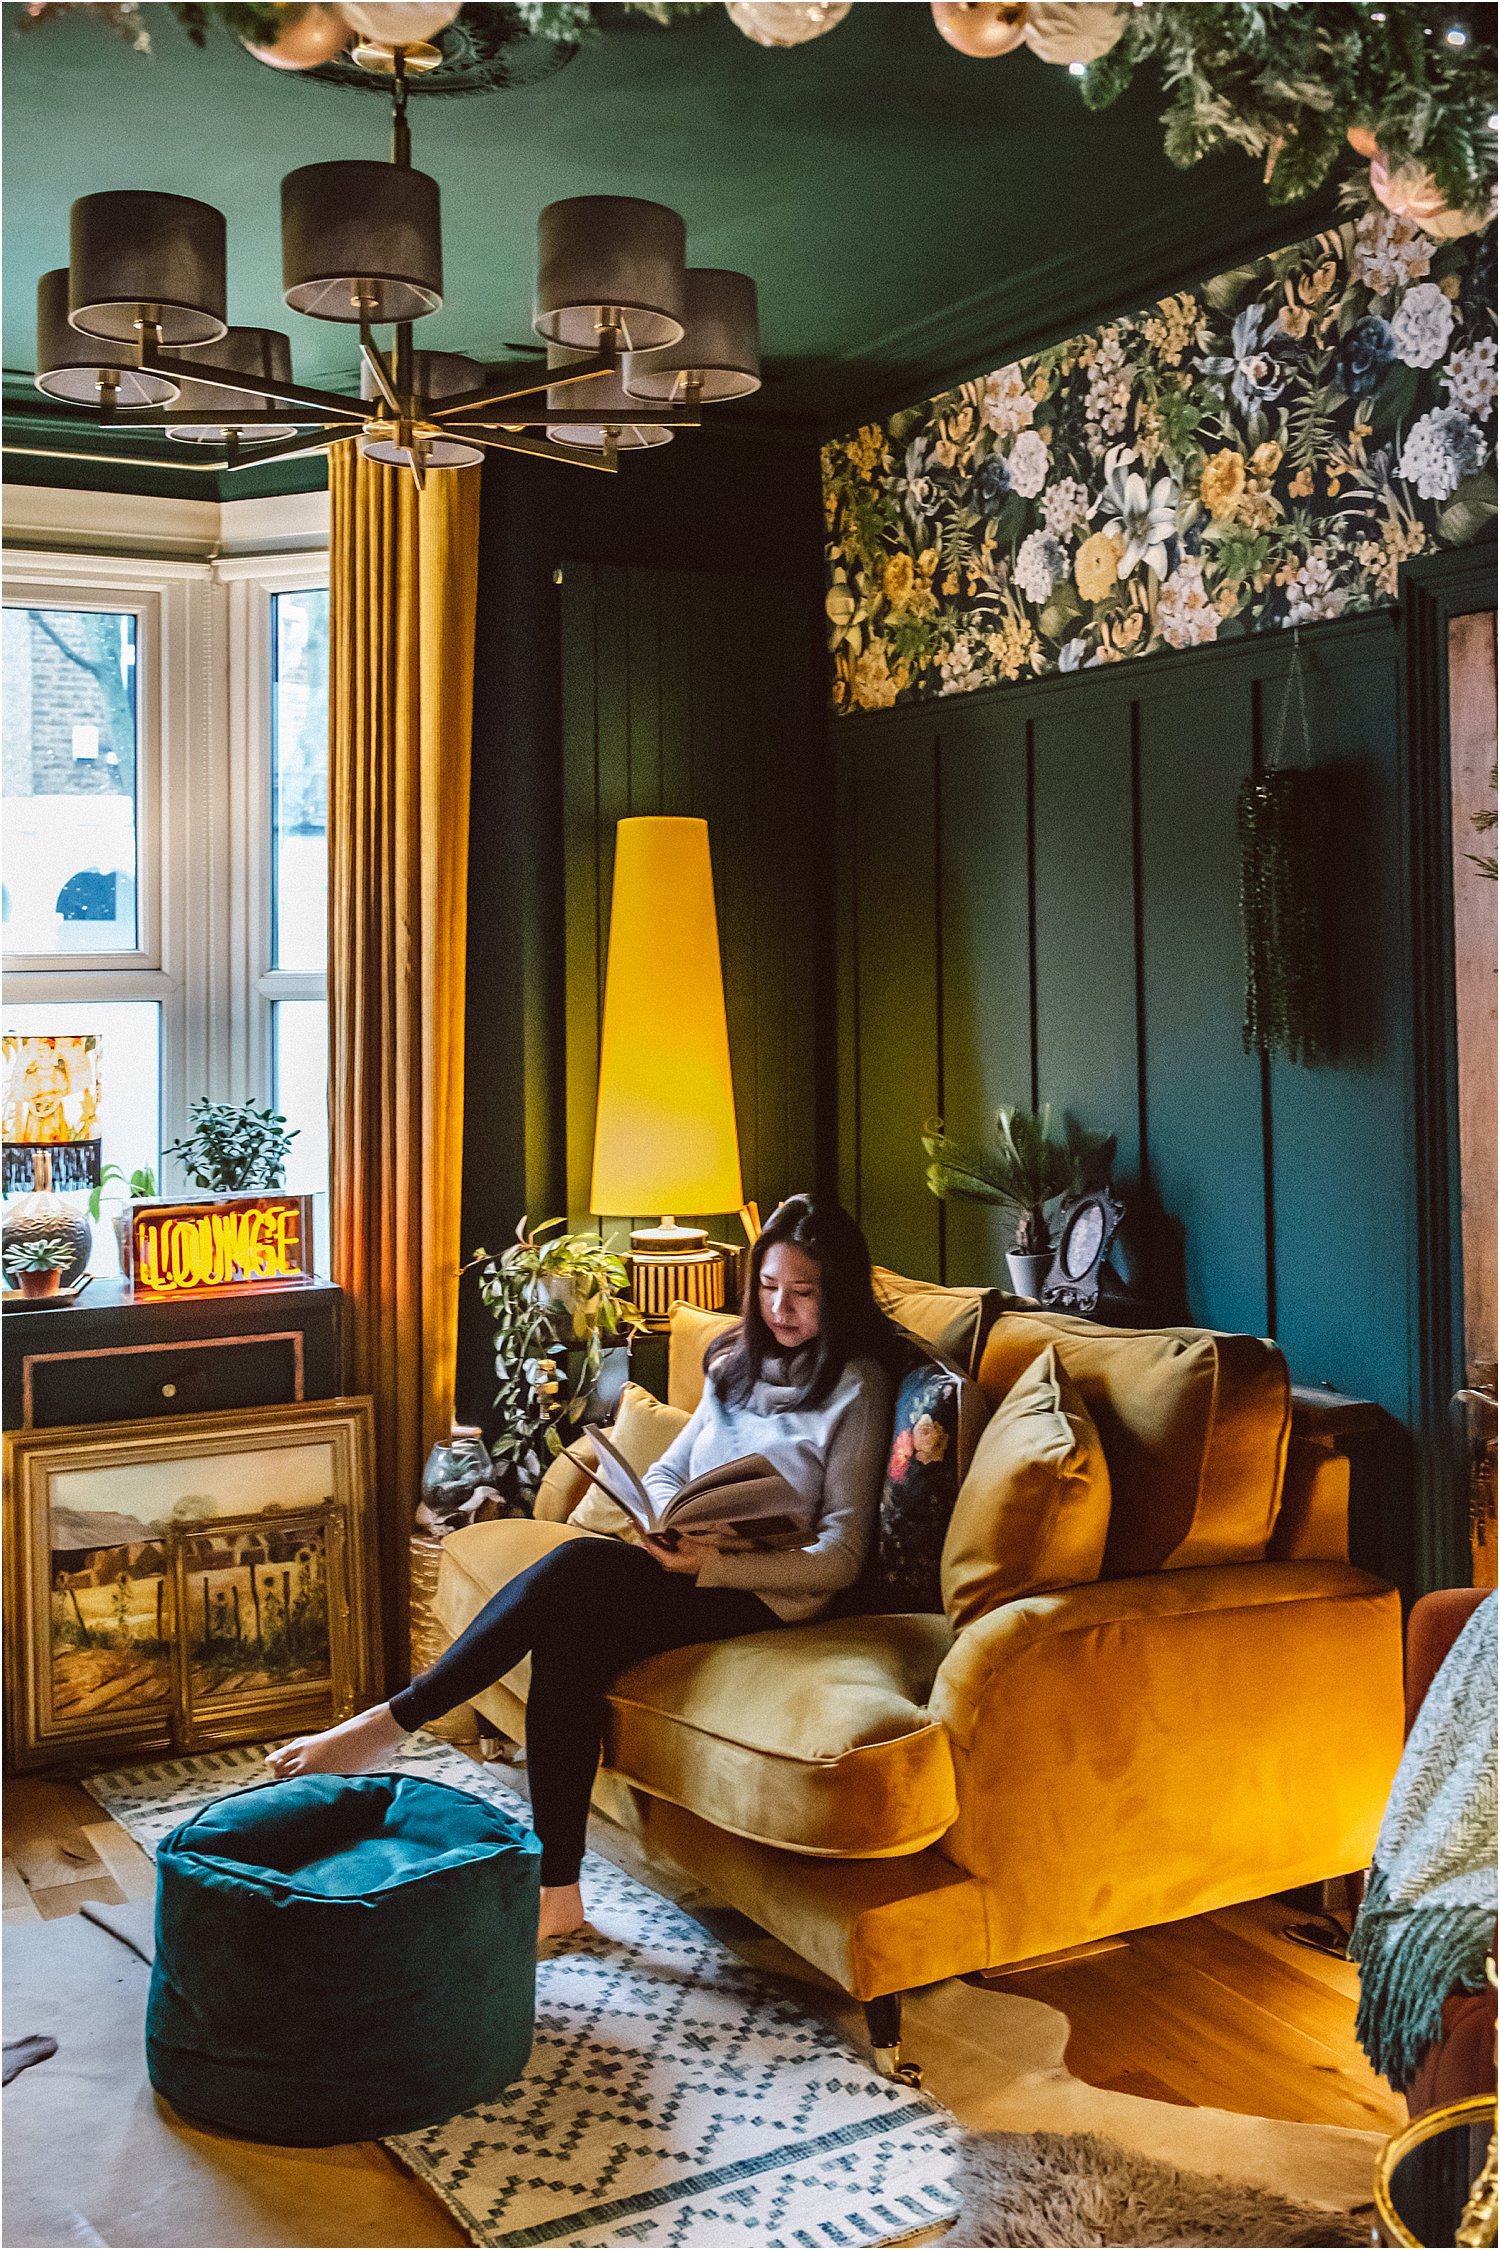
And here I am enjoying this new space whilst pretending to read my craft book for this photo!
And that was it. Simples! Here’s a little time lapse video I made on Insta.
With leftover Graham and Brown Glasshouse Flora wallpaper from a previous collaboration, I papered the top of the wall between the wall panelling and the coving. I had to enlist the help of the teen boy because of height limitations!
Here’s a before and after. Which do you prefer?
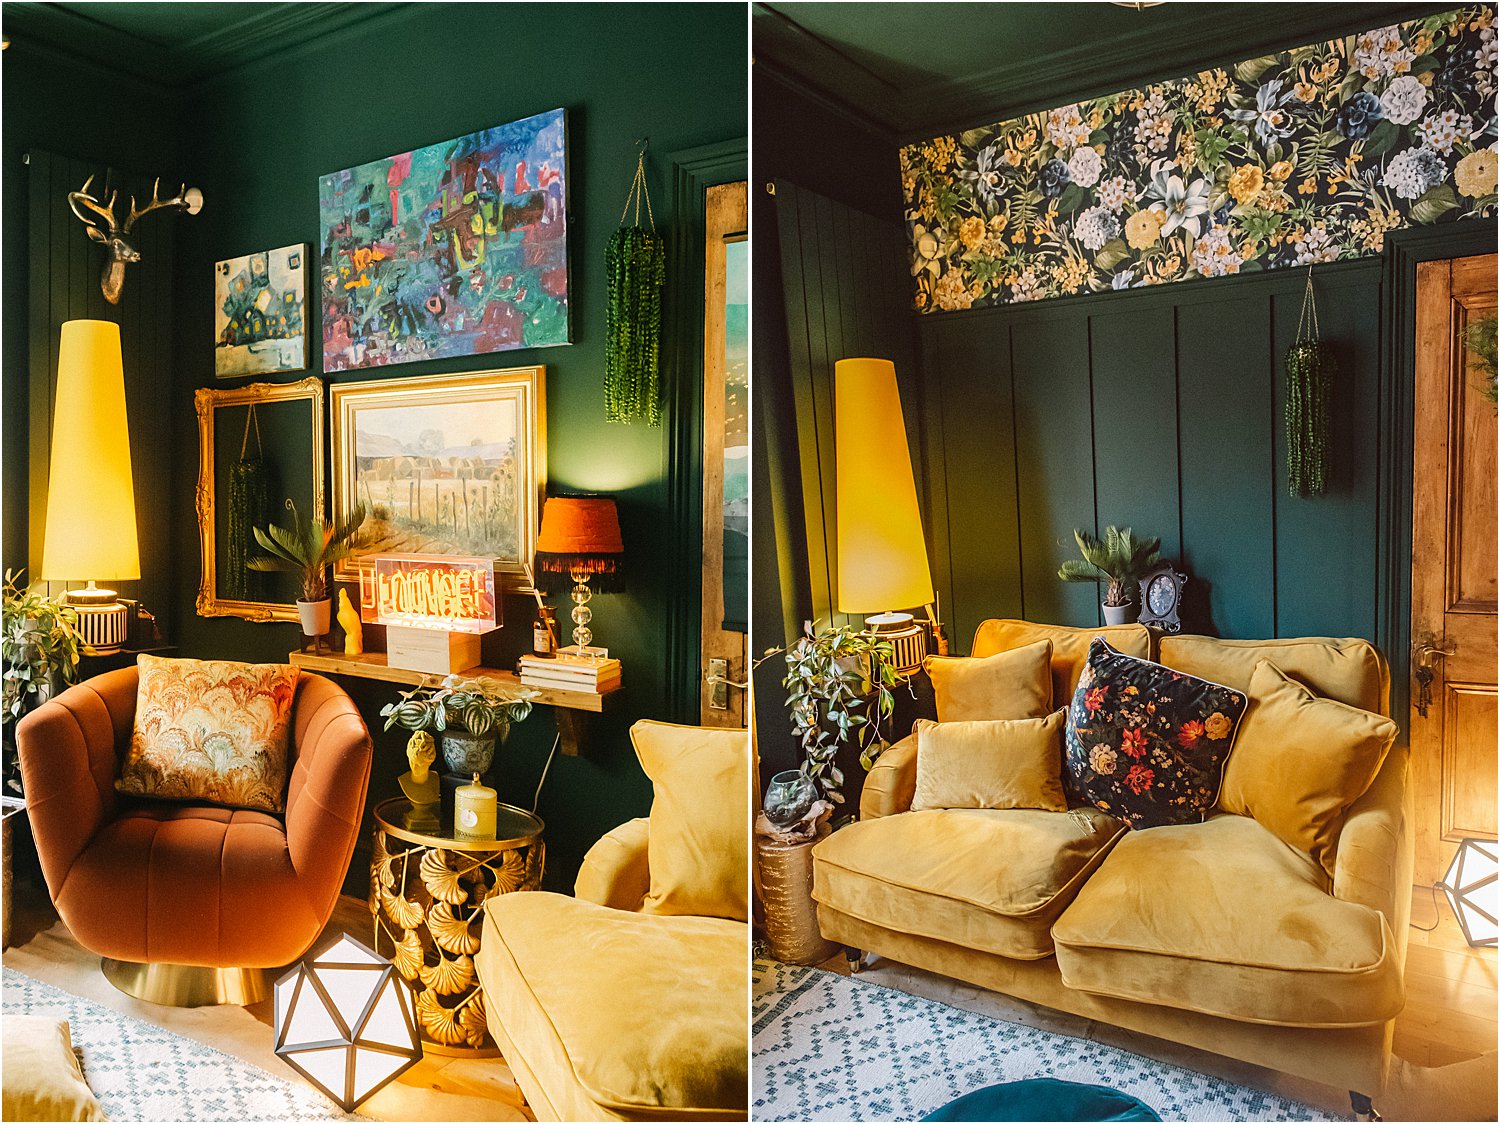
And here you can see both sides of the room.
So what’s your verdict? Will you have a go at doing a similar project yourself? Let me know! I hope you enjoyed this DIY wall panelling step-by-step tutorial.
Don’t forget to download my free resources that will help you design your own interiors and grow your Instagram account! Let’s chat on Instagram and follow me on layered.home for more inspiration.