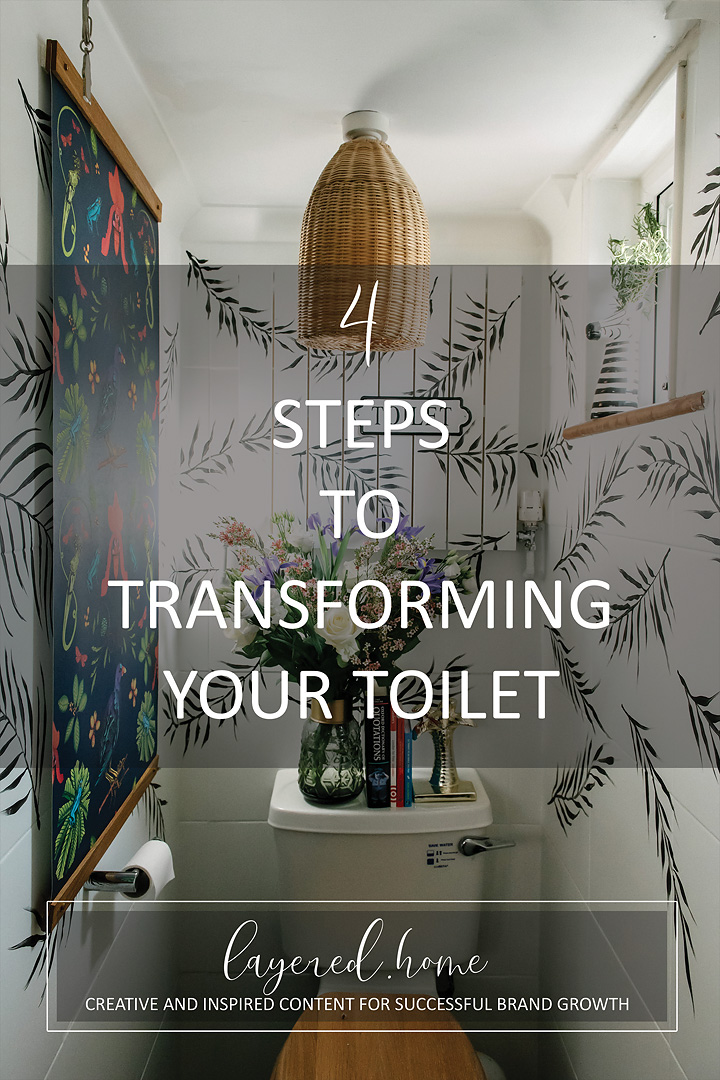
Toilet moodboard & revamp: from dull to floral with Frenchic Paint
No one wanted to use this back toilet much. It wasn’t bad; it was purely functional. Small and dull. Right at the back of the house. Light brown tiles, black floors, white radiator. But at least everything worked, except the radiator couldn’t be turned off. That was probably the only good thing about it – it was warm.
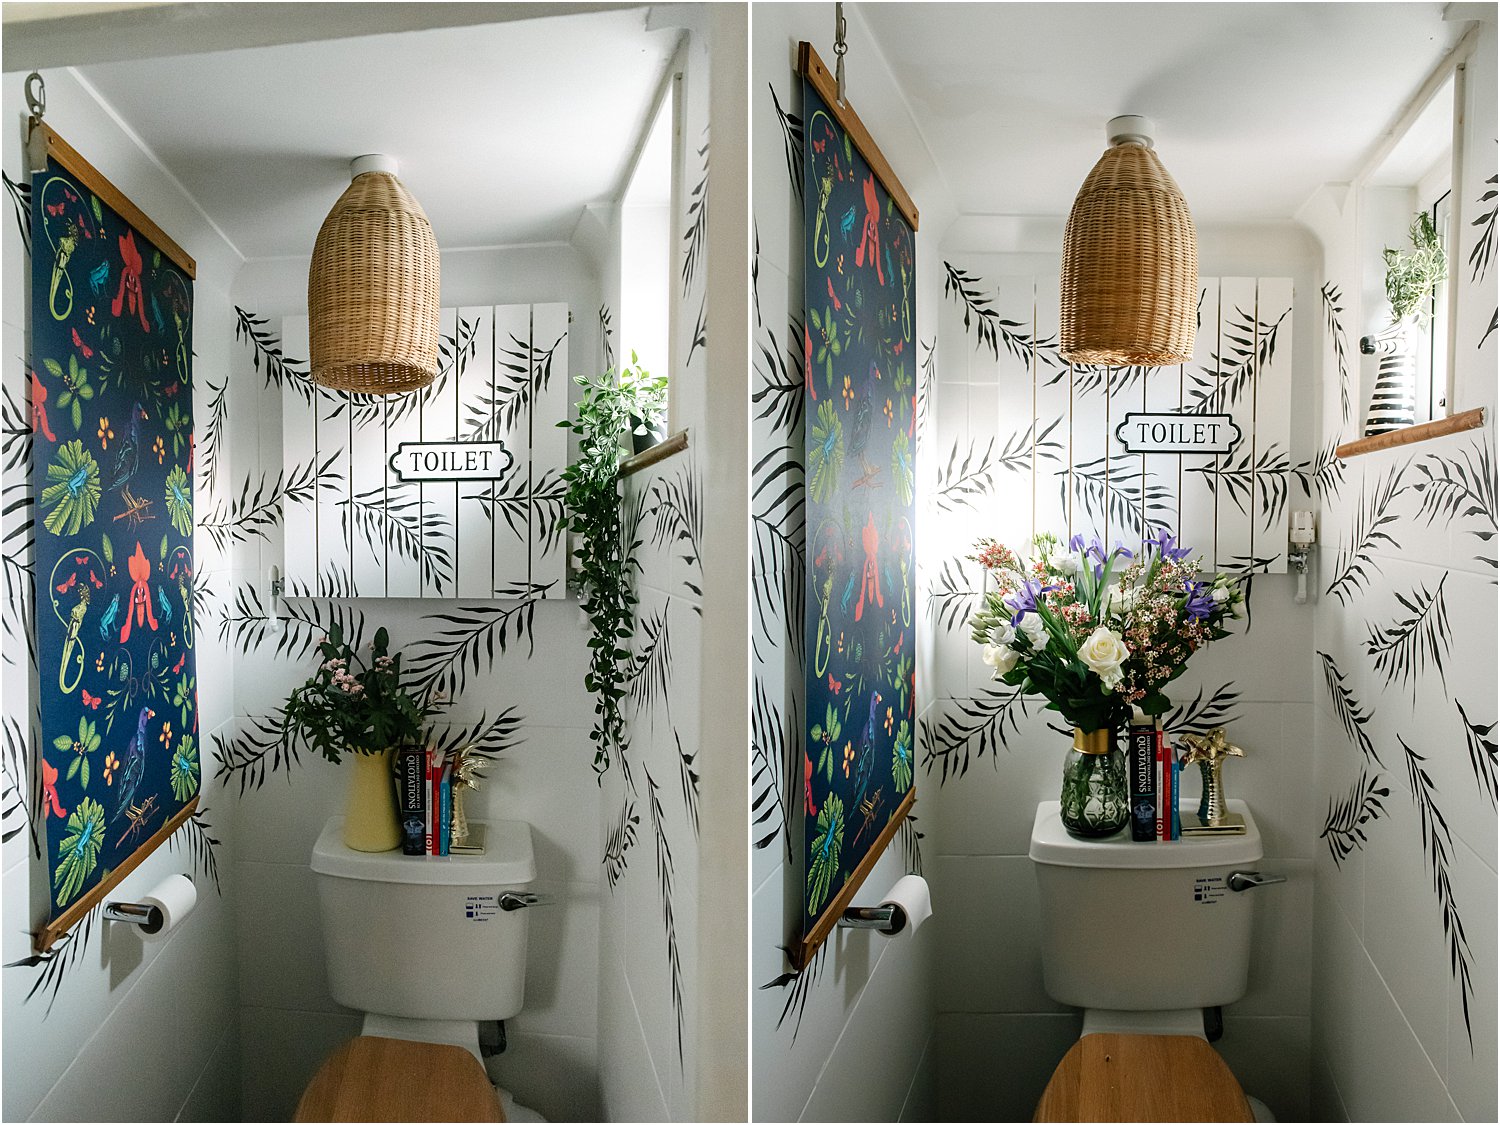
One day it went from this (left) to this (right) in a matter of hours.
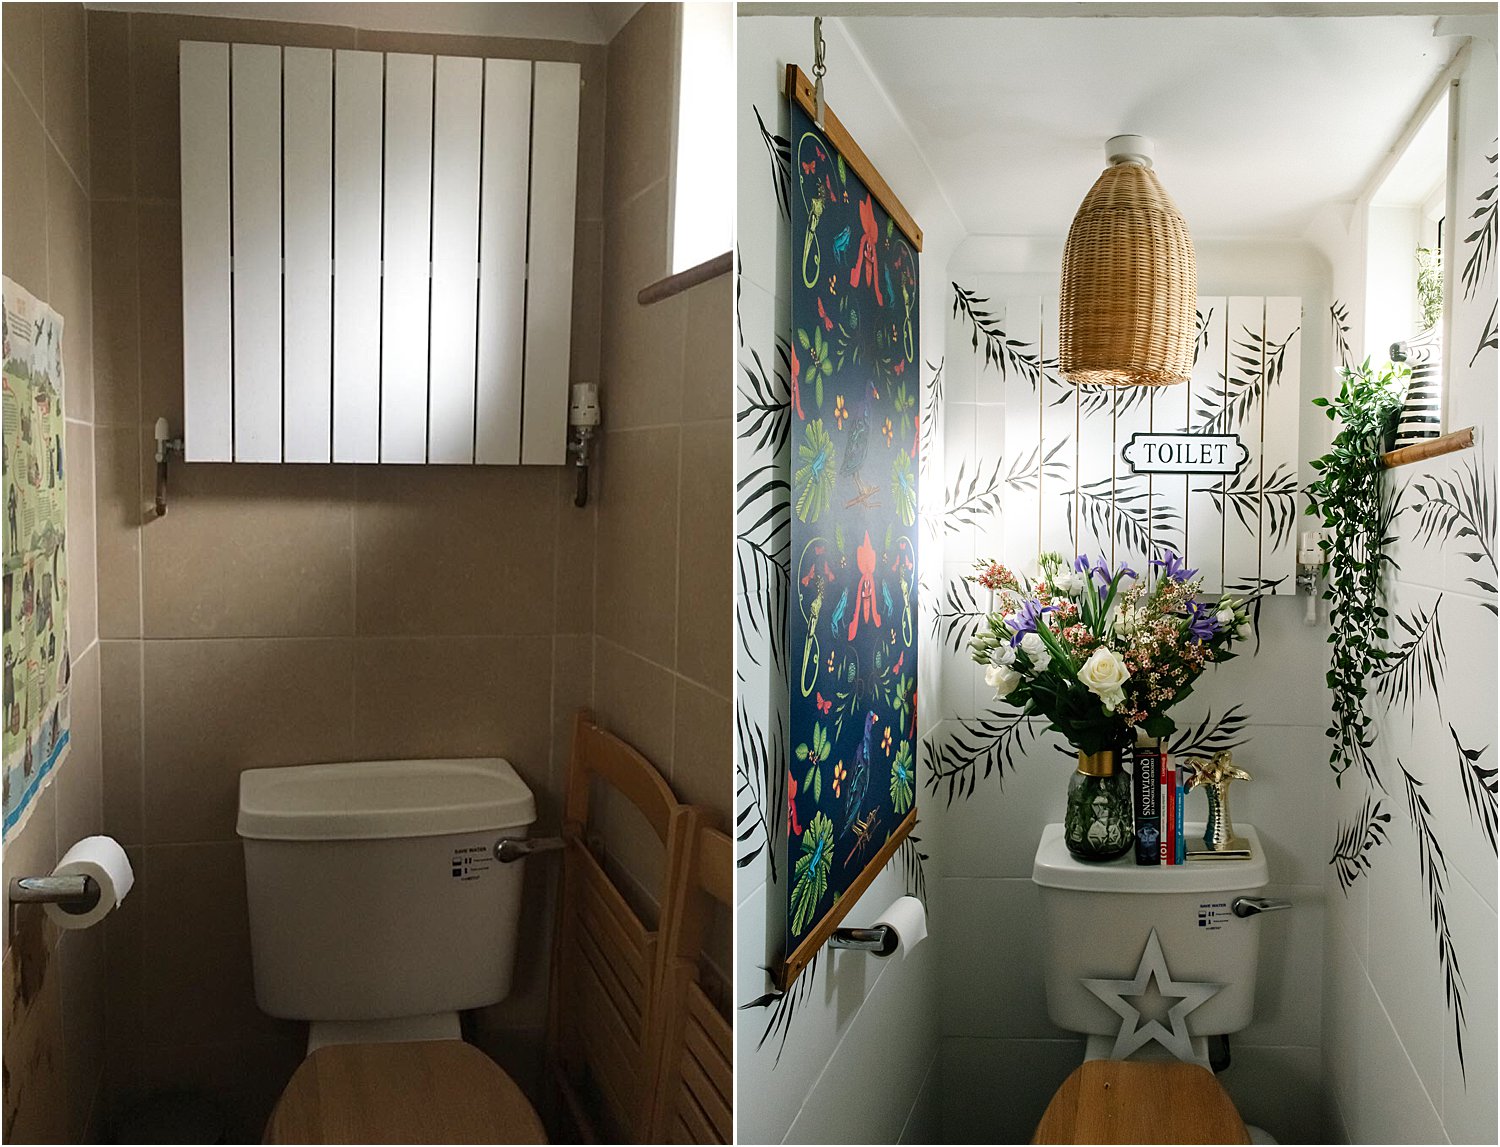
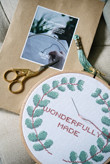
All it took was a tin of White White Lazy Range Frenchic Paint, some Loof Chalk Paint for the ferns, a bit of faffing after I shopped my home (for a vase, gold bookend, faux plants, wicker lampshade), a toilet plaque from Amazon and a wall hanging from the very talented Emma of WilFul Ink. And voila, it is finished! Just like that. Quite a simple idea and it worked.
But, the truth is, it all started with a moodboard. And that is what I’d like to write about in this blog. By the way, don’t forget to download my free resources that will help you design your own interiors and grow your Instagram account!
1. Inspiration
Every revamp of mine starts from a need or want to change a space in order to improve form or function or both. This is often followed by a lot of thinking and browsing for inspiration. Contrary to what others may see as a compulsive action, there is a lot of thought that goes behind the spaces I change in the house. I may not be shouting the thought-process to the rooftops but I often look for inspiration in the weeks and months prior.
The two top places that I go to are Instagram and Pinterest. I follow many fabulous people on Instagram with a great eye for design and often just borrowing some ideas or taking inspiration from their posts works for me. It doesn’t have to be a whole room inspiration. It could be the tiniest thing, the smallest idea for placing a throw or arranging a vignette.
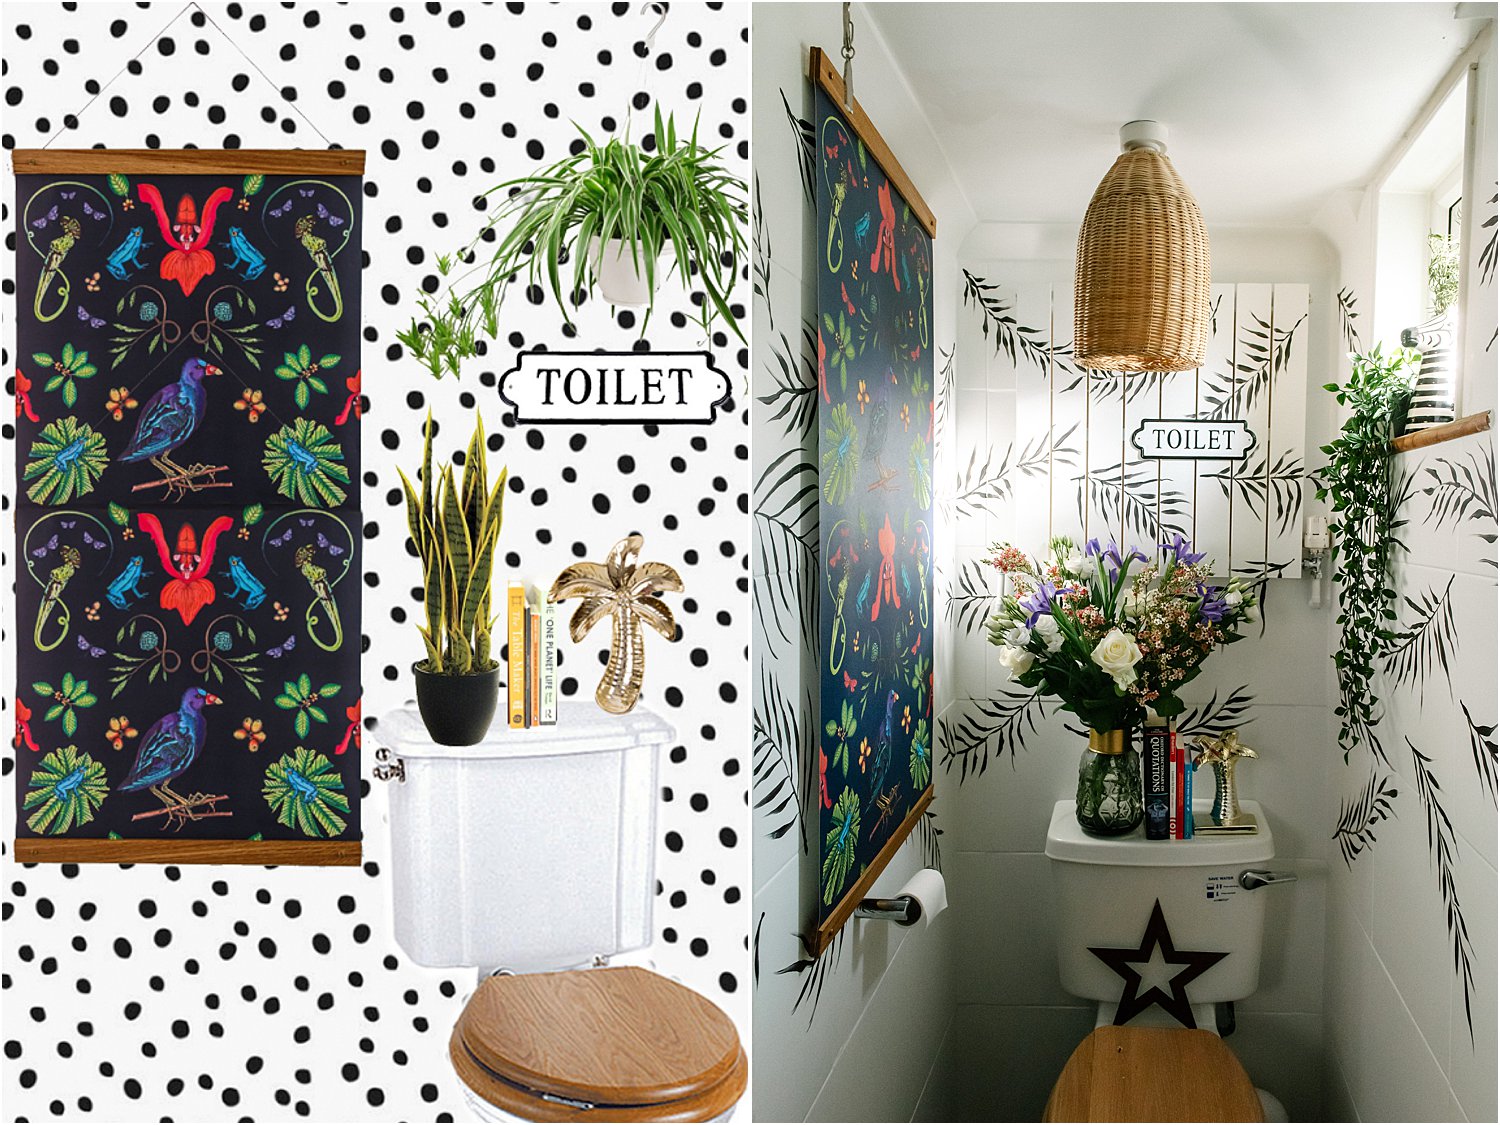
This toilet had been on my mind for months. I just didn’t know yet what I was going to do with it. Do I go dark, plain, patterned? And then I came across Pati Robins’ makeover of her cupboard. Mind-blown. A cupboard smaller than my bathroom became a beautiful workspace. And so I thought I could do the same. Pati painted her cupboard in white with Dalmatian spots and added some lovely accents and accessories. That was decided then. I was going white with spots, not dalmatian spots though, just spots.
2. Moodboarding
I set about creating a moodboard (above left) in Photoshop using Google and Pinterest for help with images such as the spotty wallpaper, cistern etc. I put them together as a collage but intentionally putting items more or less in the right spot as to where they should go in real life rather than the usual moodboard which is a collection of photos of items and colours all pasted together randomly on a sheet to create a scheme.
3. Gathering materials and actual makeover
I thought about hand-painting the spots but then changed my mind as I didn’t want it to look too shabby. A stencil like Pati’s would work better. However, I could not find a spot stencil so went for the Dalmatian.
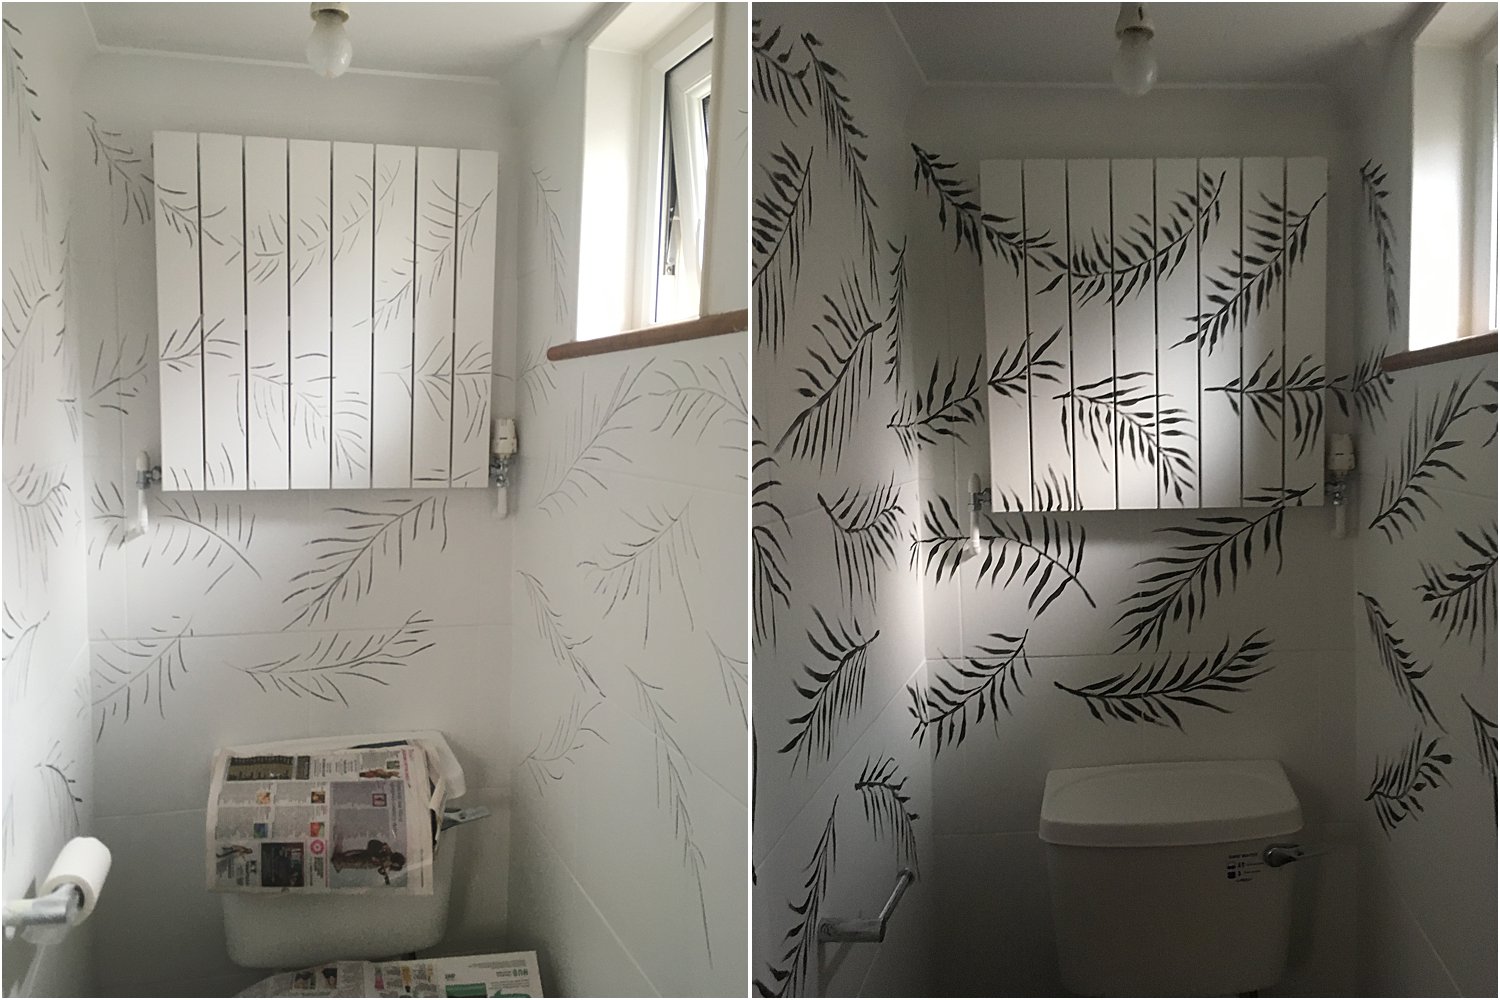
The makeover process was fairly easy: clean the walls, sanded the tiles a bit for key, wipe clean, apply 3 thin coats of paint, drying between coats obviously. I then applied 2 stencil areas of the dalmatian spots and quickly decided this was not going to work for me. I painted over them with Whitey White and decided on ferns instead, which was easy enough to hand-paint.
I first drew the ferns in charcoal and then went over the charcoal with Loof chalk paint. Just the one time. I then wiped the charcoal off after the black ferns have dried.

There’s the option to seal the paint for more protection from water splashes etc. The paint already has wax in it being the lazy range but as this toilet is hardly used and doesn’t have a sink, there’s very little chance of splashes and wet patches on the walls so I didn’t think a lacquer or protective finish was necessary.
4. Dressing it all up
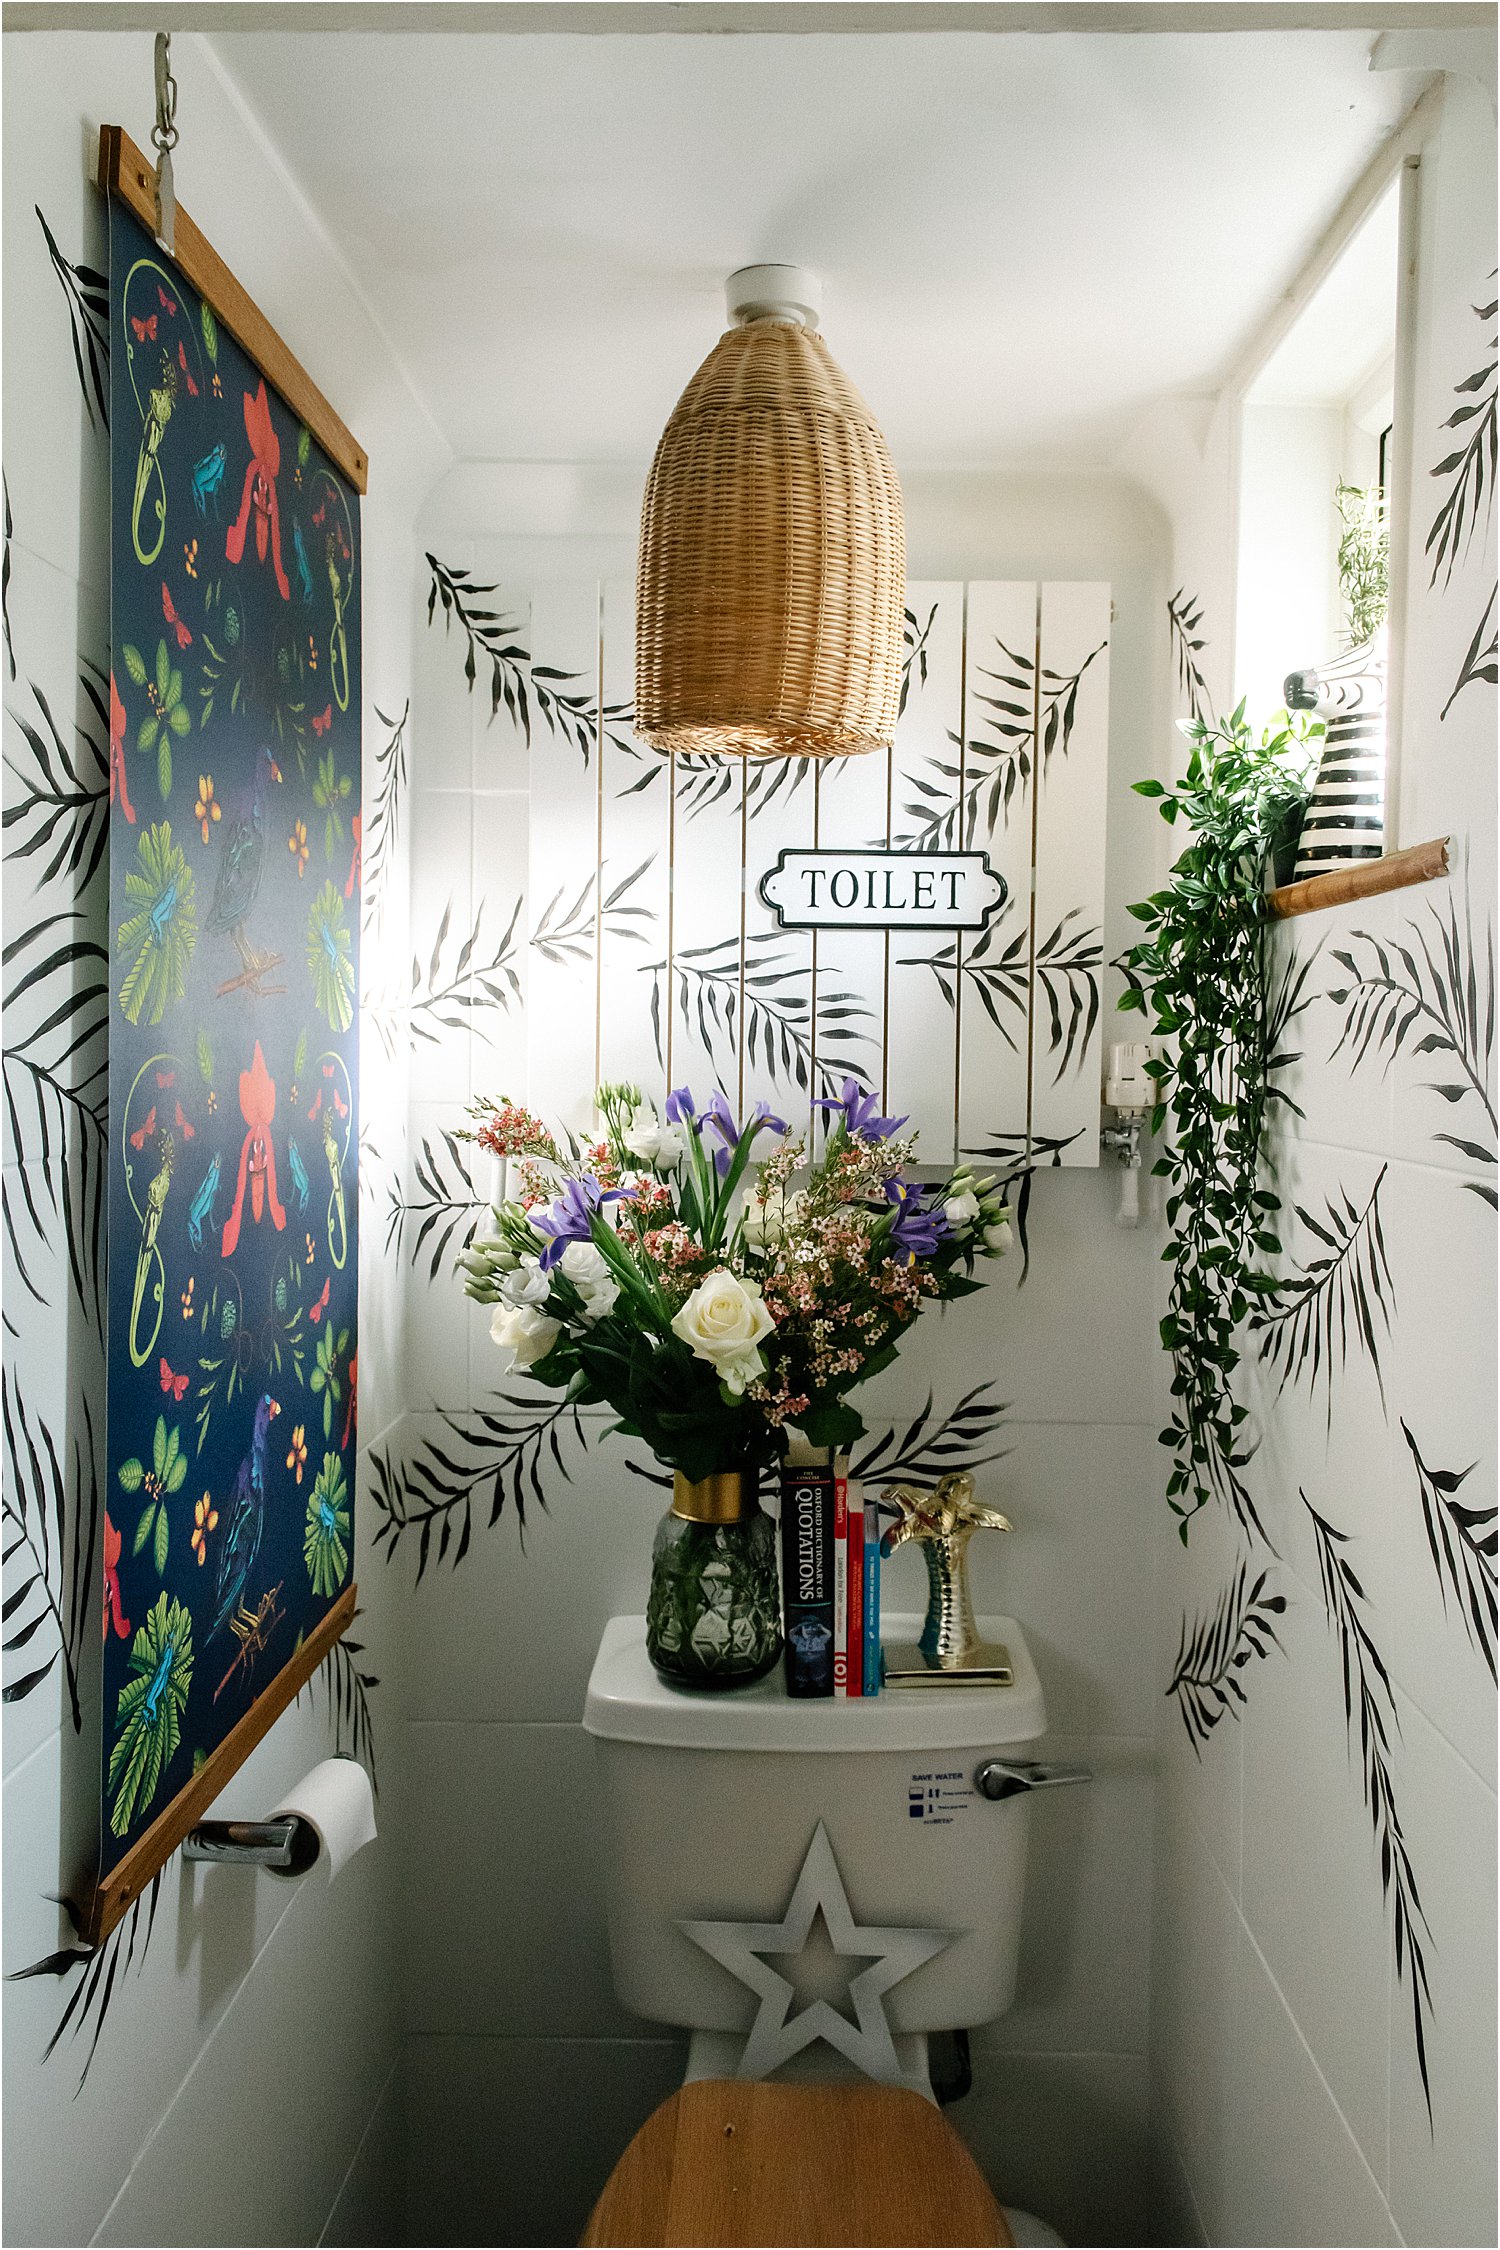
Now here’s the best bit and my favourite. I gathered everything and dressed the newly painted white toilet up. That’s really all there was to it! This back toilet is now a cheery place to do one’s business in and it even gets to model fresh flowers too! A huge thank you to Rob and Pam of Frenchic Paint and Emma of Wilful Ink for gifting me the products for this makeover.
I hope this little makeover on Toilet moodboard & revamp: from dull to floral with Frenchic Paint has inspired you somehow. Do share your thoughts on Instagram layered.home and I’d love it if you would follow me on there too! And please share on your stories or repost on Instagram, I’d be forever grateful!Don’t forget to download my free resources that will help you design your own interiors and grow your Instagram account!