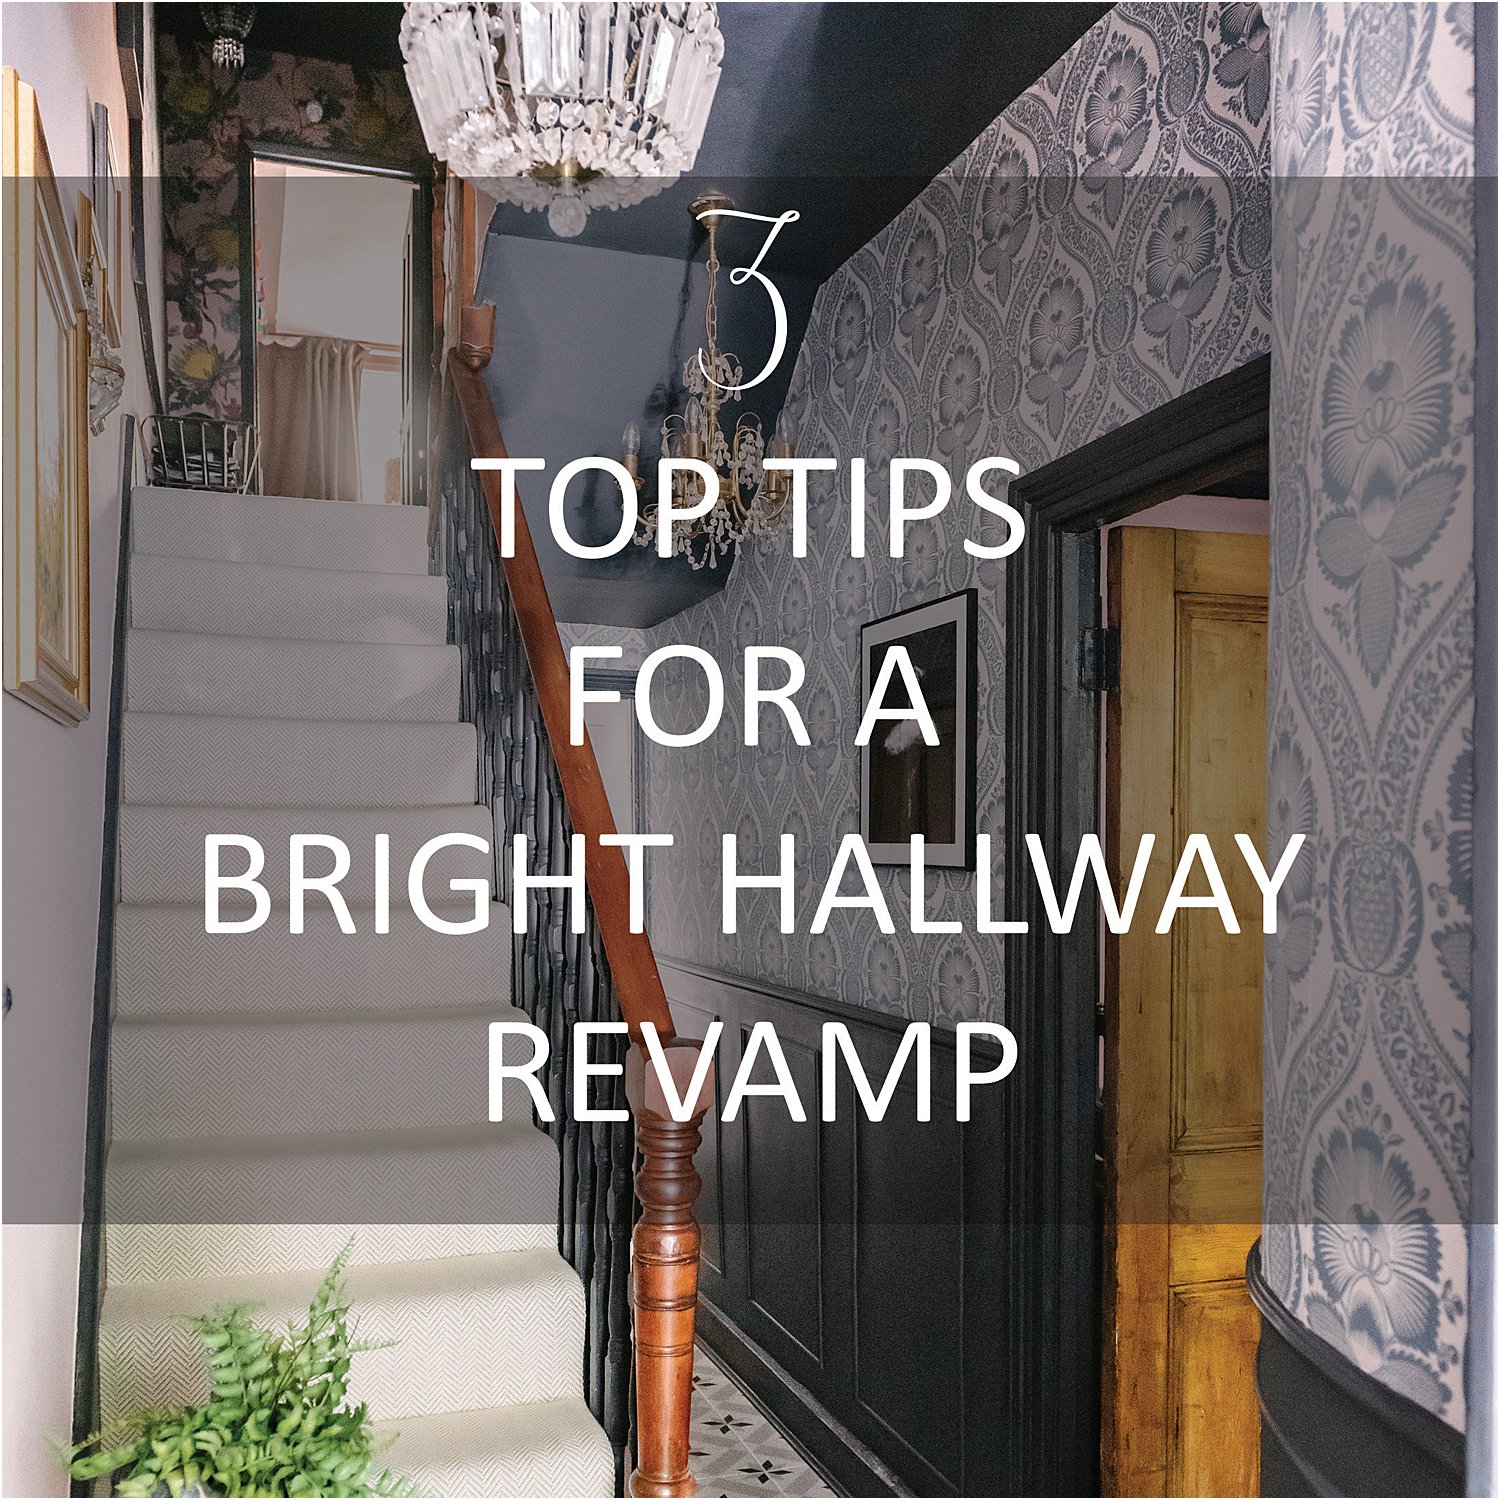
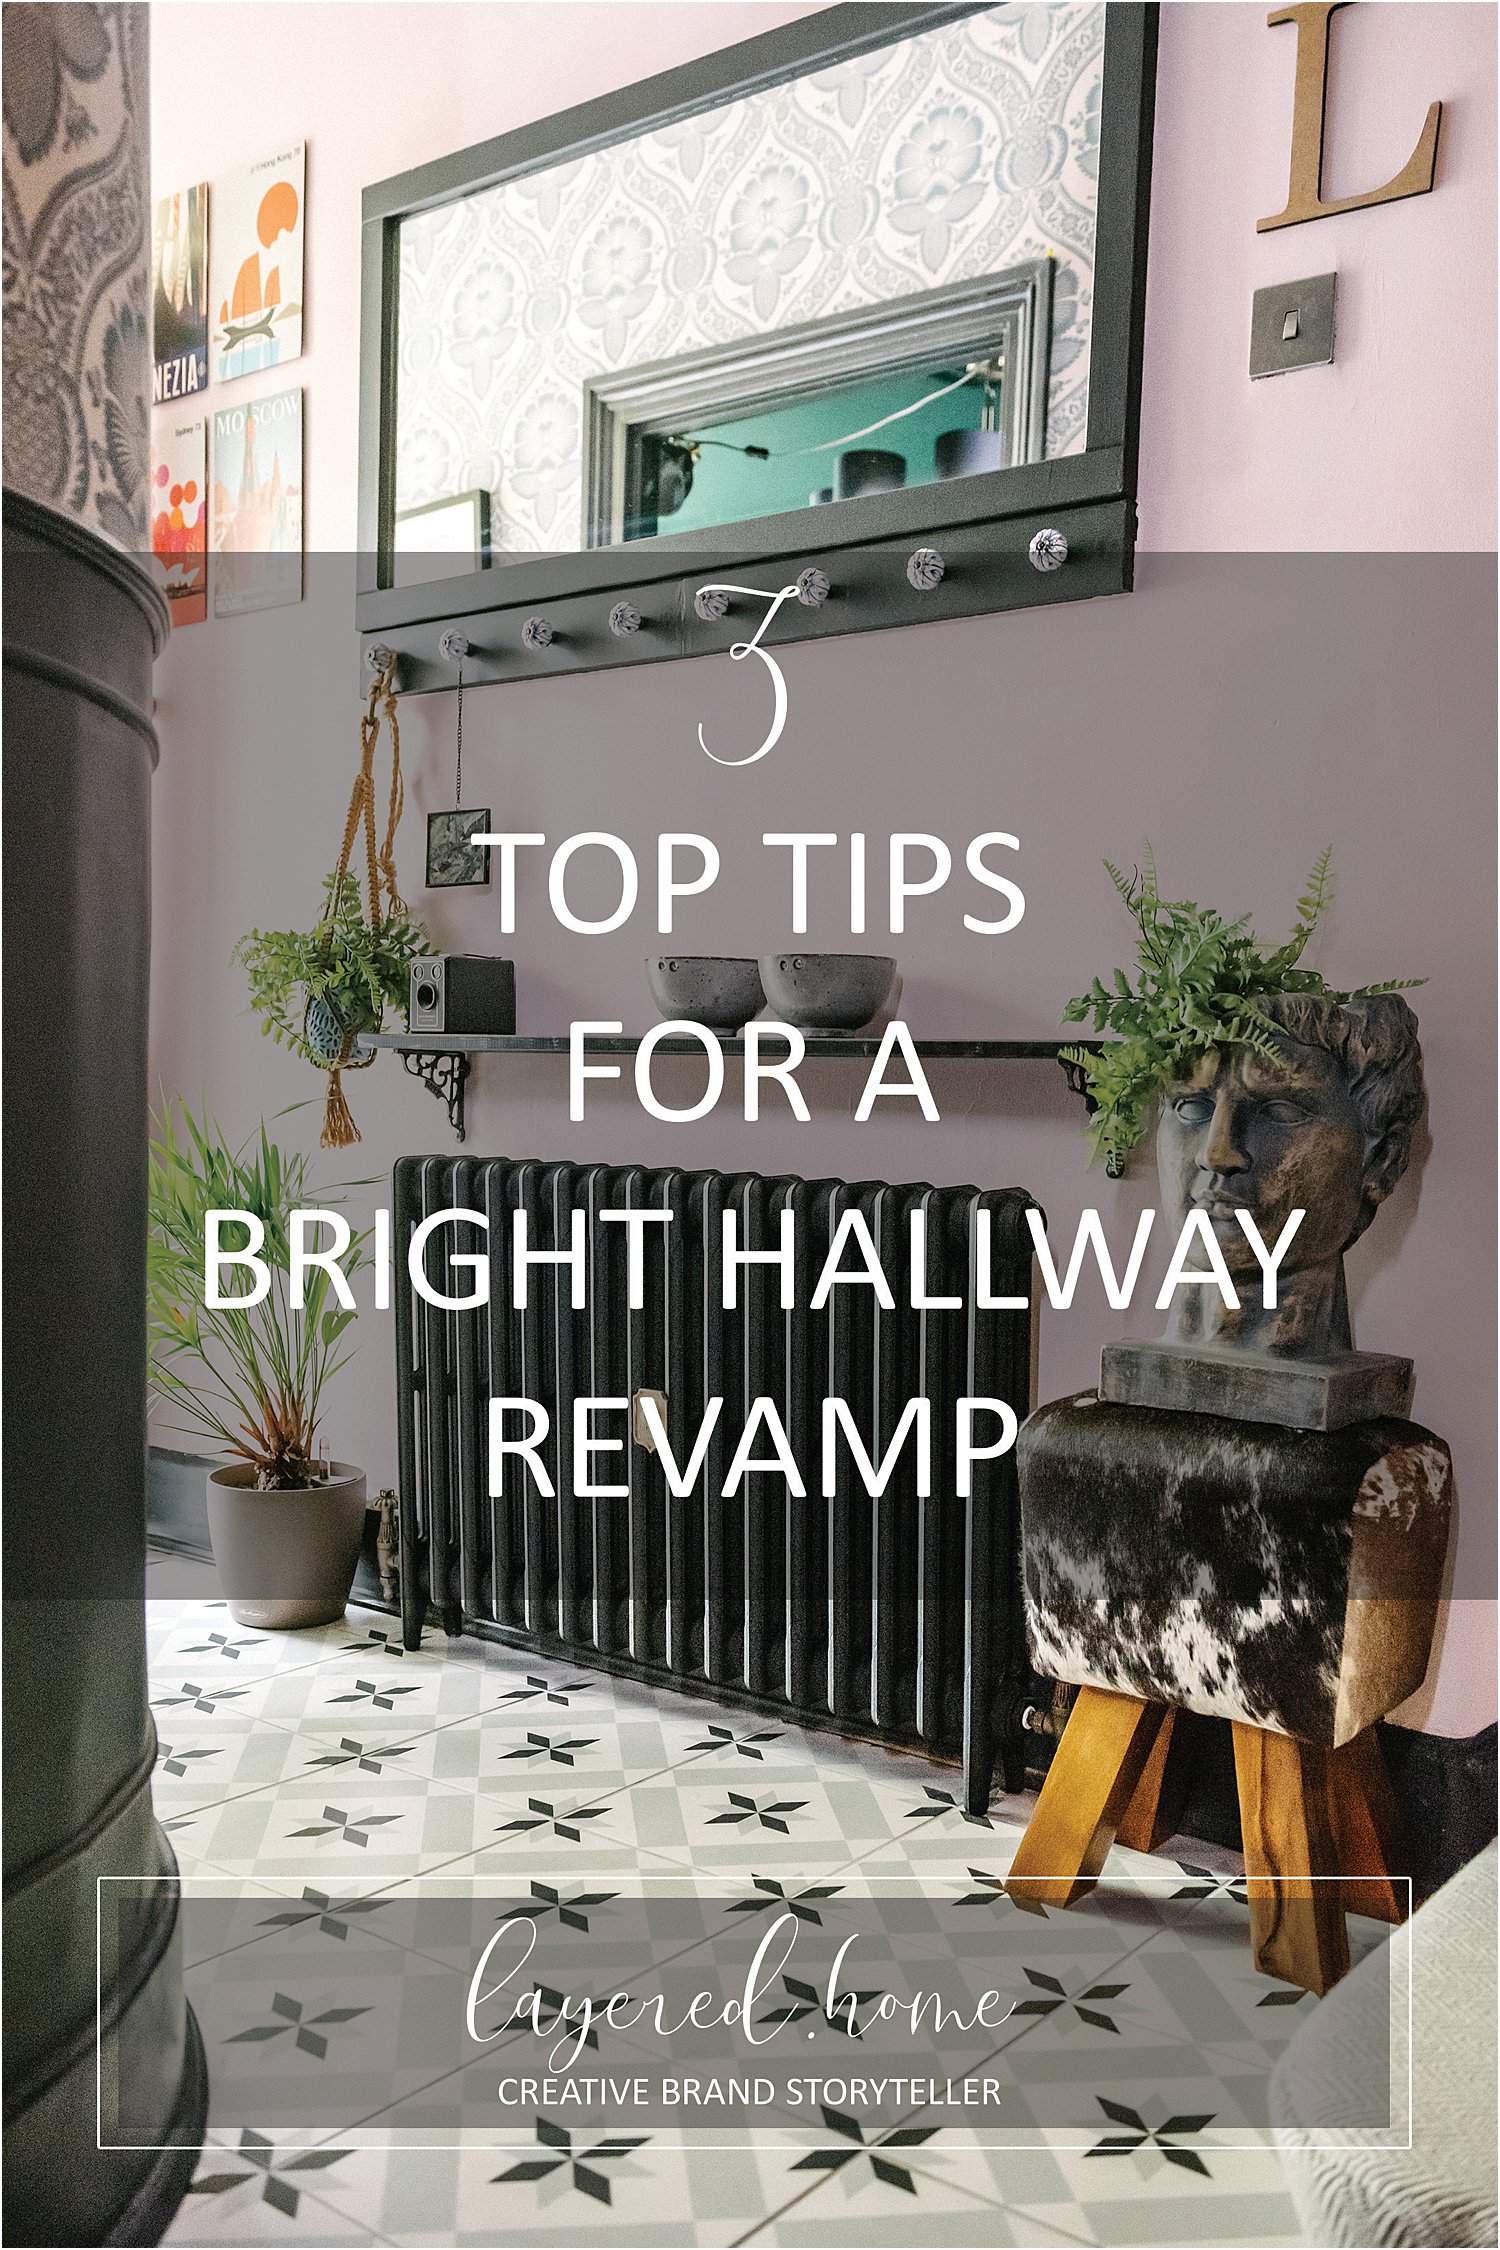
If you follow me on Instagram Layered.Home, you may have seen I’ve been working on my hallway – again! Here are my 3 top tips for a bright hallway revamp from dark to light.

I’ve recently decided to embrace the light in my poorly lit home, now adding lighter and brighter spaces into the dark interiors. There are a couple of reasons for this…
First, the lockdown has been so long that I felt so cooped up in the house, which I didn’t mind so much at first because of all the fears and anxiety around Covid.
But more recently with the weather being nicer and lighter outside, I am yearning for freedom and the great outdoors.
This new confidence has been brought on in huge part from having had our second jabs in the home – that’s me, my husband and my Mum, but not the children.
I’ve been planning this revamp early this year and started working on it at the beginning of spring. Now I am 100% finished and can finally sign it off as done!
In this article, I’ll show you my 3 Top tips for a bright hallway revamp and the stages I went through from planning to execution.
3 Top tips for a bright hallway revamp
1. Create a mood board, but not as you know it
The first step in moodboarding for me is not sitting in front of a computer grabbing images online like a magpie or getting a few items and magazine pages and sticking them on to paper. Not at all. The clue is in the name… mood board.
It’s taking some time really thinking about how I want to FEEL whilst being in my hallway. How the space feels and how you feel when you’re in it is so intertwined. Until I am able to articulate that feeling clearly, I couldn’t really start on a mood board.
So I start with this: feeling followed by inspiration.
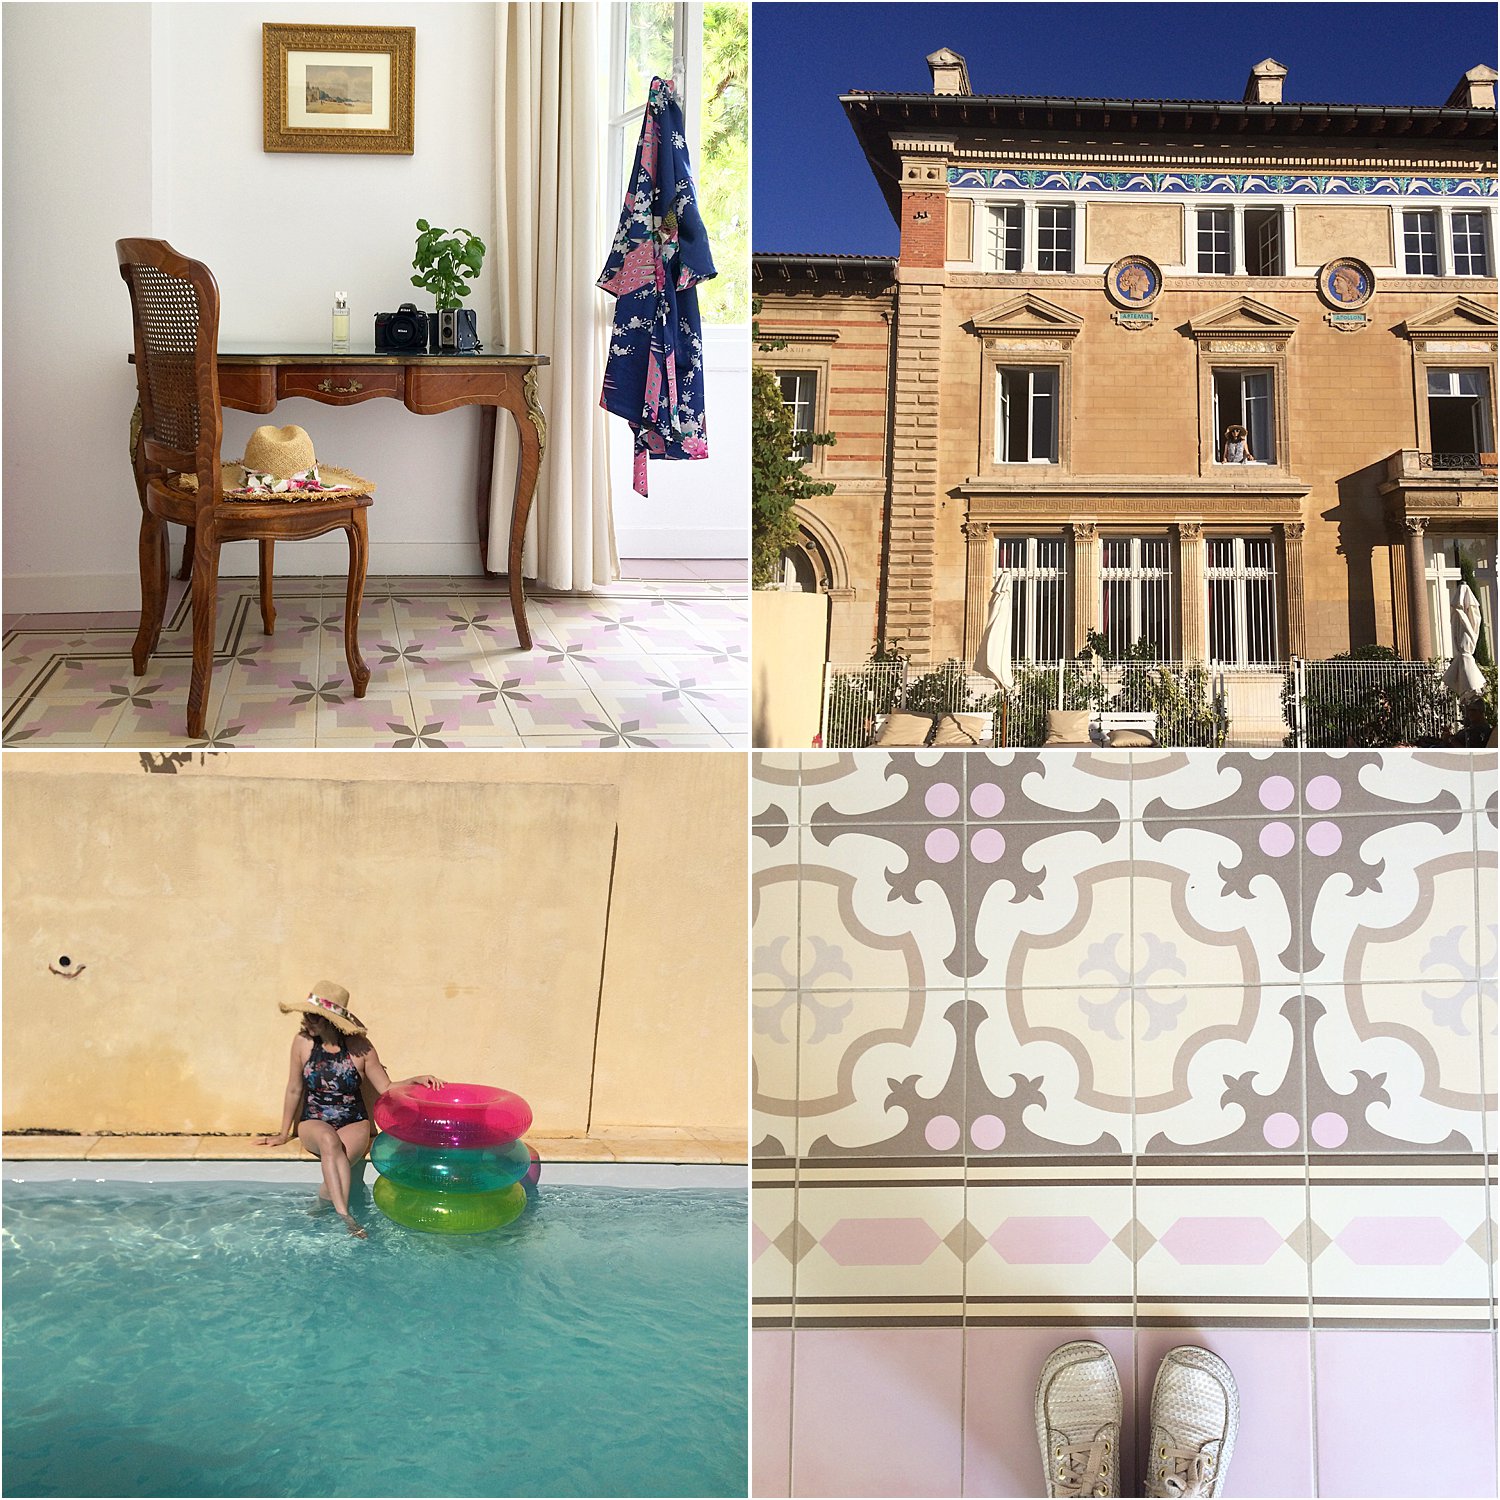
I wanted to feel like I’m on “holiday” when in this space. Bear with me for a minute. A few years ago we rented an apartment in a chateau in the South of France. The front of the chateau looked stunning.
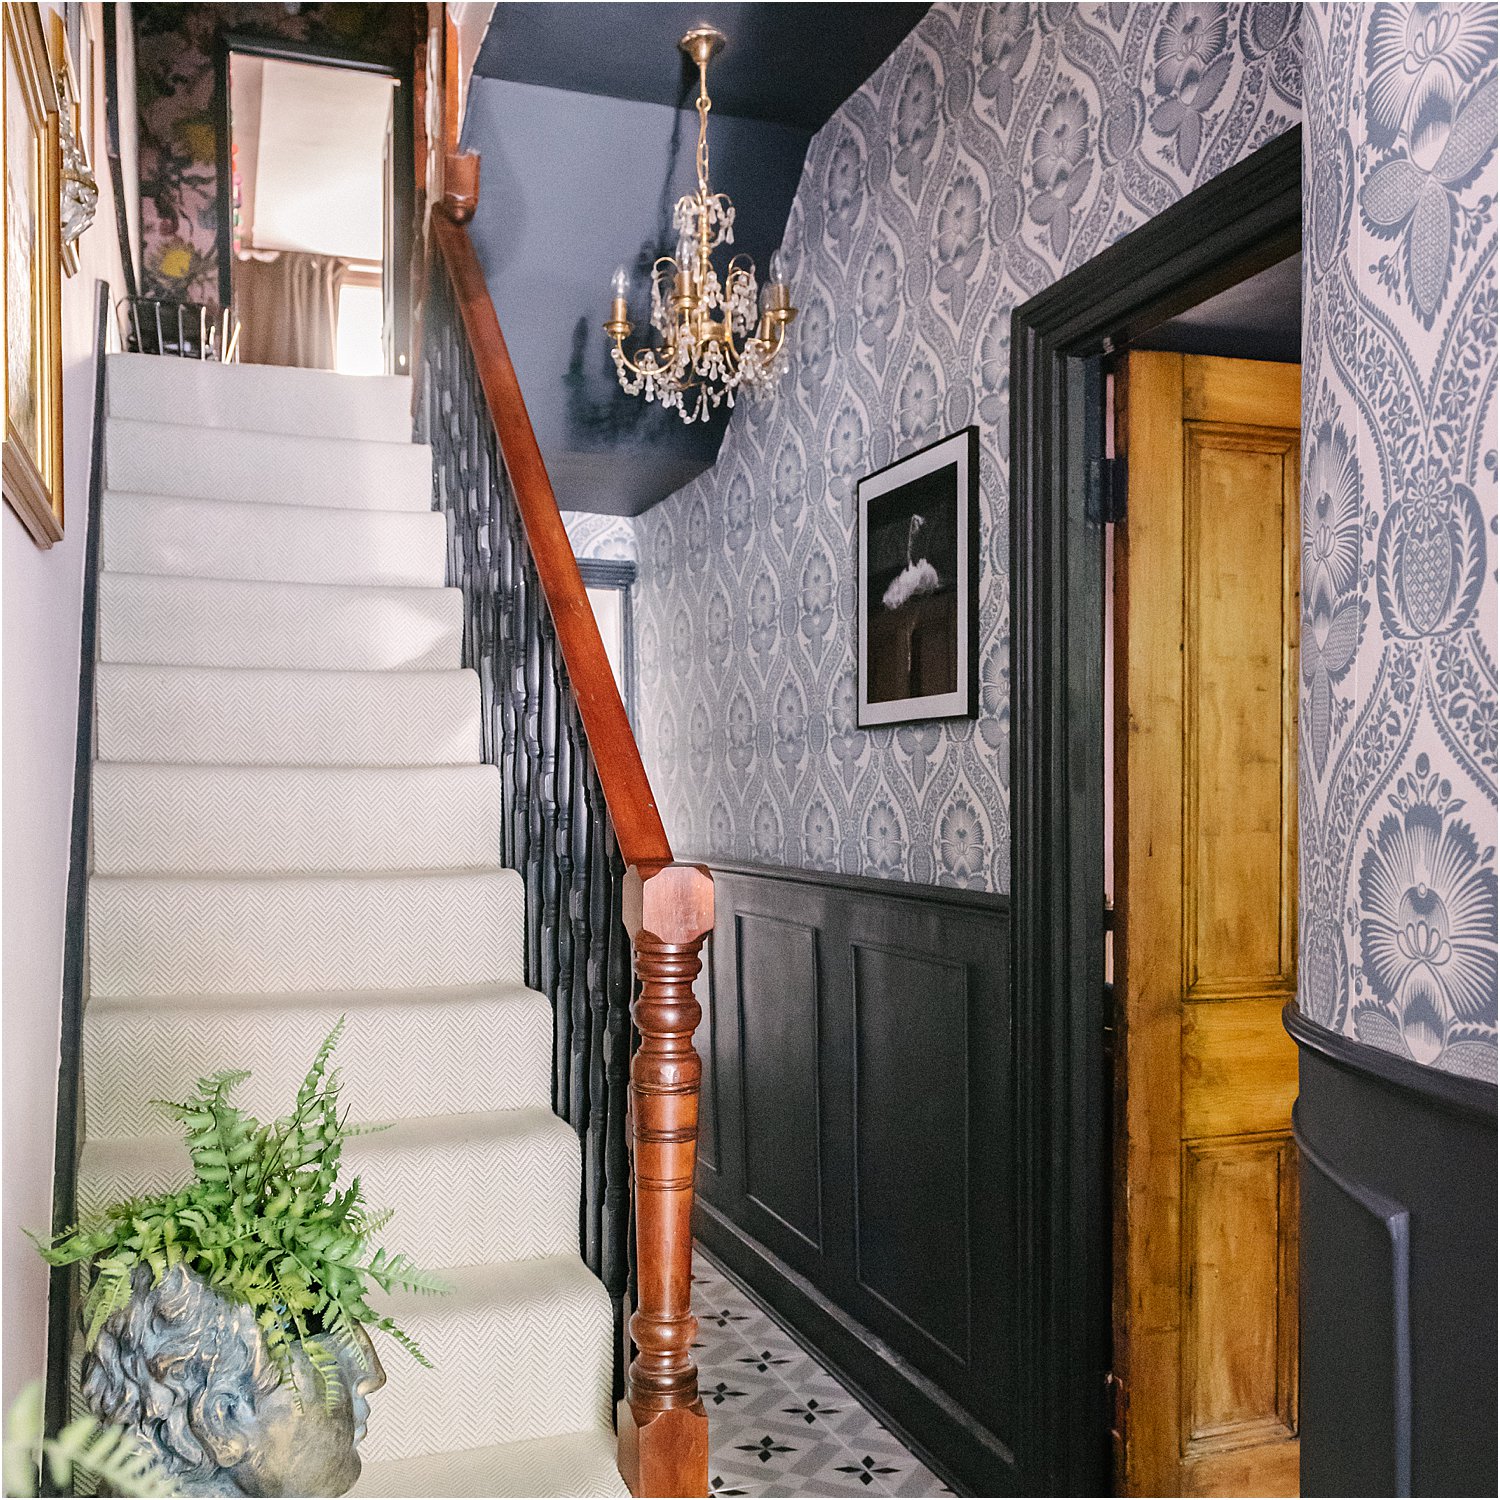
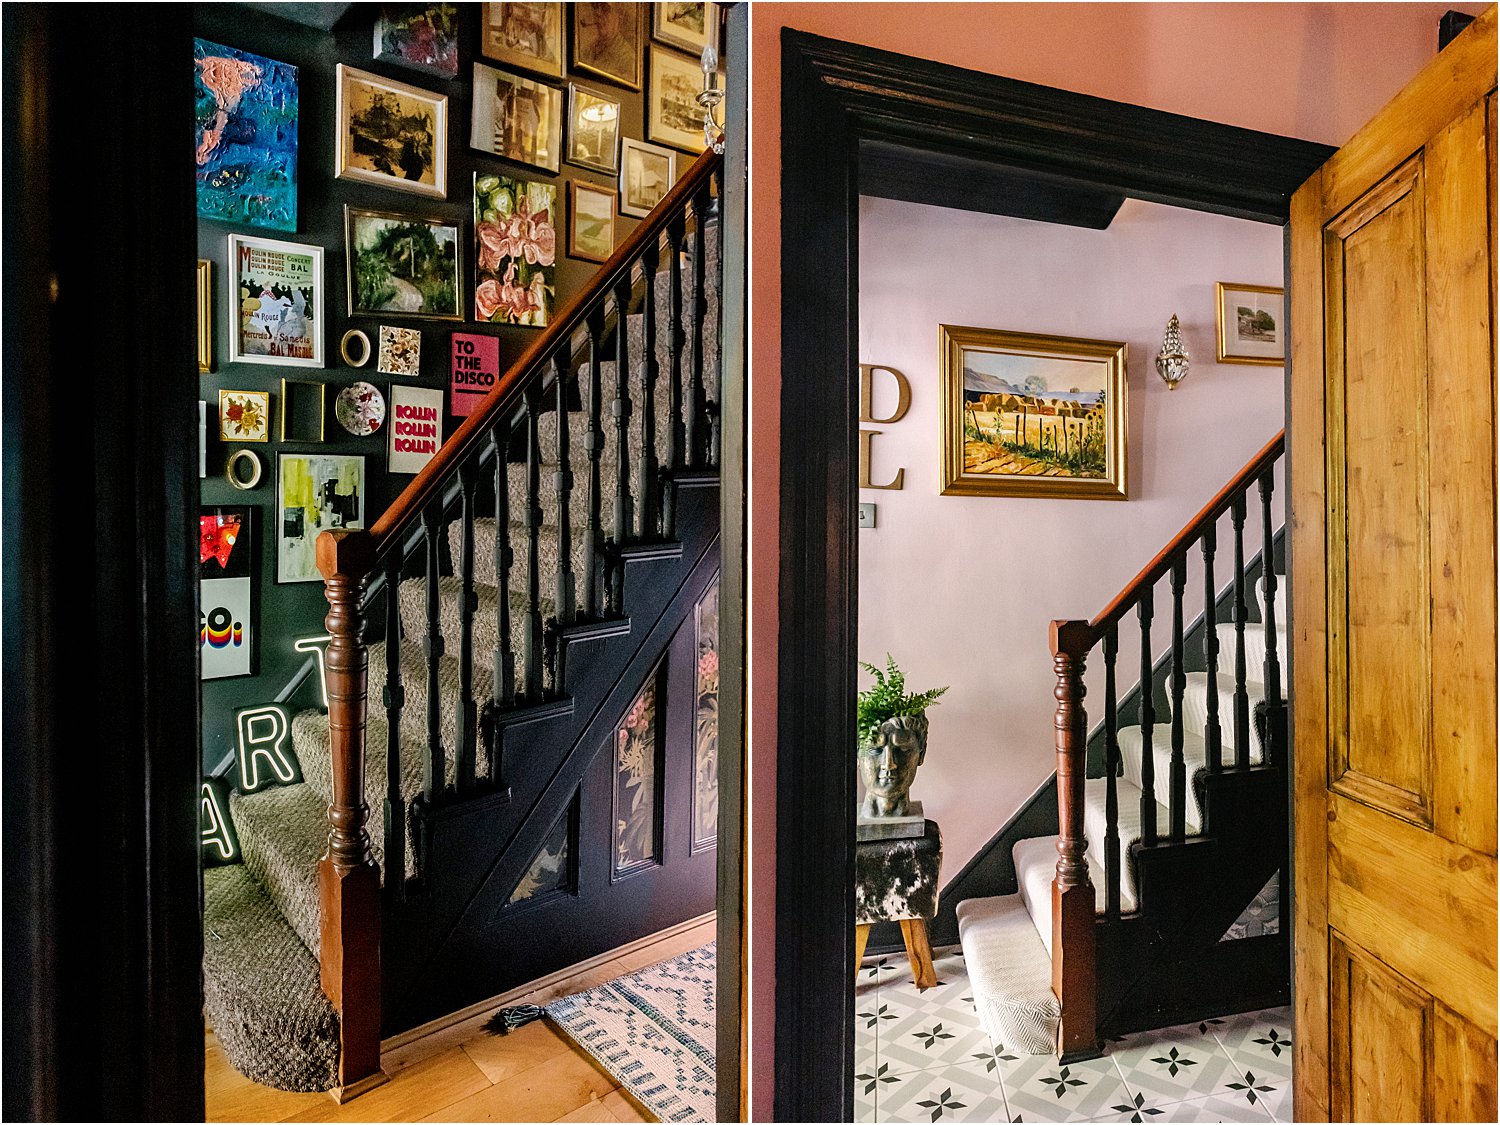
The entrance hall was dark and dated and quite gloomy. But as soon as you walk up the bright and light staircase and enter the apartment, you immediately feel welcomed into your holiday.
This is the feeling that I wanted to recreate. I remember clearly one of the first things that struck me was the patterned tiles on the floor! Walking on floor tiles made me feel like on holiday straight away!
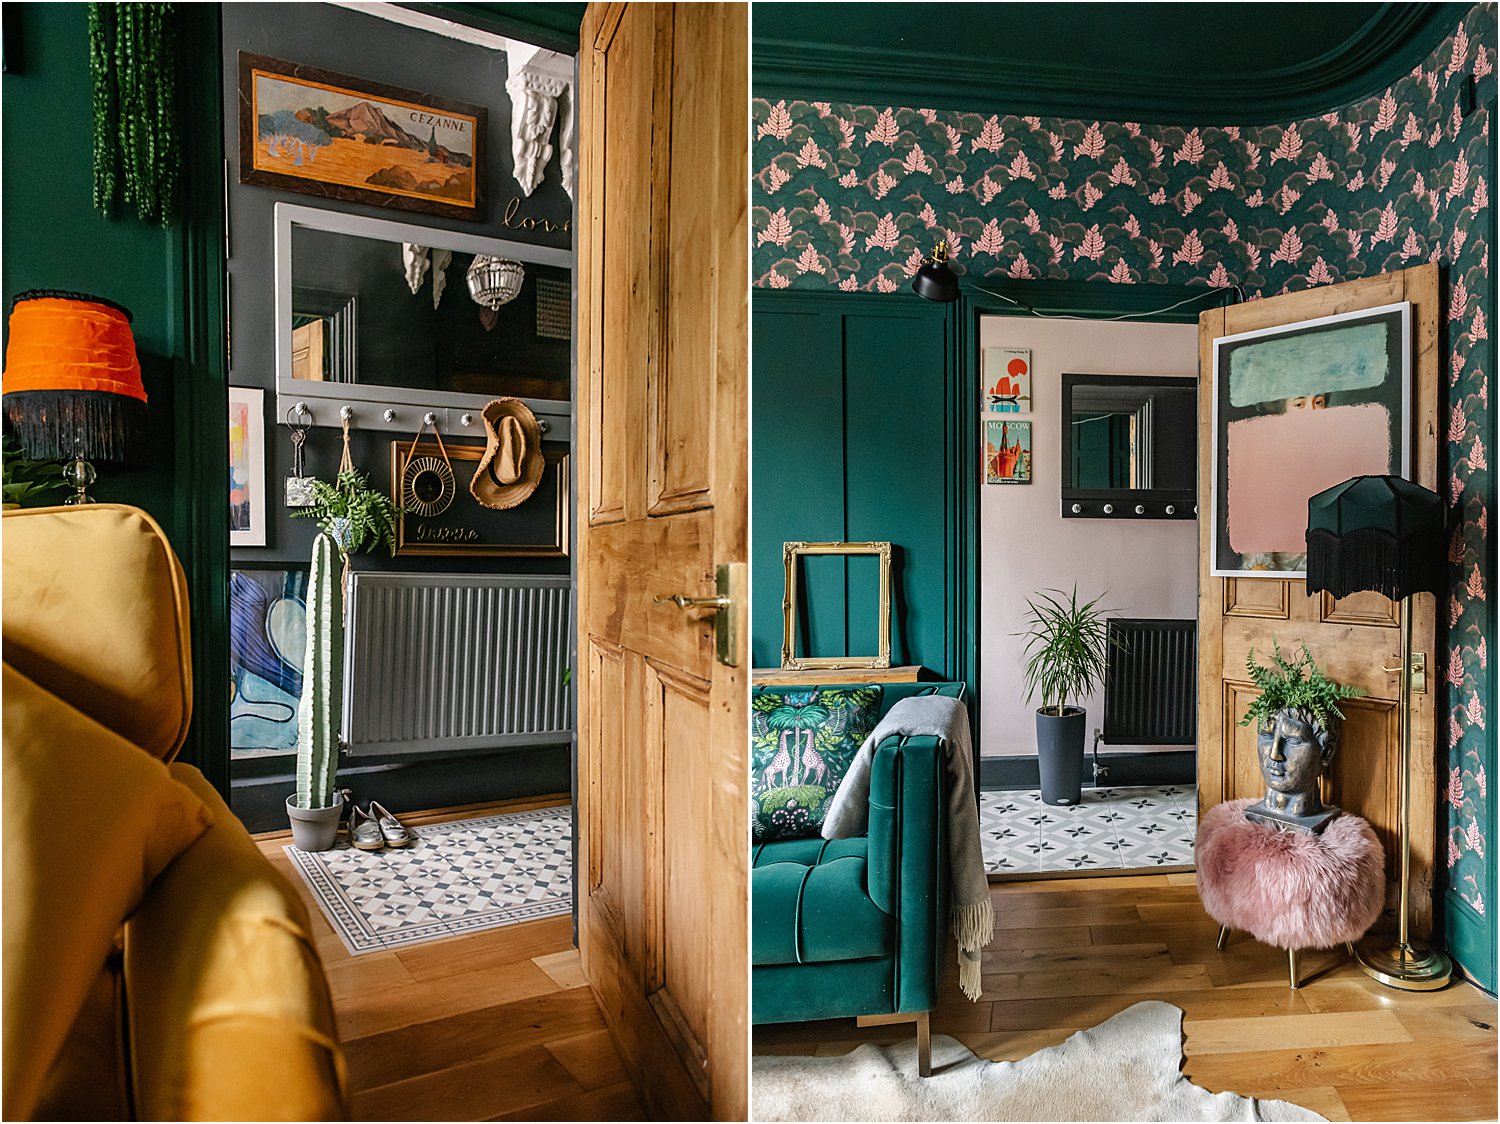
When we moved into this house 7.5 years ago, all the floors were done. There’s dark honey coloured wooden flooring on the ground floor hall and reception rooms and cold black slate in the kitchen, dining and back toilet.
The house is north-east facing and gets very little light and the dark floors just kind of “suck you in” into a dark hole. The entrance hall was a sea of magnolia enveloped in dullness.
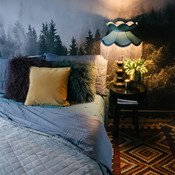
This is one of the reasons why I went dark at first because I thought “why not embrace all the dark and make a feature of it”? It’s better than the constant state of dullness and beigeness and darkness. So I set about finding inspiration from dark interiors.
Brainwave
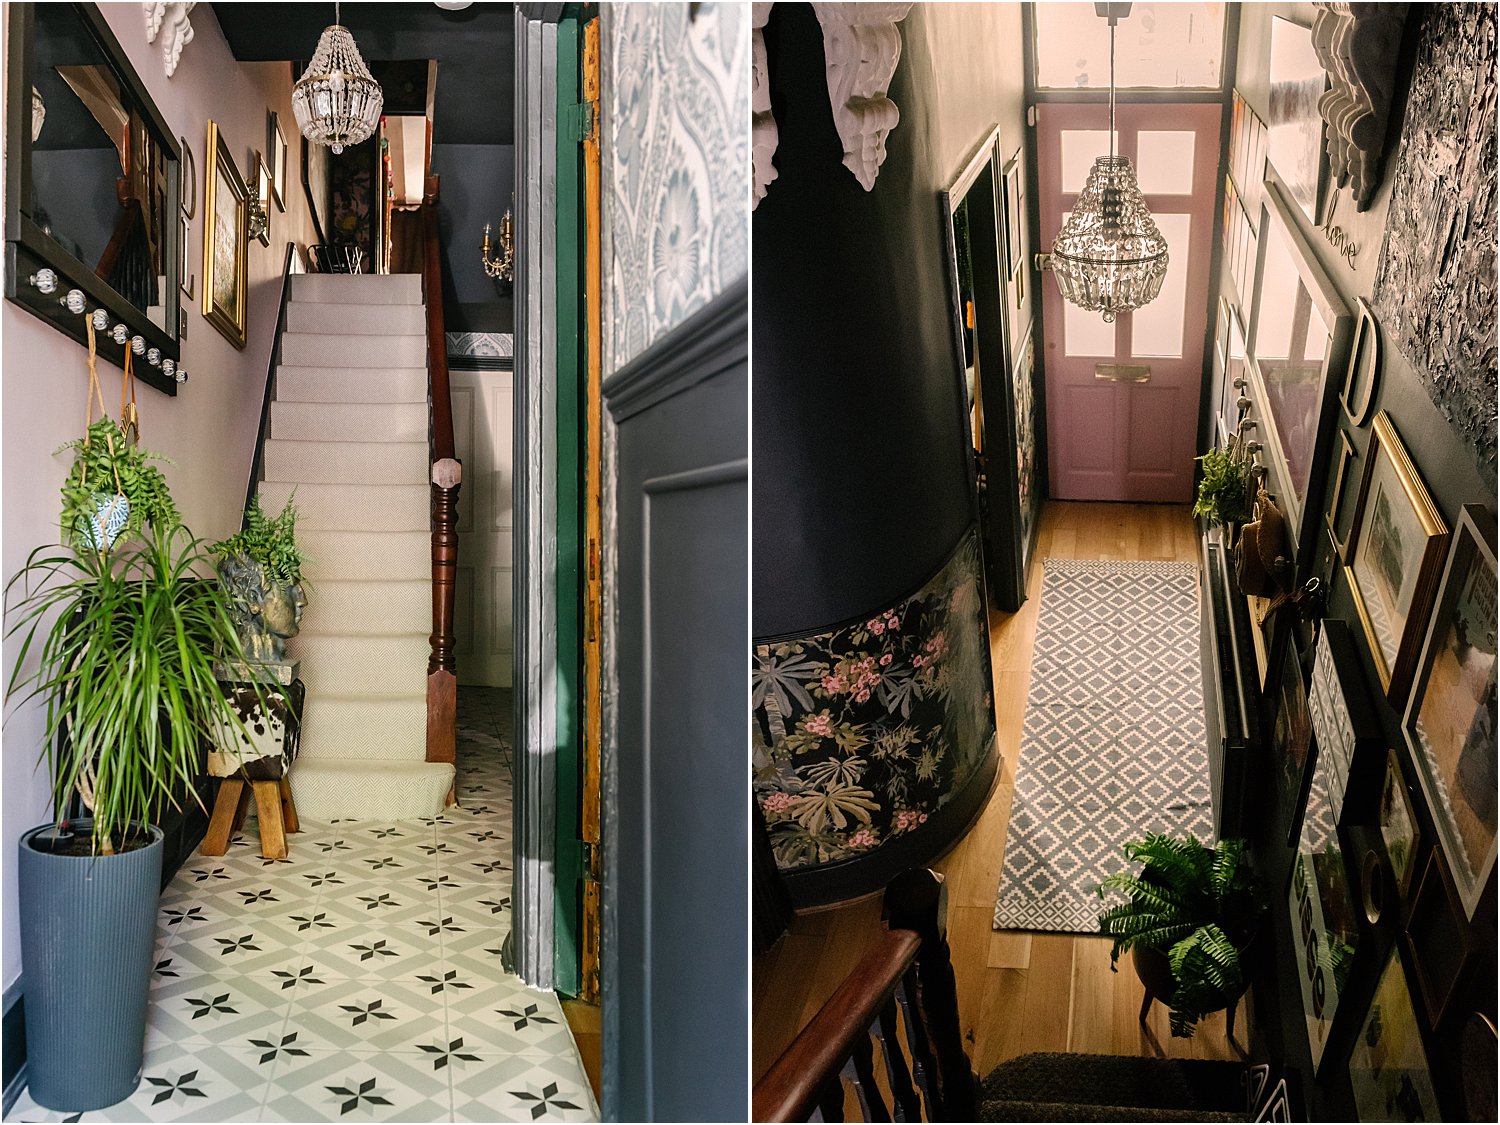
A couple of years ago I had this brainwave of glazing the front door. I paid a professional glazer to take 4 panels off the Victorian front door and replace them with double glazing. The difference this decision made was mind-blowing!
Our entrance hall is no longer the dark and gloomy light-poor space that it was. I no longer had to keep the yellow incandescent light on all day long and night. And what a delight it is to come down in the mornings not stumbling blindly in darkness!
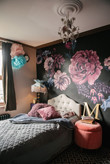
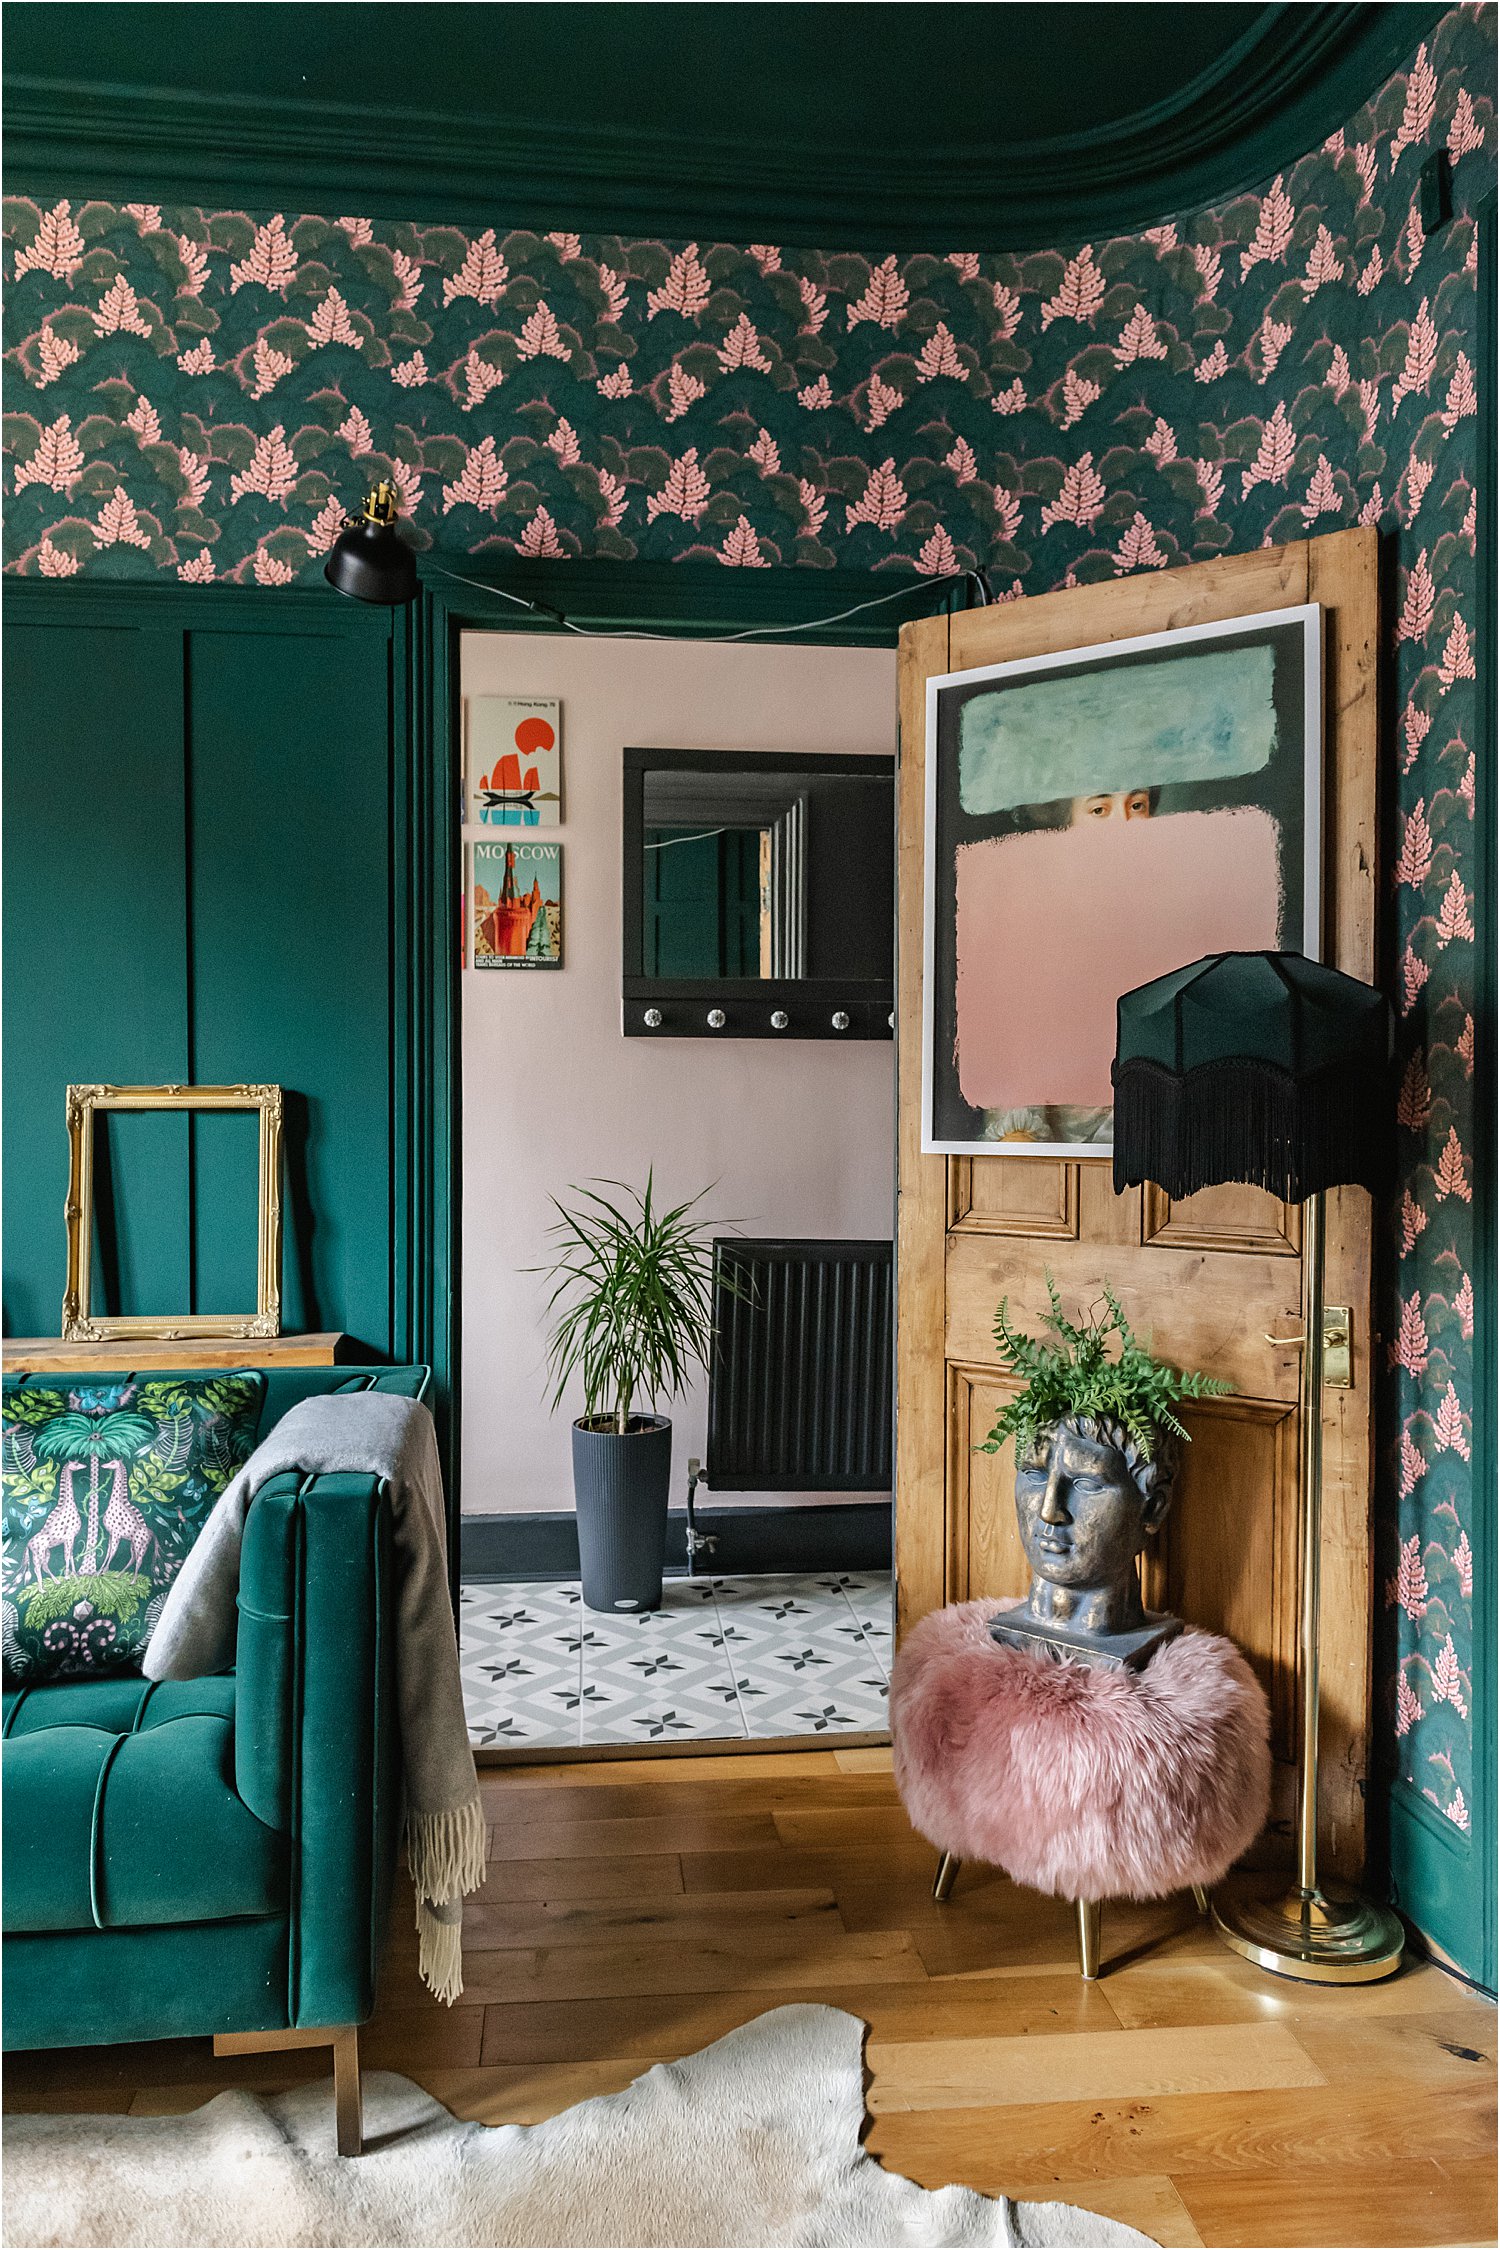
We now have some natural light seeping through our front door! And voila, with that, I started to see the light in interiors. But not immediately. Last year I thought I’d bring the florals and pink in. You can see this navy and floral pink revamp here. That was the first step.
This year, I thought I’d take it further into the light and repaint the entire left wall a light colour, retile the floors light and change the dark carpets to the lightest carpet possible.
And that’s how this mood board started. When I was clear of what I wanted, I searched Pinterest and the internet for inspiration to enable me to visualise that feeling.
I copied and pasted images and colours that brought this feeling to life and that I liked and placed them on this mood board as you see below. This is the now the master plan.
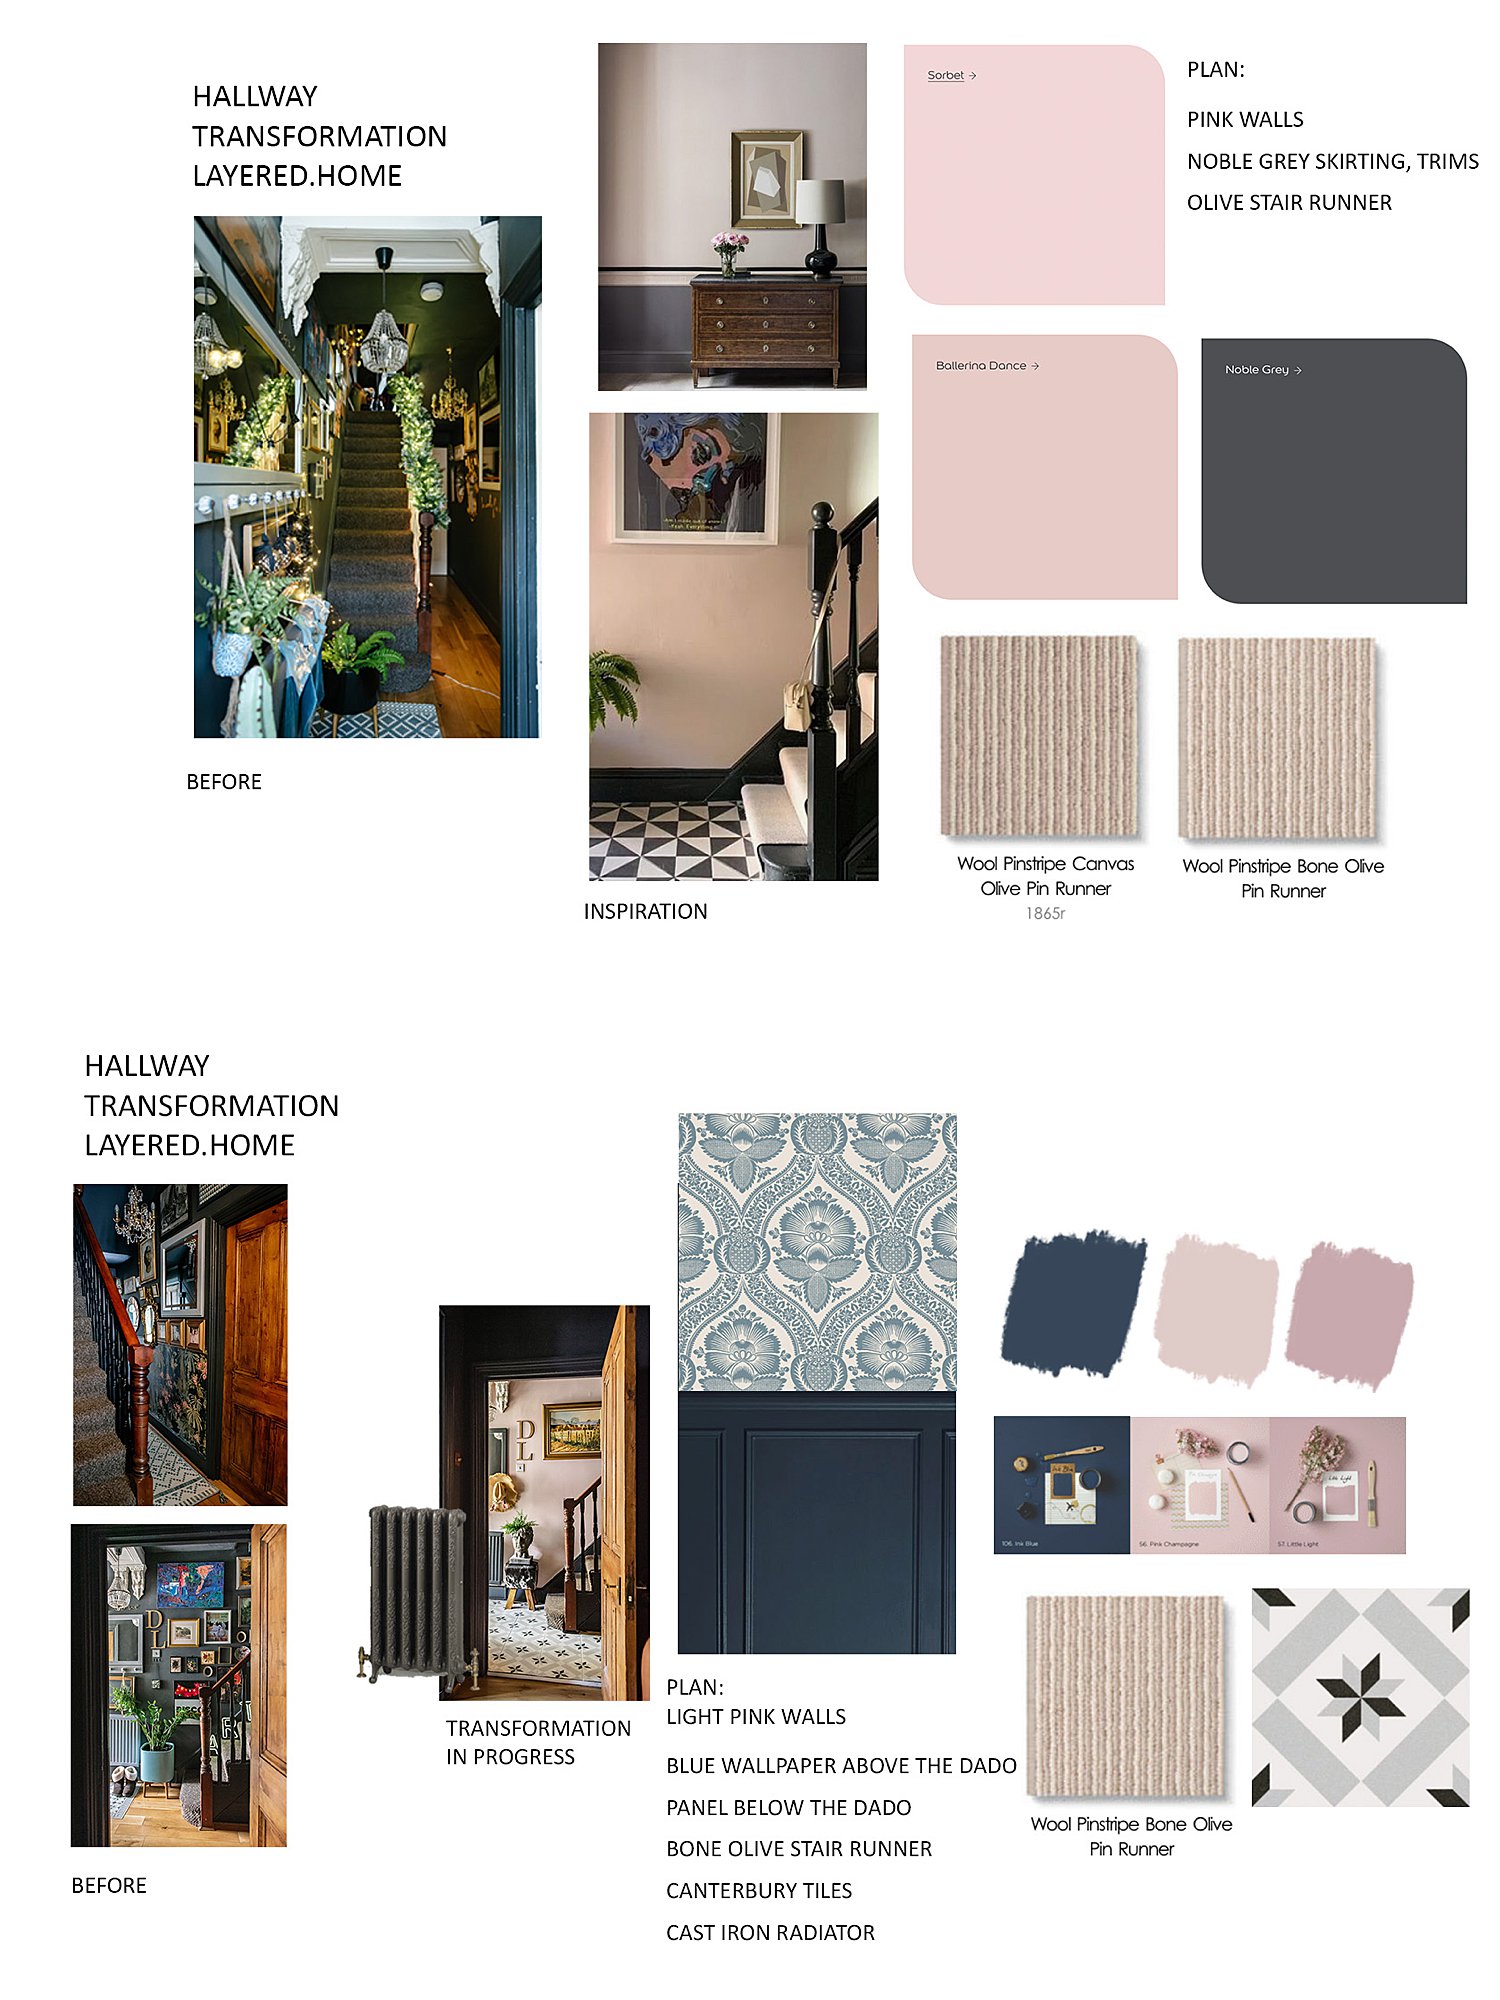
The top mood board is the first attempt with inspiration and the bottom mood board is work in progress.
2. Consider the right contrasts
Having lived in darkness for the past 7 years, I have come to learn that when you have dark walls that blur boundary lines and make the space recede, light floors define the ground you are standing on and provides a sense of solidity in the space.

This is why over the past few years I have always opted for light rugs to cover my dark honey coloured wood flooring. It’s to give structure and solidity to the ground where my walls are dark.
But I cannot have rugs in the hallways all the time – it’s not practical and everyone keeps stumbling on it especially my Mum who shuffle-walks.
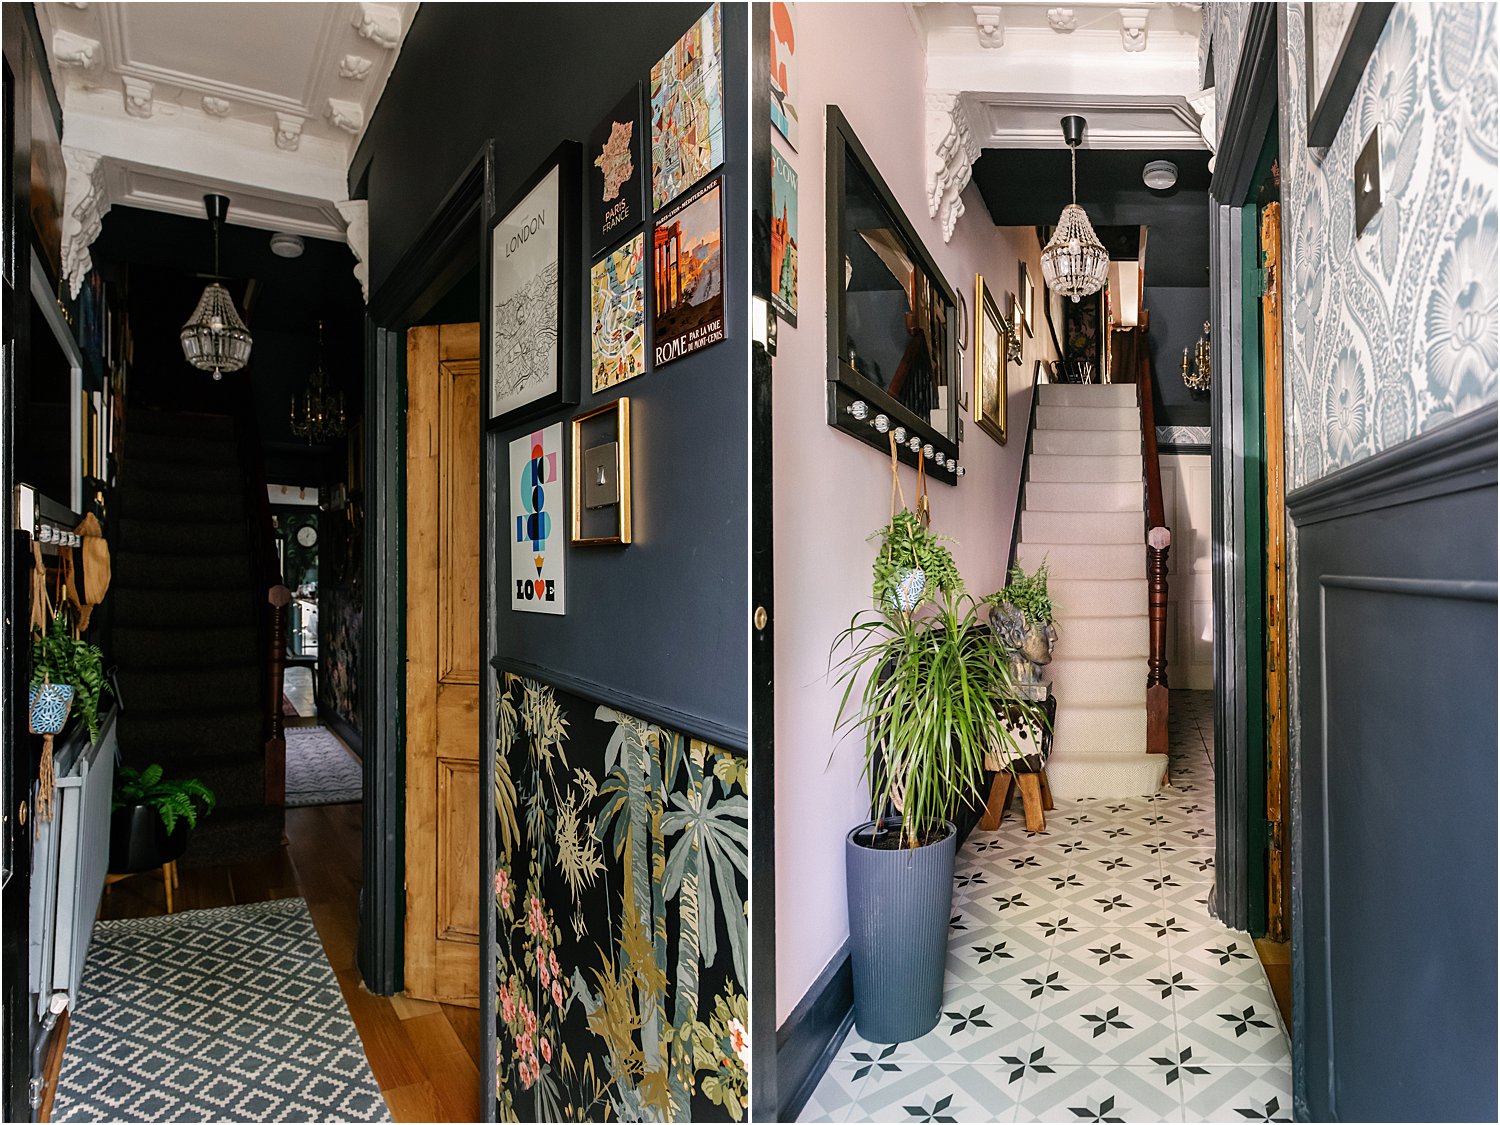
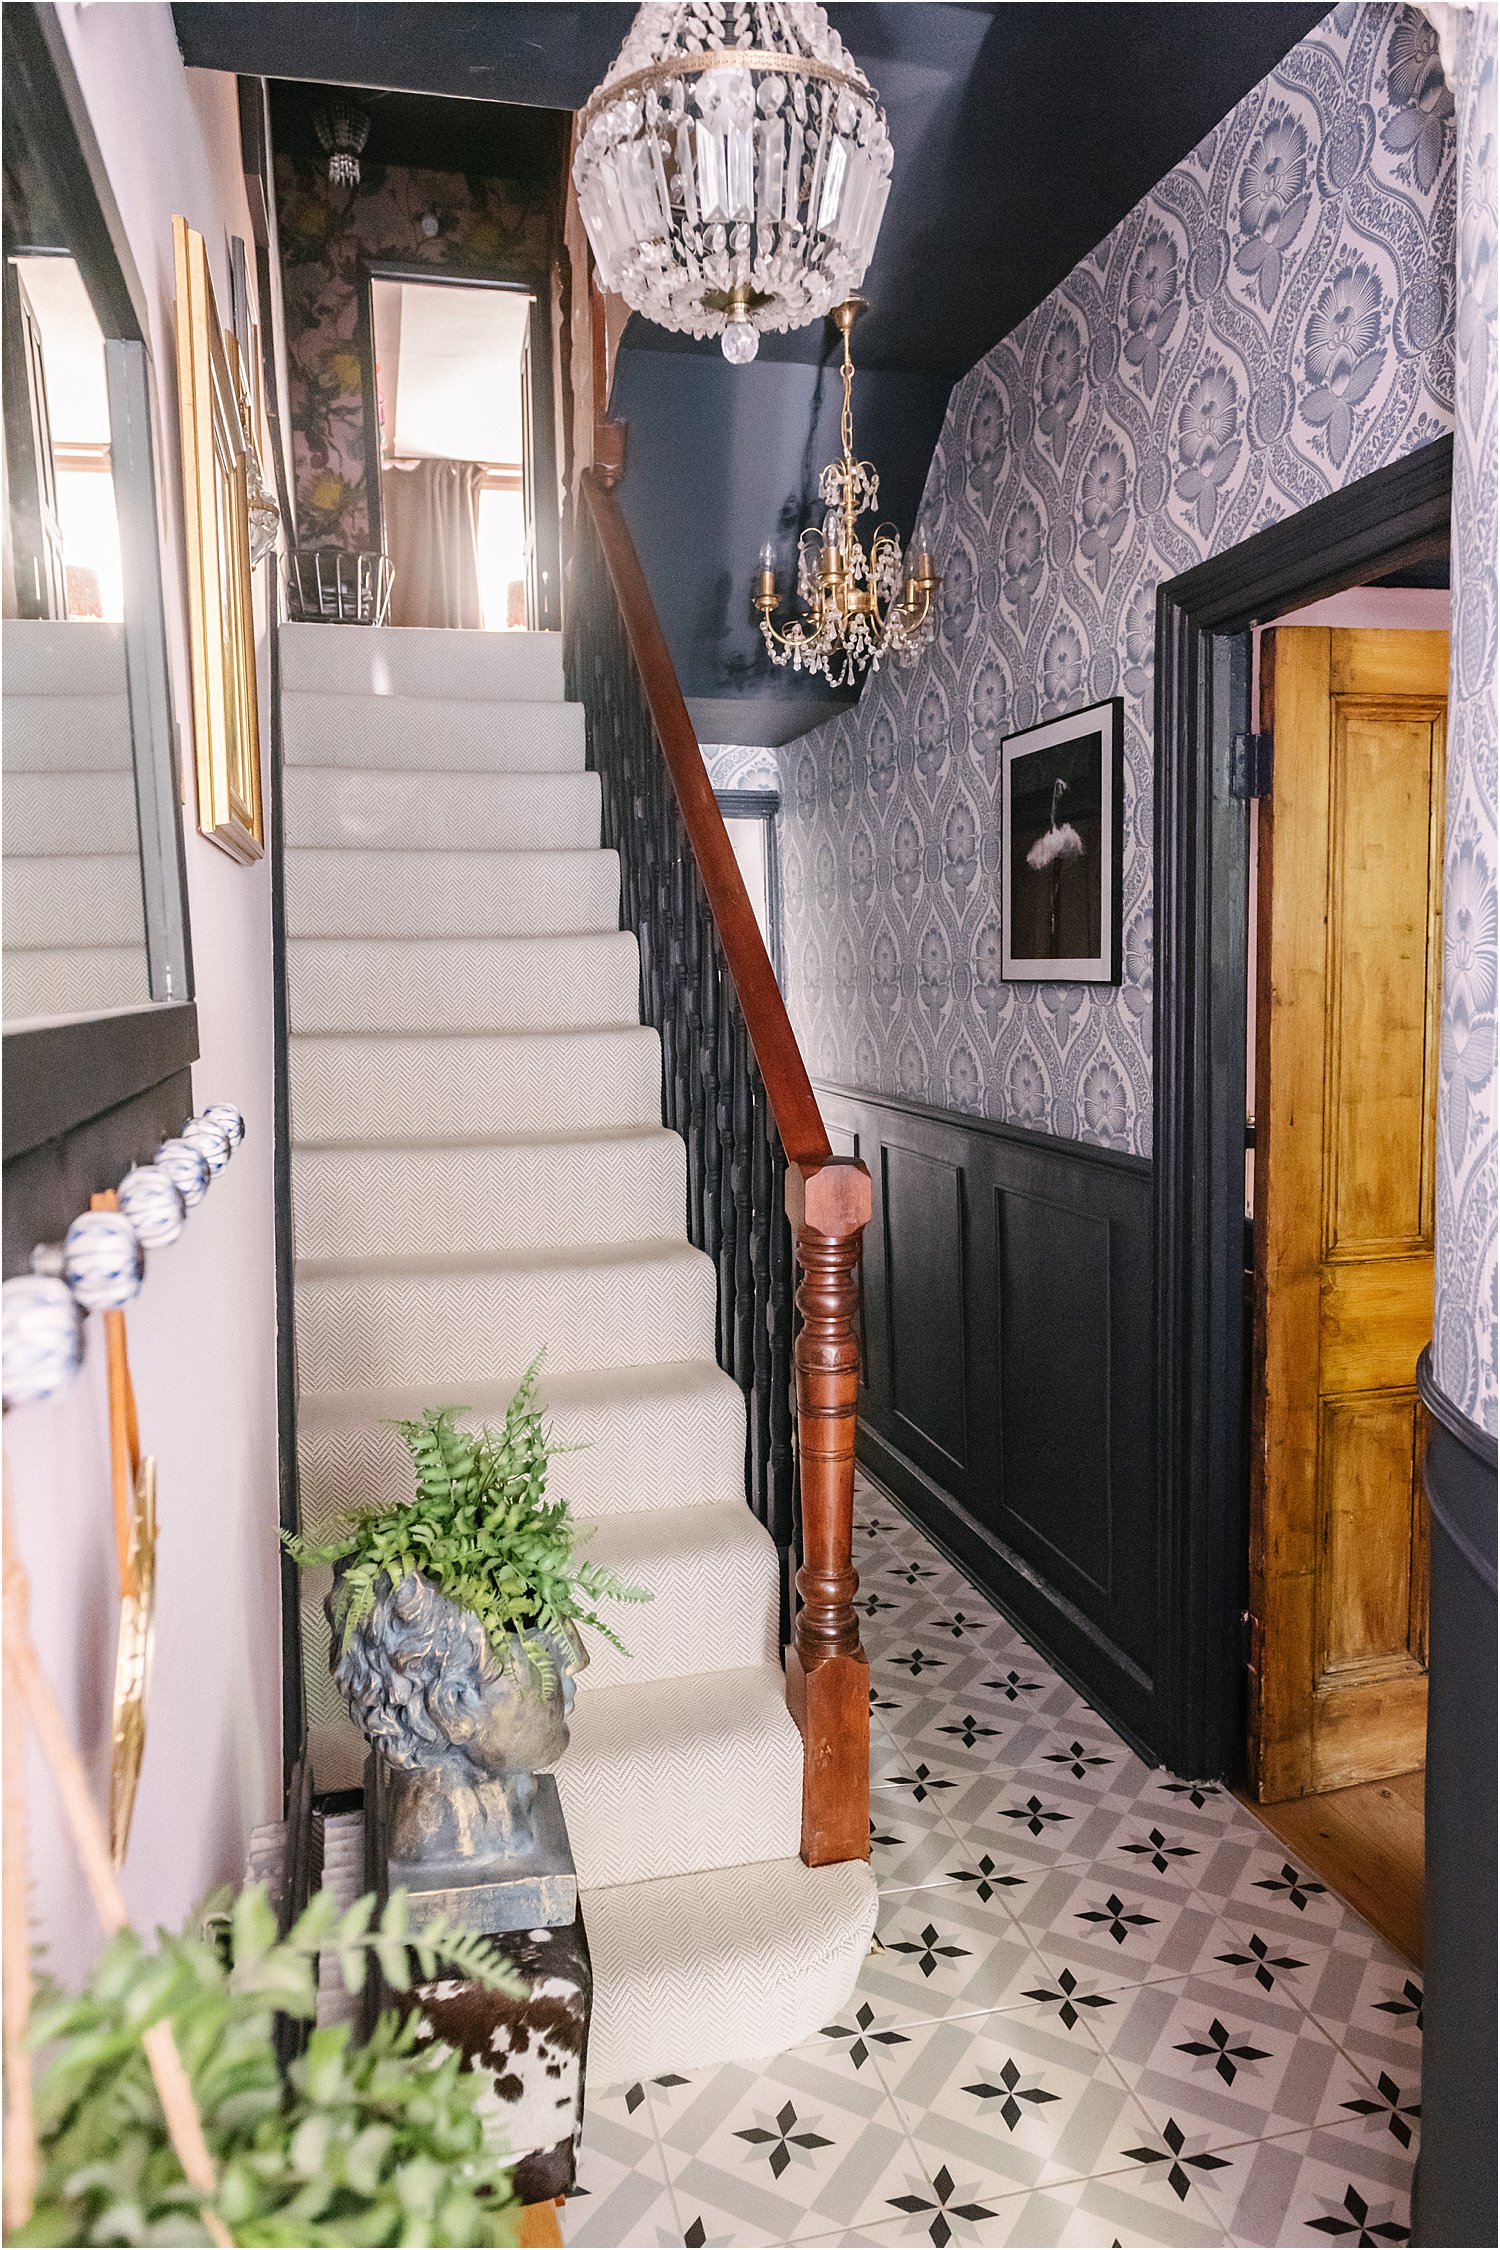
a. The first contrast I decided on was to keep one wall dark but install a light patterned wallpaper above the dado for maximum emphasis.
b. The second contrast I decided on was to lighten the wooden flooring somehow. I didn’t want to paint it light as I’ve seen wooden floors painted light and they always chip from heavy traffic. There was no way I will be repainting the floor every year! So tiling it is with light tiles – the way forward. I’ll explain this process of tiling over wooden flooring below.
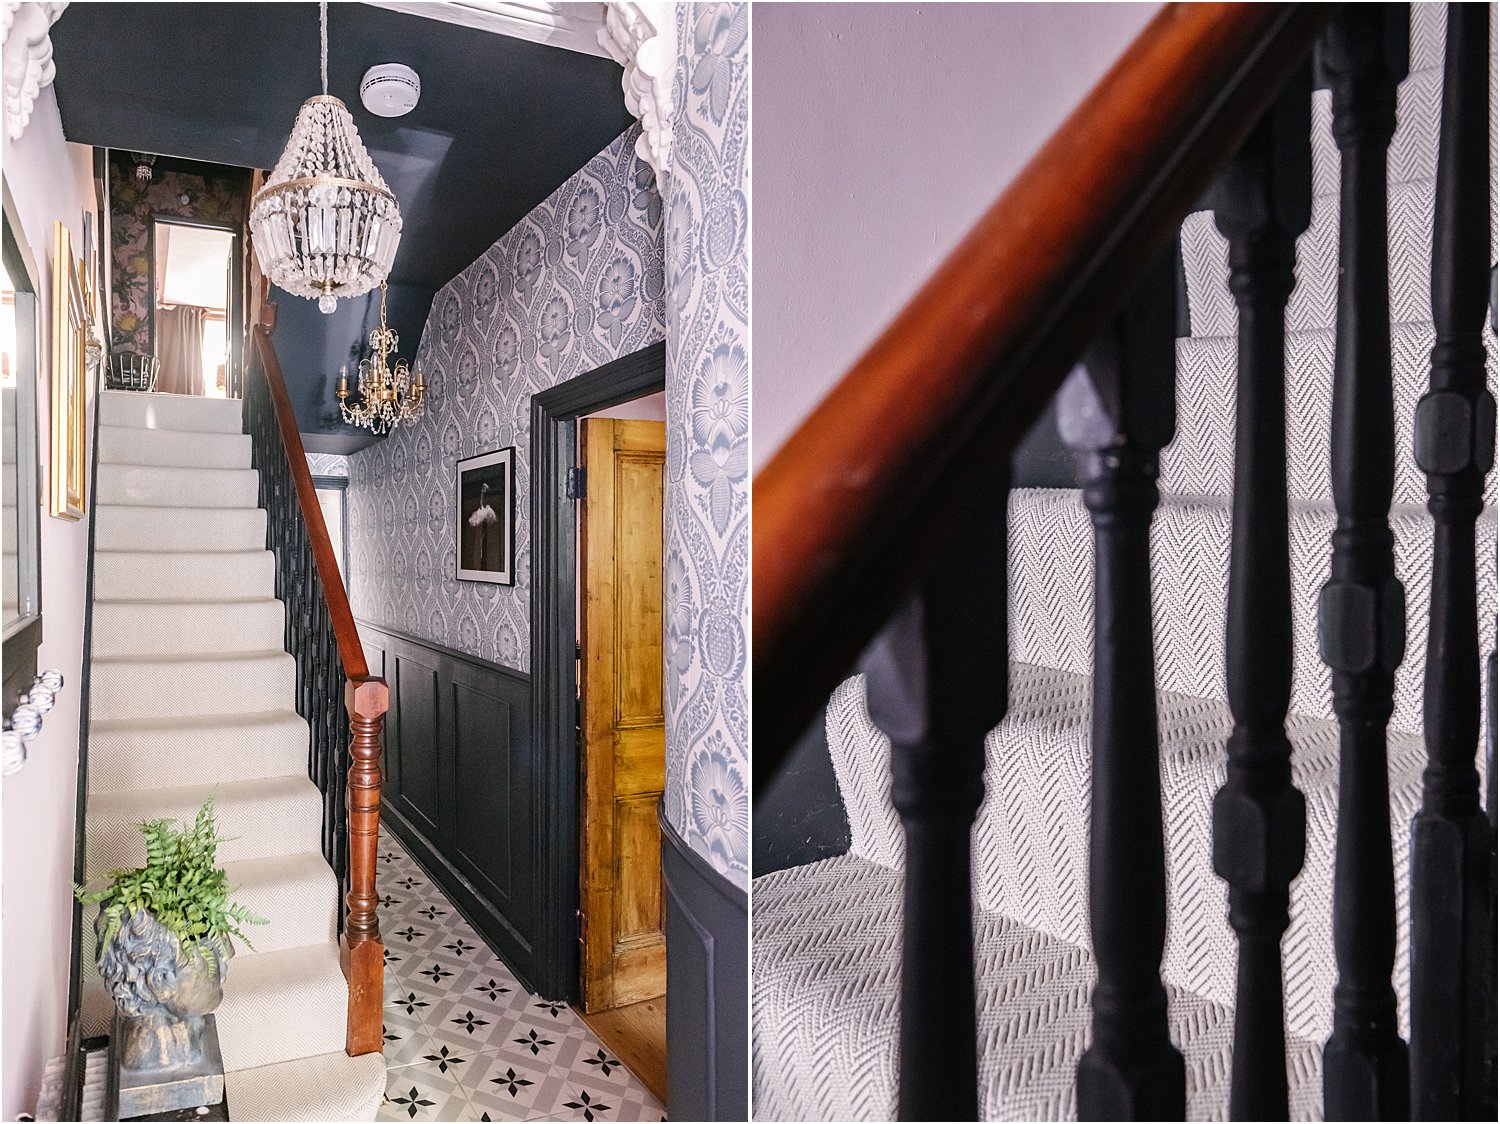
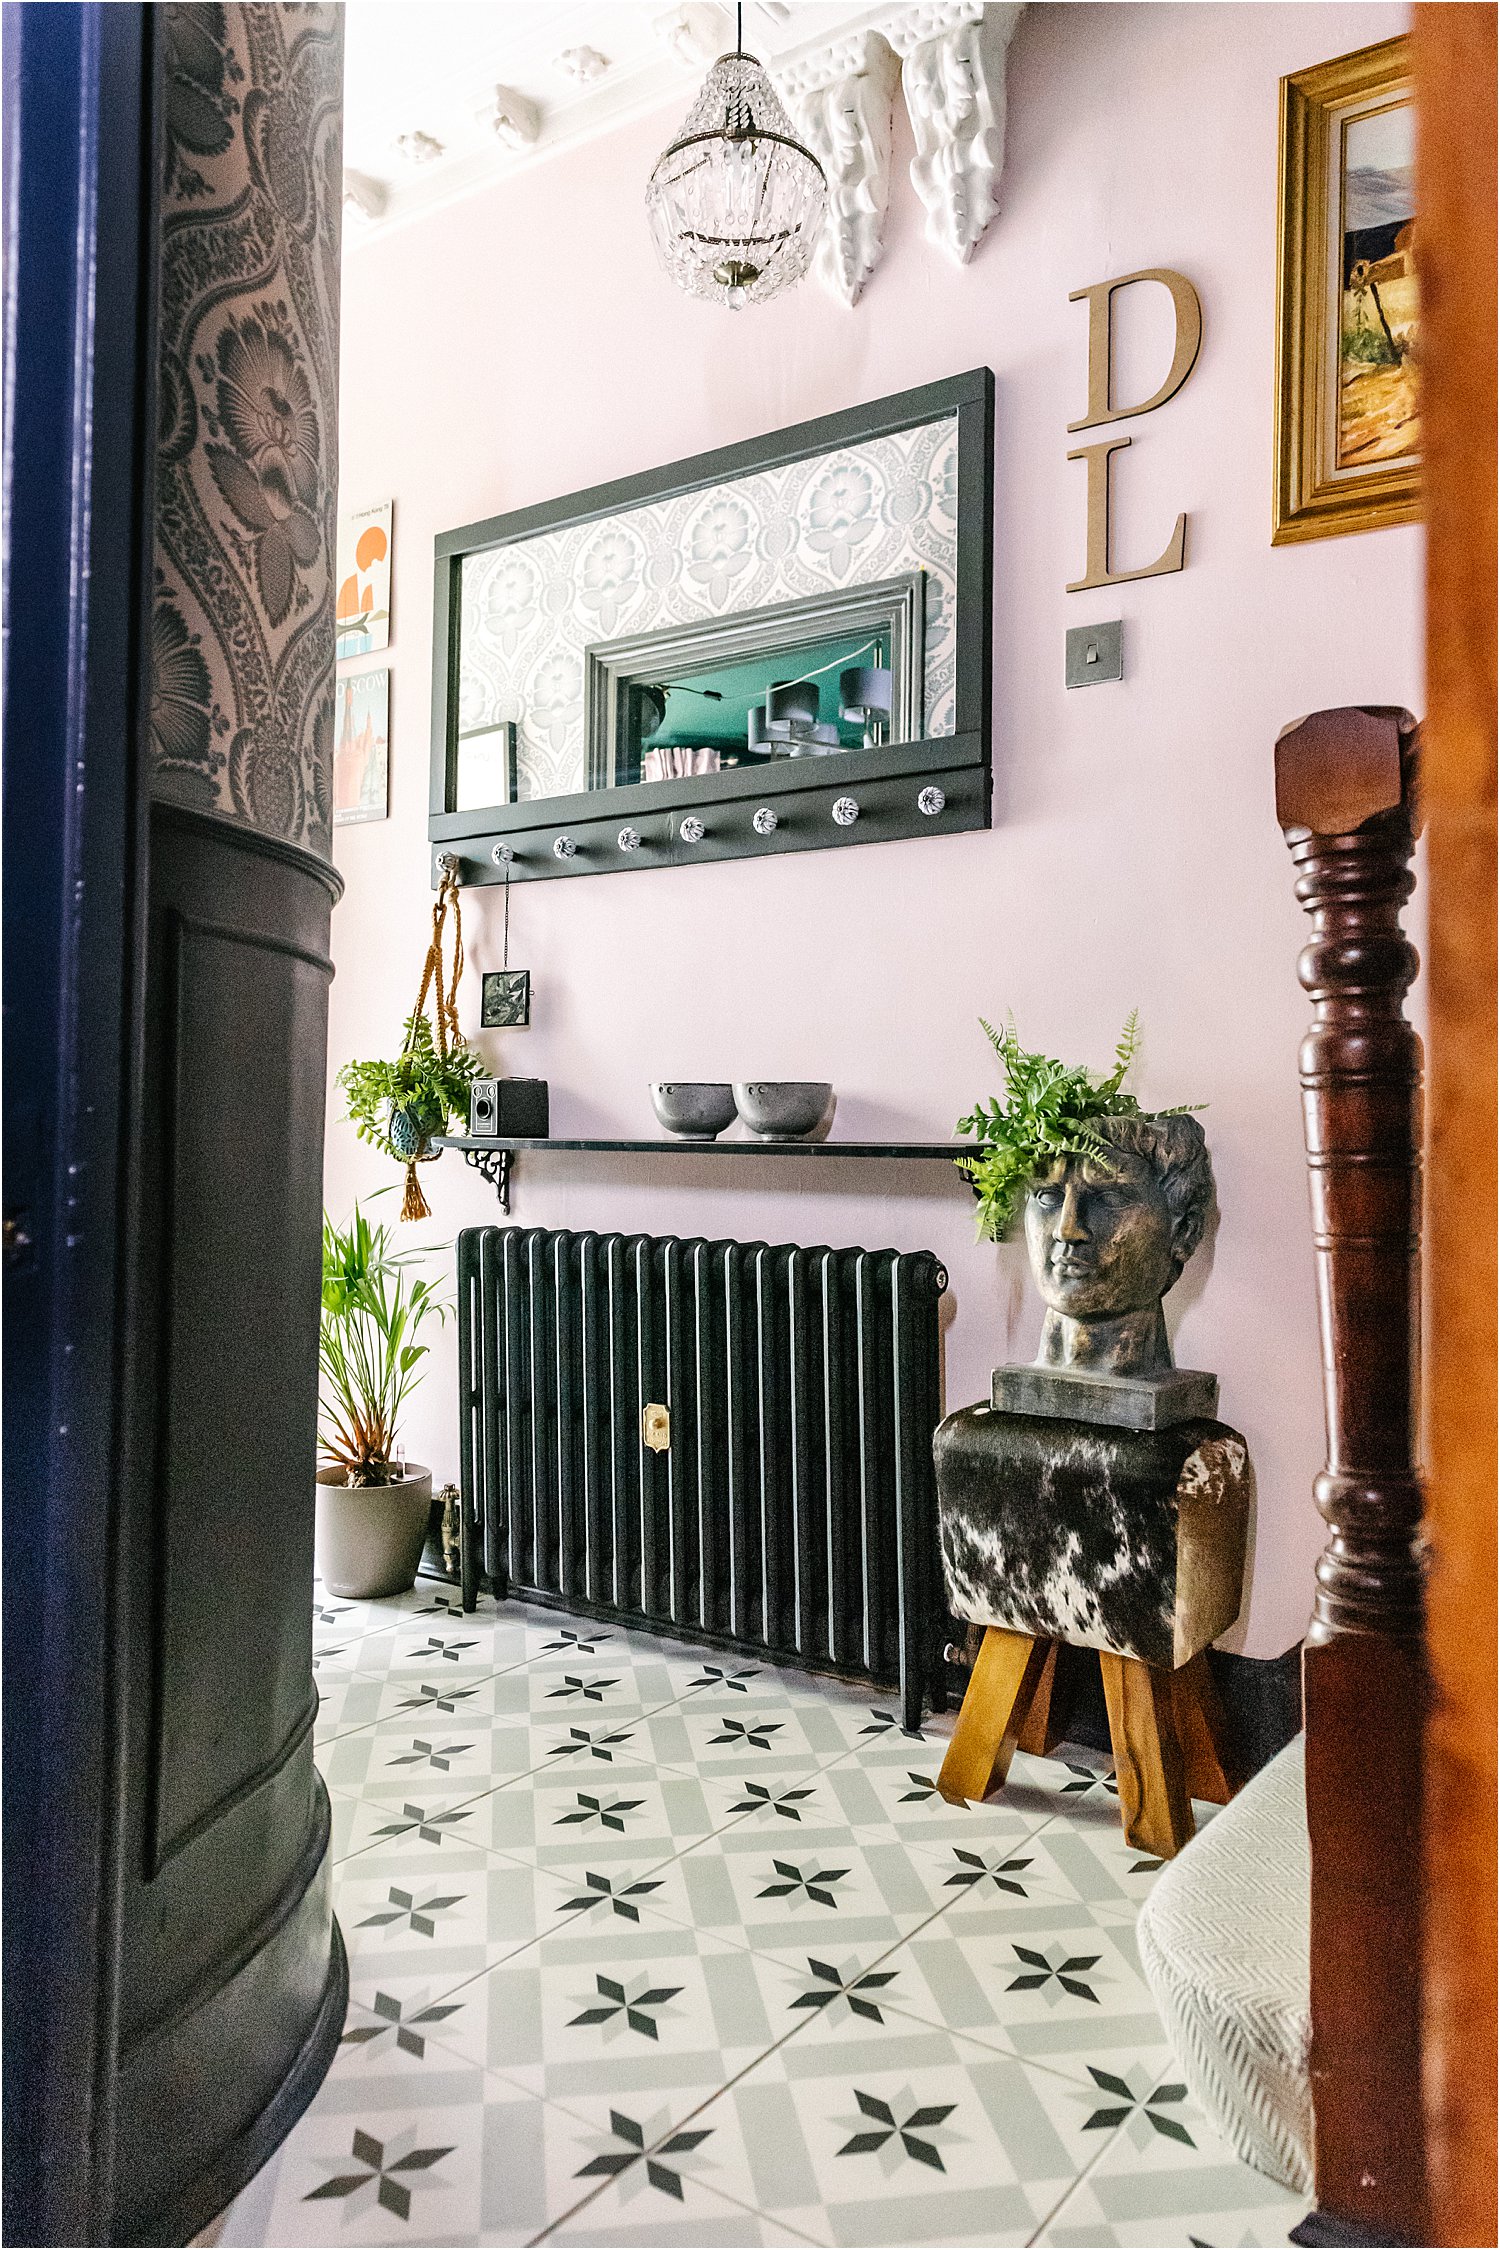
c. The third contrast I decided on was, with the opposite wall to be painted a light pink, to have a pattern to contrast on the tiled floor with this new light wall.
d. The fourth contrast I decided was to change to a lighter carpet so it stands out against the dark banister and skirting. The carpet before was a very dark brown – you couldn’t really see where you were going!
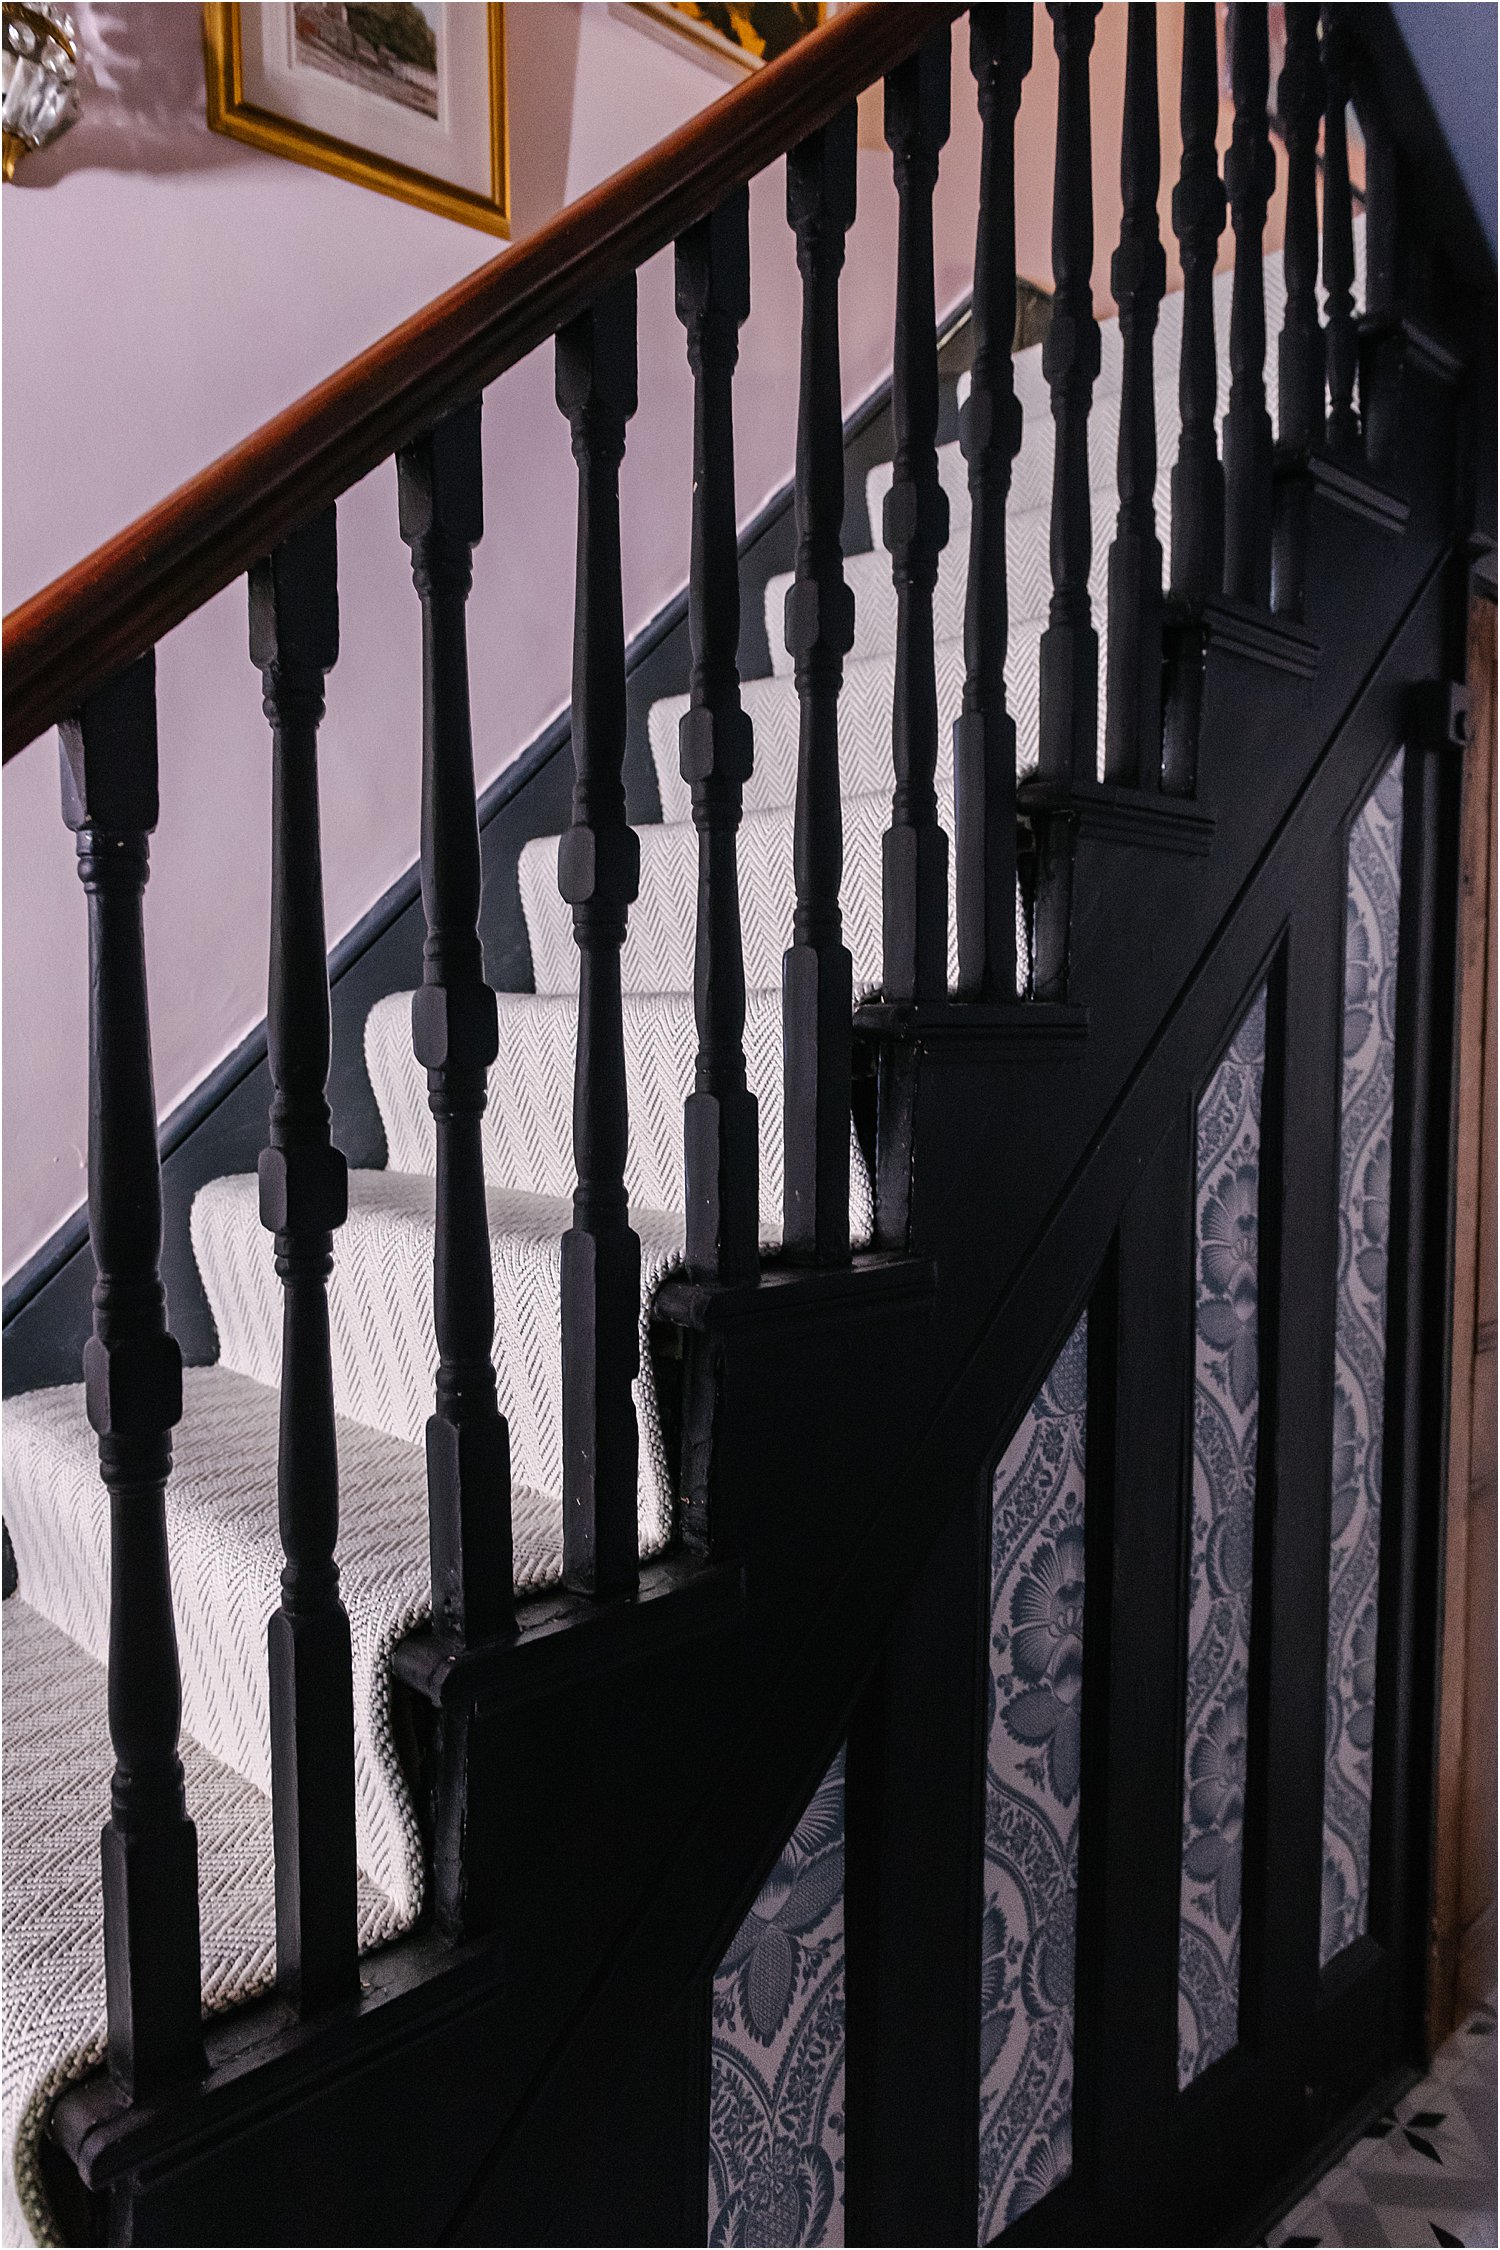
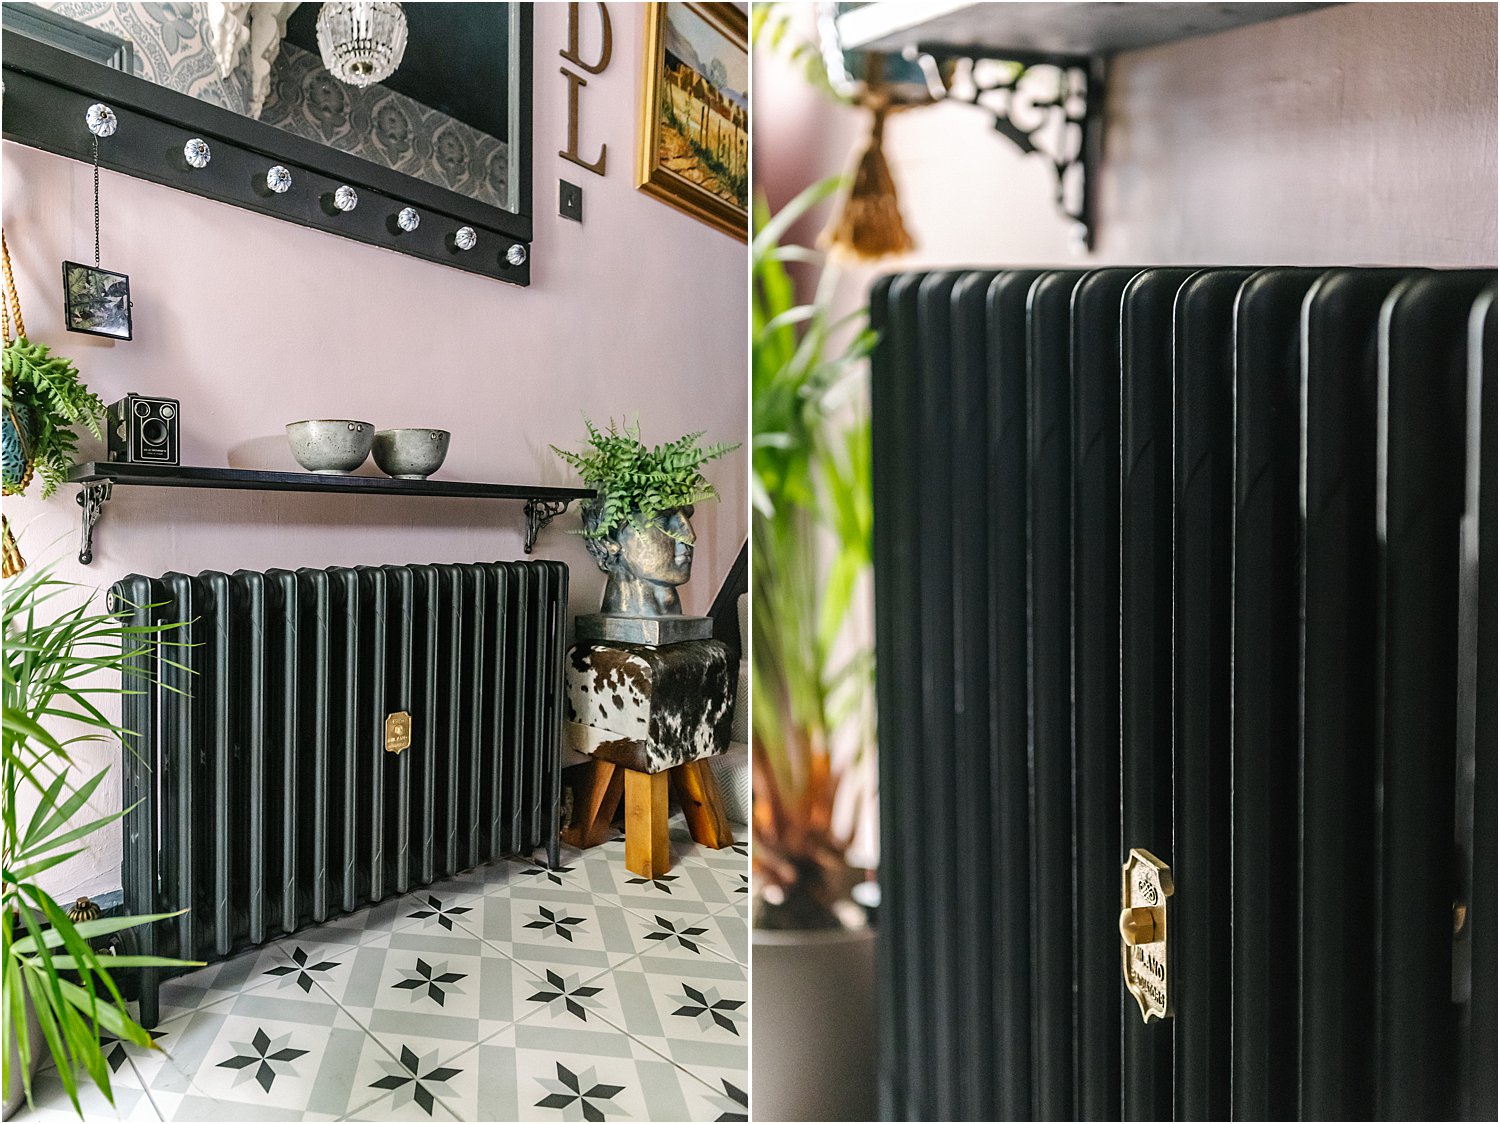
e. The fifth and last contrast in this space was to make the mirrors the radiator contrast against the pink walls by painting them black. I have since changed my old panel radiator to this super slim Best Heating Milano Mercury cast iron radiator in slate black. More details further down.
3. Sample the products first in situ
Light is so important. In fact it’s all important as everything in interiors is pretty much judged against the light the space gets. The best thing to do is to obtain samples for everything first before making decisions.
Here are the products I used on my hallway revamp.
a. Wallpaper – I knew that this is the wallpaper that I wanted and would work in this space and I was 100% sure of it. Read more here on how I chose this wallpaper and 3 questions to ask yourself when deciding on wallpaper. I was working with Warner House on a paid collaboration for this project.

b. Paint – I had sample sachets of Rustoleum’s Chalky Finish wall paint which I painted on a couple of parts of this wall and observed them during different times of day. I was especially watching the effect of light on the paint.
For example, when it was bright in the early morning and late afternoons, some colours tend to look warmer but when it’s overcast, some colours would feel too cold. I didn’t want it the paint to be too warm all the time nor to be too cold that it looked grey on overcast days. My decision was mainly driven by this.
I was already working with Rustoleum on a paid collaboration bathroom project and they kindly gifted me this wall paint.
c. The tiles had to look and feel like I’m in a villa in Italy or a chateau in France. These Canterbury tiles from Wickes were the ticket – neutral greys and blacks geometric pattern against a white tile and is the right geometric classic design for me.
I was fortunate to be working with Wickes for the floor in my hallway on a paid partnership project. Tiling my hallway was by far the most difficult yet most satisfying DIY we have ever done!
It is possible to tile over existing wooden flooring. You would need concrete backer boards to cover the entire wooden floor. Stick them on the wooden flooring using adhesive and then tape up the seams and where the boards meet using fibreglass scrim tape.
To further secure the boards in place screw them on the floor with drywall screws with enough grip and countersunk. Prime the entire concrete backer board with a suitable waterproof primer – I used SBR, 1 part primer to 3 parts water – to improve grip and adhesion.
Now it’s time to lay the decoupling mat on top of the concrete backer boards. Many skip the decoupling mat and tile straight on top of the boards. The decoupling mat has 2 layers that move independently of each other so that should there be any movement on the substrate, the top layer where the tile sits on remains in place, thus preventing any cracks on the tile. This is as solid as it gets.
The decoupling mat is stuck on the concrete backer boards with tile adhesive. After drying, you are now ready to tile on top of the decoupling mat. Apply grout after tiling and voila you have a new floor.
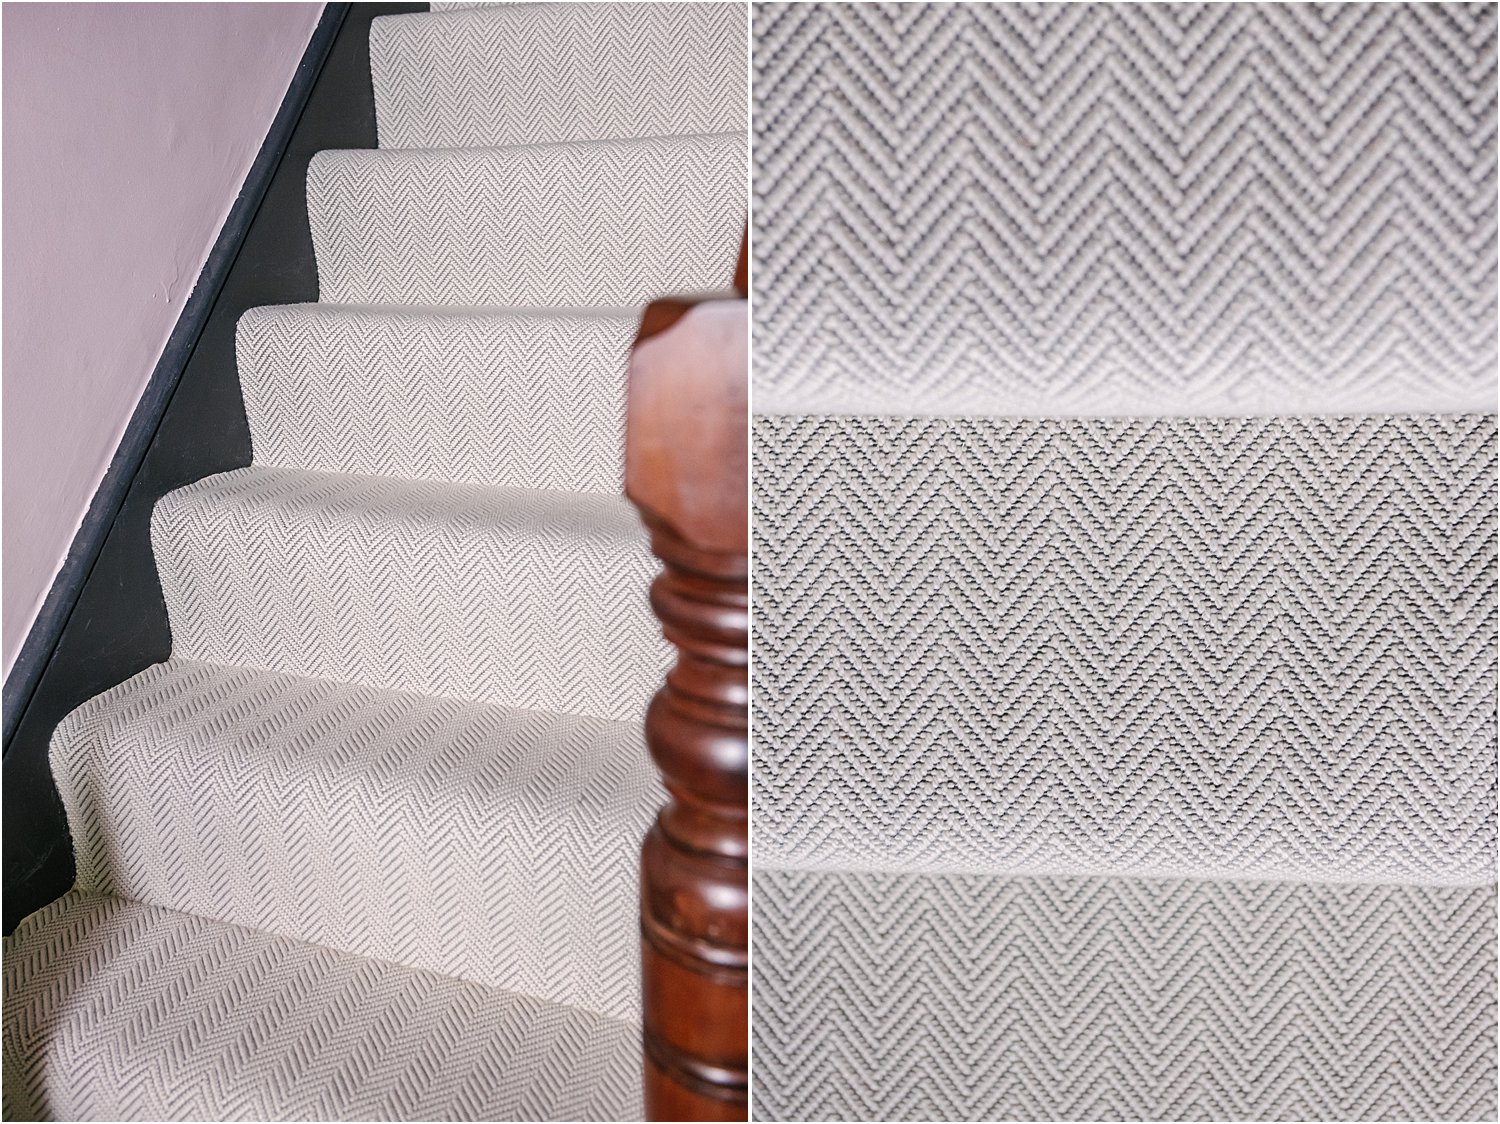
d. The carpet had to be right this time. The last time was a mistake – I chose the darkest brown possible to cover any dirt. This was on overwhelming rebellion from the yet again honey-coloured carpets that I inherited. They looked dull and dirty; it was not a welcome sight when you entered the house.
It took me a long time to choose the right carpet after samples had arrived from Designer Carpet who I’m working with for this carpet project. They are a dream to work with and so helpful. They sent me sample after sample so I can really take my time deciding and choosing the right carpet.
I cannot emphasise how absolutely totally necessary it is to get samples in your hand! When I made my mood board, I was already set on Alternative Flooring Wool Pinstripe Bone Olive. I got the samples along with other colourways and it felt right.
But after looking at other brands too like Crucial Trading and got samples, my eyes were opened and I realised there are also other options that could work just as well or even better if I took the time to decide. I was set on stripes at the beginning but now I was open to herringbone too.
The samples looked and felt different in real life! I put them on my treads and stood on them to get a feel. Some carpets are thicker and bouncier than others, others are firm and harder and more solid. This is impossible to guess when looking at a website photo.
Eventually I ordered more samples, herringbone this time in various colourways. And yet again, what I thought I’d go for from looking at the website, changed completely! The samples looked different in real life – you should never trust how the colours look on your screen as your monitor will most likely be calibrated differently anyway.
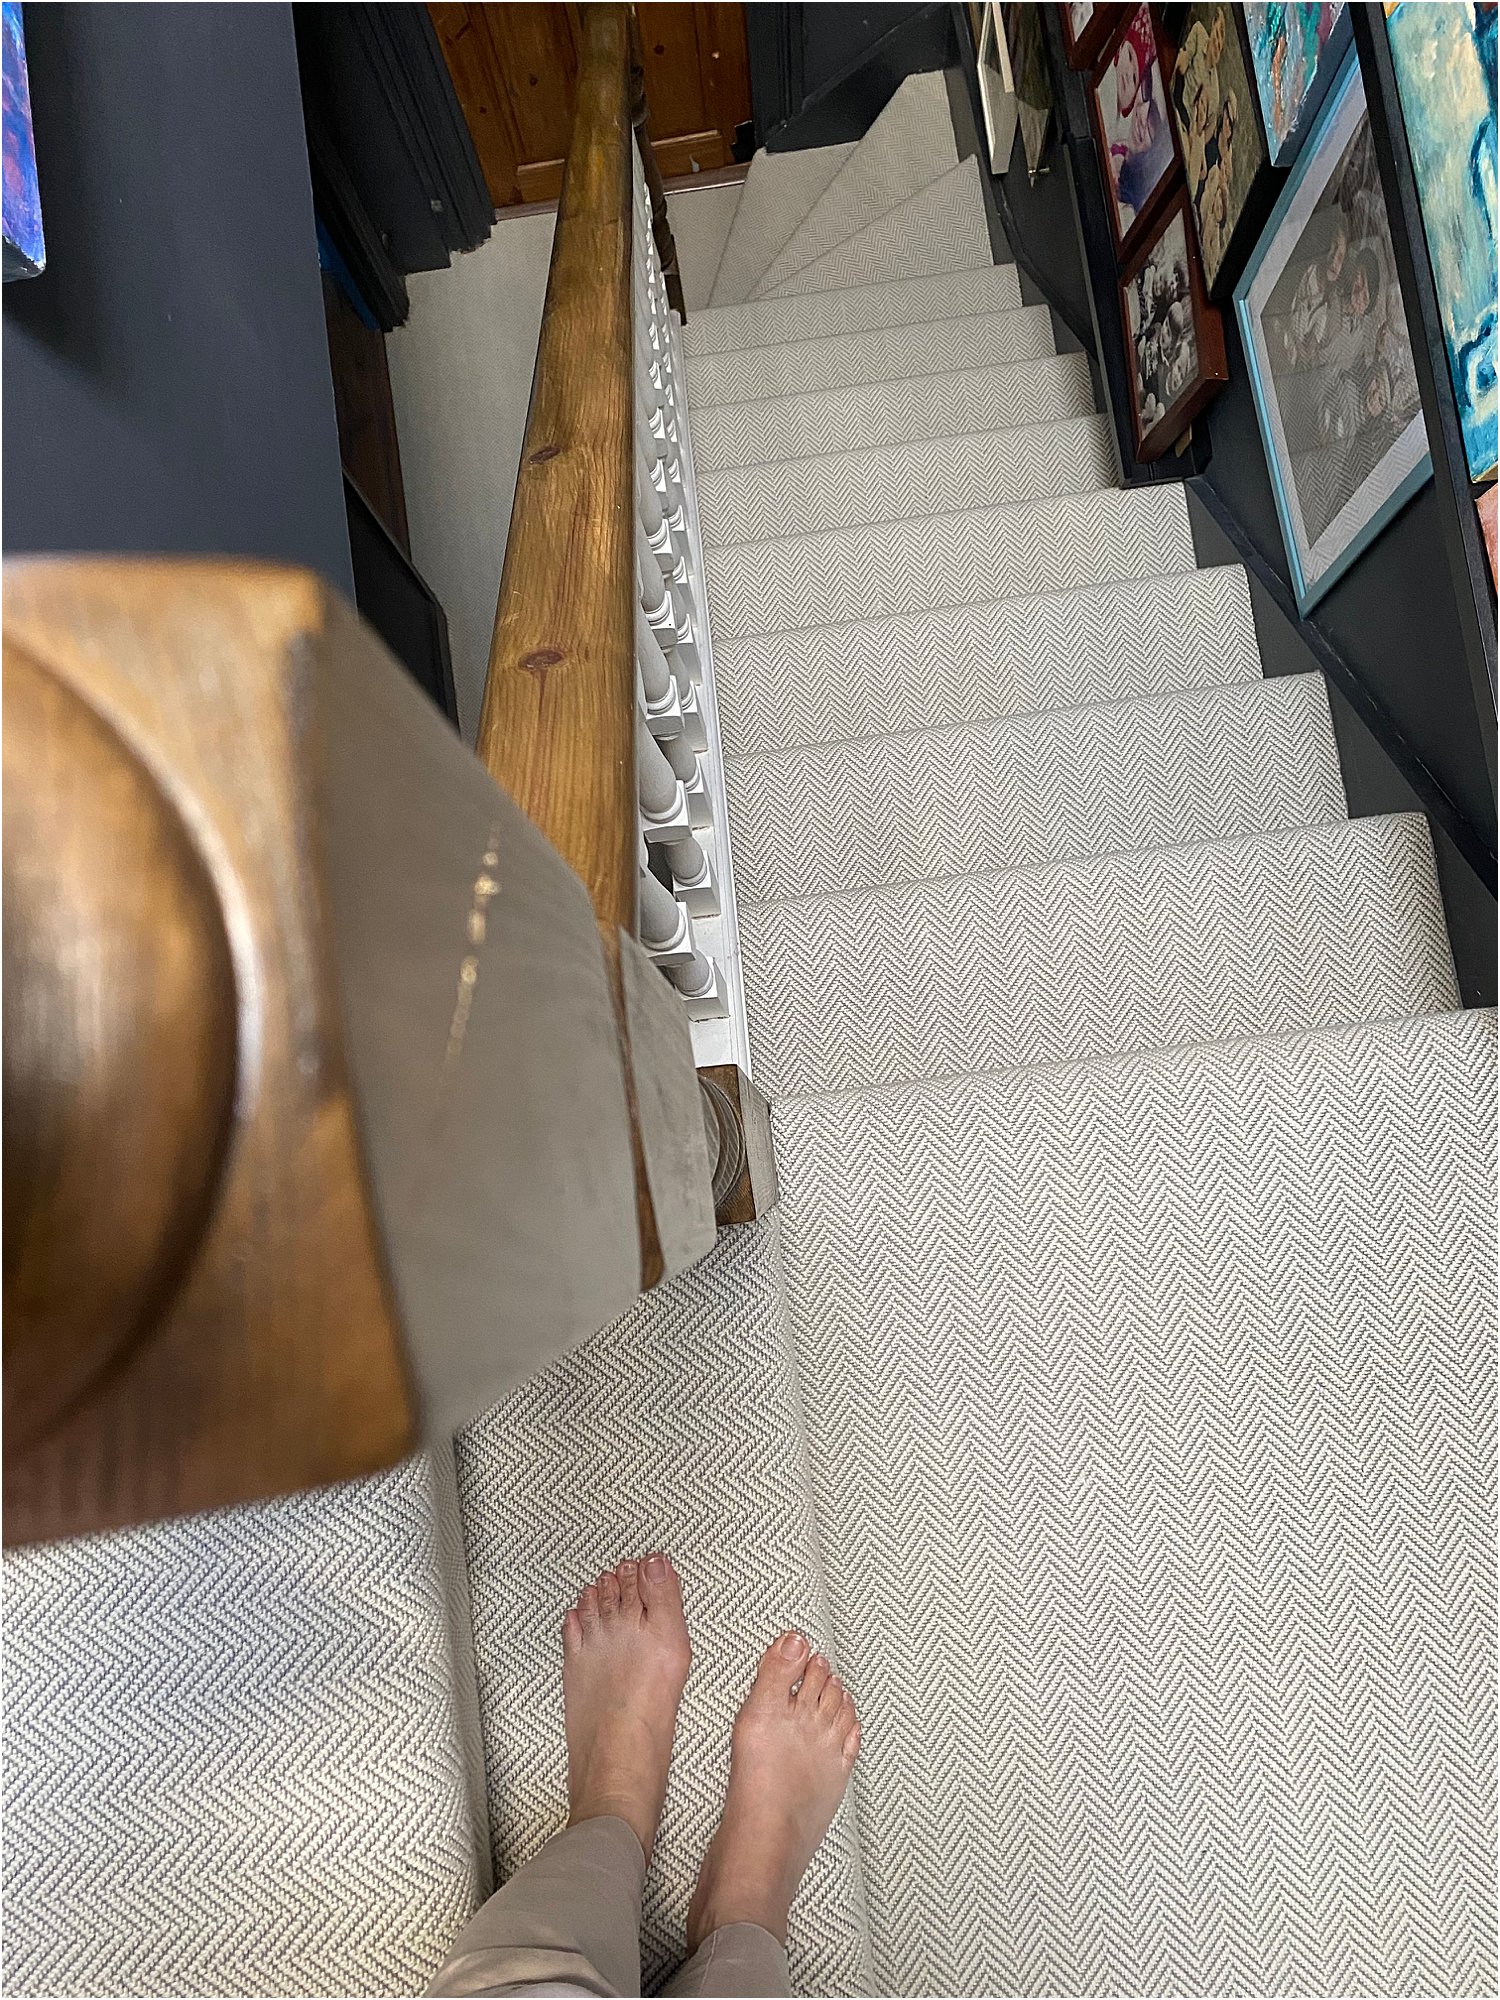
Finally, I settled on the Crucial Trading Alpine Frosted Peaks herringbone carpet. It is firm and not as thick and fluffy and bouncy as the others. But with the correct underlay, it felt solid, strong, comfortable and “trustworthy” for lack of a more descriptive word. I felt assured it’s not going to fluff and start snagging. It feels wonderfully comfortable and “reliable”!
Why Designer Carpet? Well, as we know branded luxury carpets are pricey. For good reason – the quality is better as well as the look. They can range from £50 to over £100 per metre and that doesn’t include paying a professional fitter. Designer Carpet offer you the opportunity to get these branded luxury carpets for less!
They work closely with brands so they can supply remnants (and large sizes at that) for less than retail price. When carpets are cut to fit awkward stairs and nooks, there will be various sizes of offcuts and remnants often large enough to fit other spaces too.
Things like these help Designer Carpet offer these brands for much less without sacrificing quality because they are exactly the same carpets.
I was helped by Joshua at Designer Carpet and he was most helpful and patient, always polite and friendly, prompt at answering my emails and questions and offering options and advice. Exactly the kind of professional you need when you know nothing about something and need personalised advice. Designer Carpet‘s customer service was second to none in my experience.
Now my entrance hall feels so welcoming and bright – with contrasts. Thanks to Designer Carpet my stairs and landing from top to bottom is now a no-shoe zone that is light and bright.
e. Radiator – The final piece to finish off this space is my super slim – at only 10cm deep cast iron radiator, the Milano Mercury in slate black by BestHeating. After all the hard work we’ve put into this revamp, the centre feature needed to be really show-stopping and not an old wonky panel radiator.
Last autumn my old wonky radiator leaked and tripped our electrics so we were out of electricity on this floor for a week until we could get a plumber to sort it out. But today is a new day with my super slim, super sleek, super hot radiator that boasts of high heat output. It’s 10cm depth is perfect for my very narrow Victorian entrance hall.
Old Victorian houses get very cold and draughty especially in the winter. It’s really important to retain heat especially by the front door. Jessica Steele from BestHeating says “when choosing a new radiator, the first thing to do is use our BTU Calculator to make sure it will supply enough heat for your space. Our beautiful cast iron radiators provide powerful outputs and retain the heat much longer than steel radiators”.
I calculated the BTU required for my space here using BestHeating’s BTU calculator and my radiator provides more than enough heat at 1480 watts for my hallway which opens up to the high ceilings into the first floor.
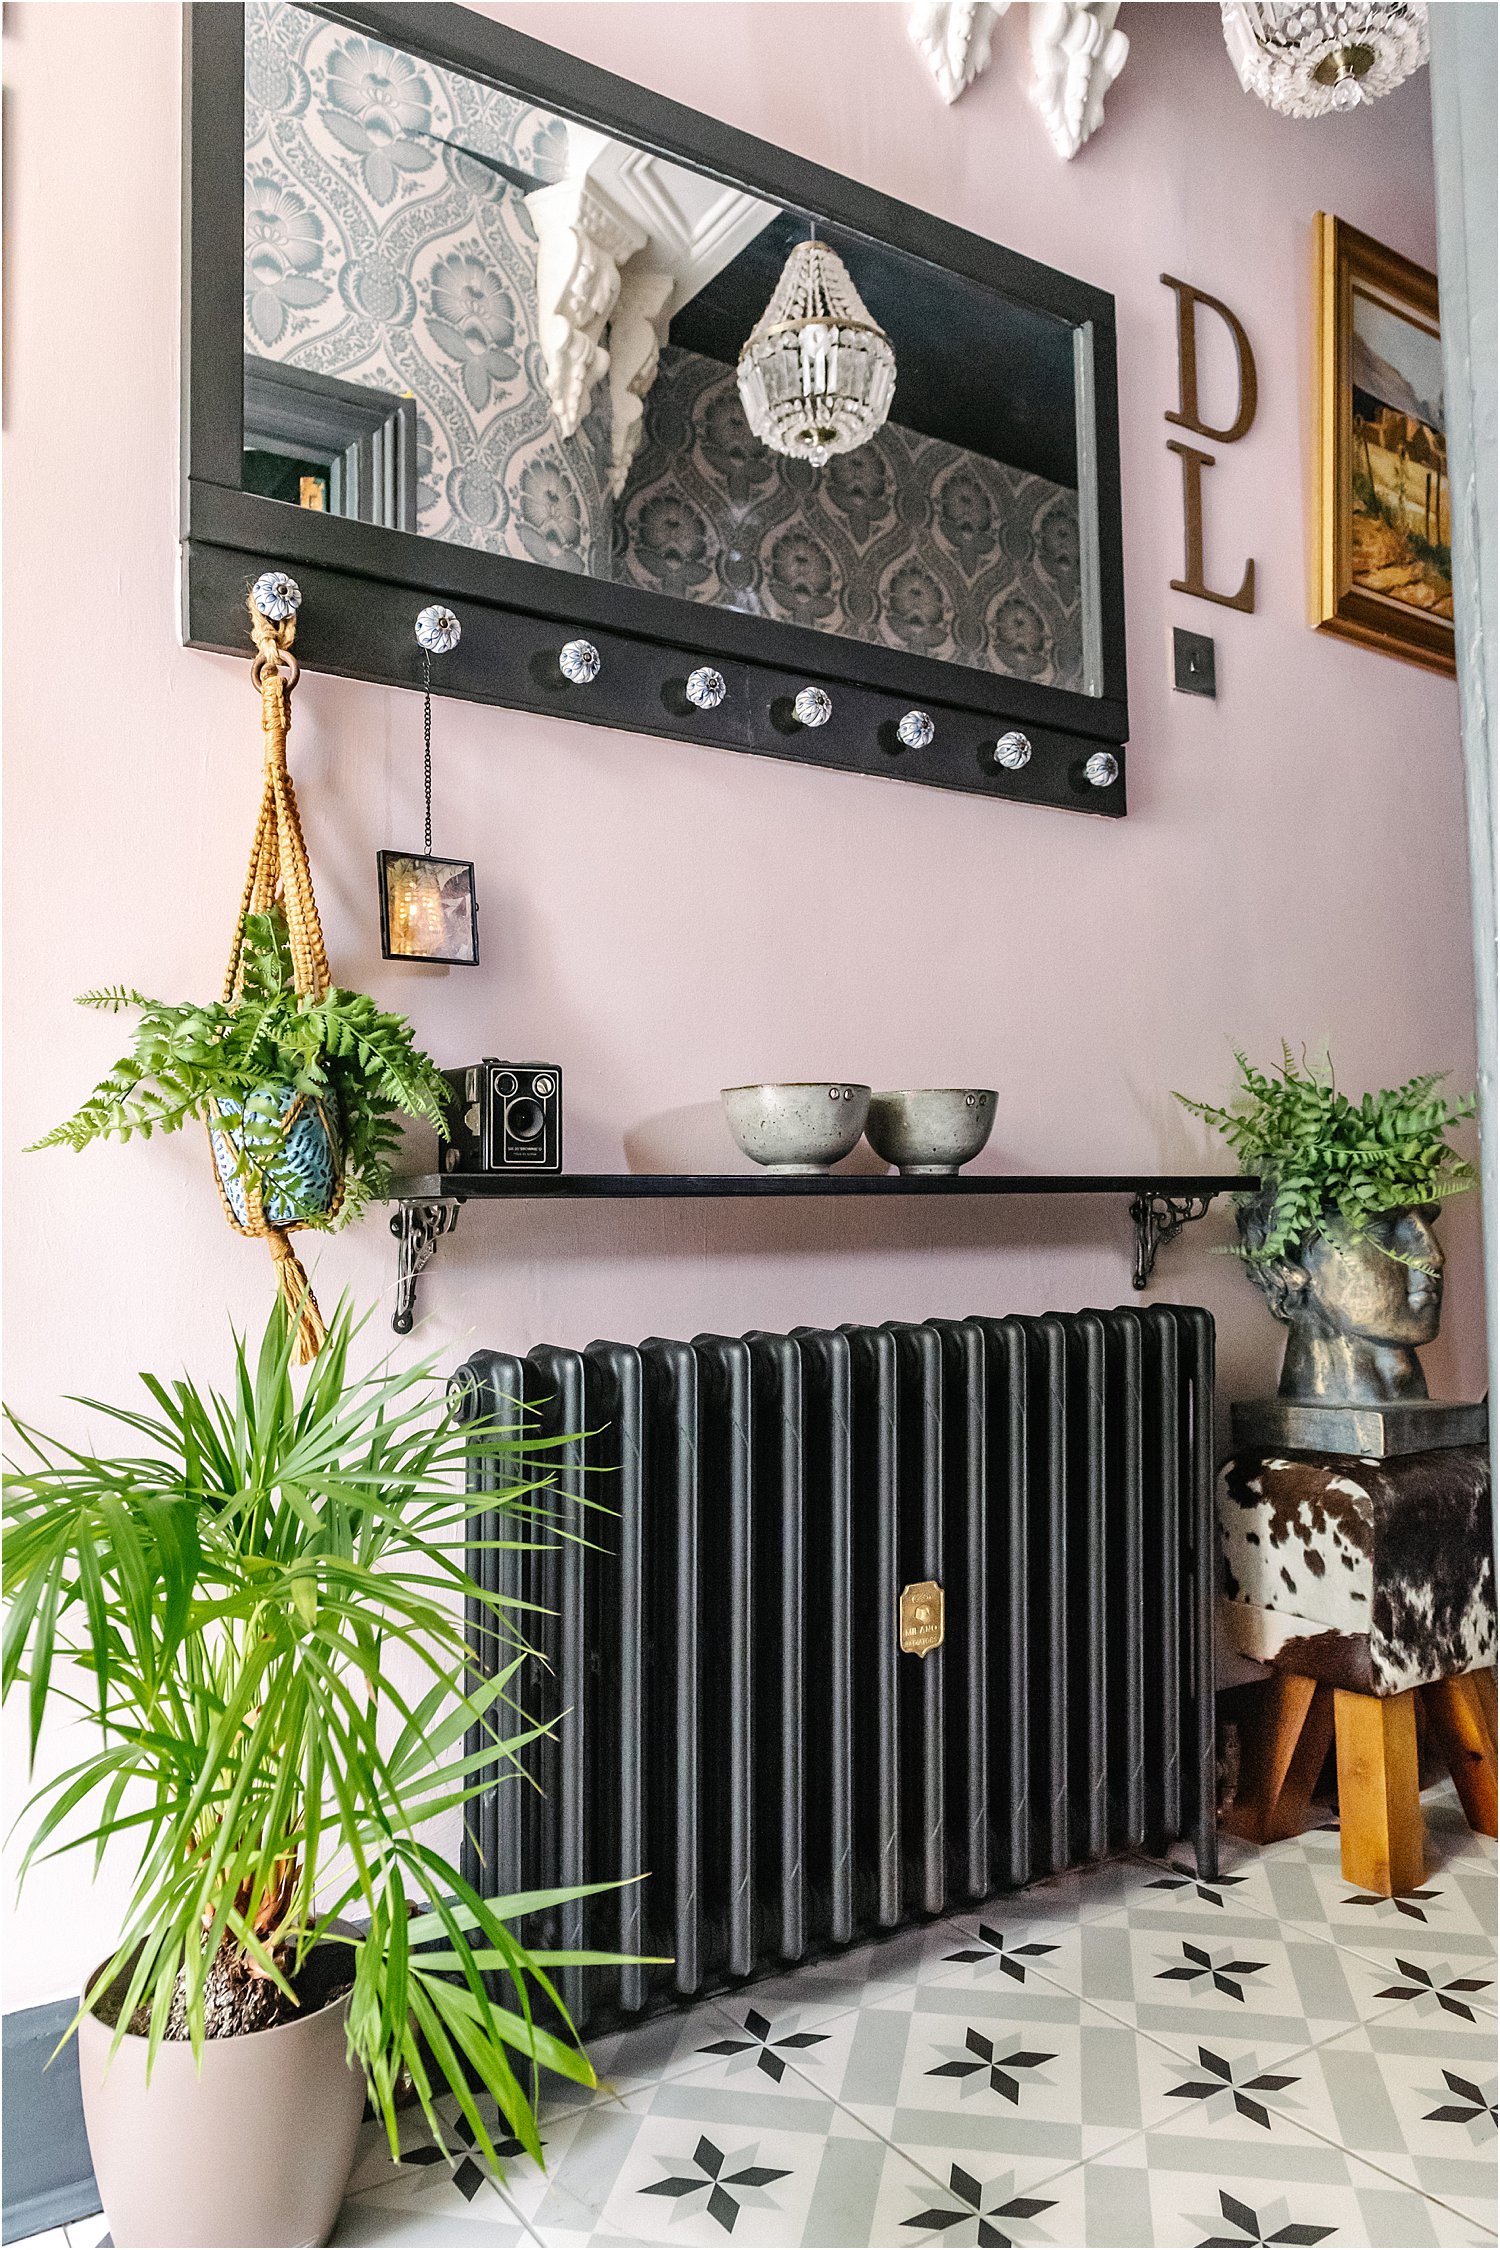
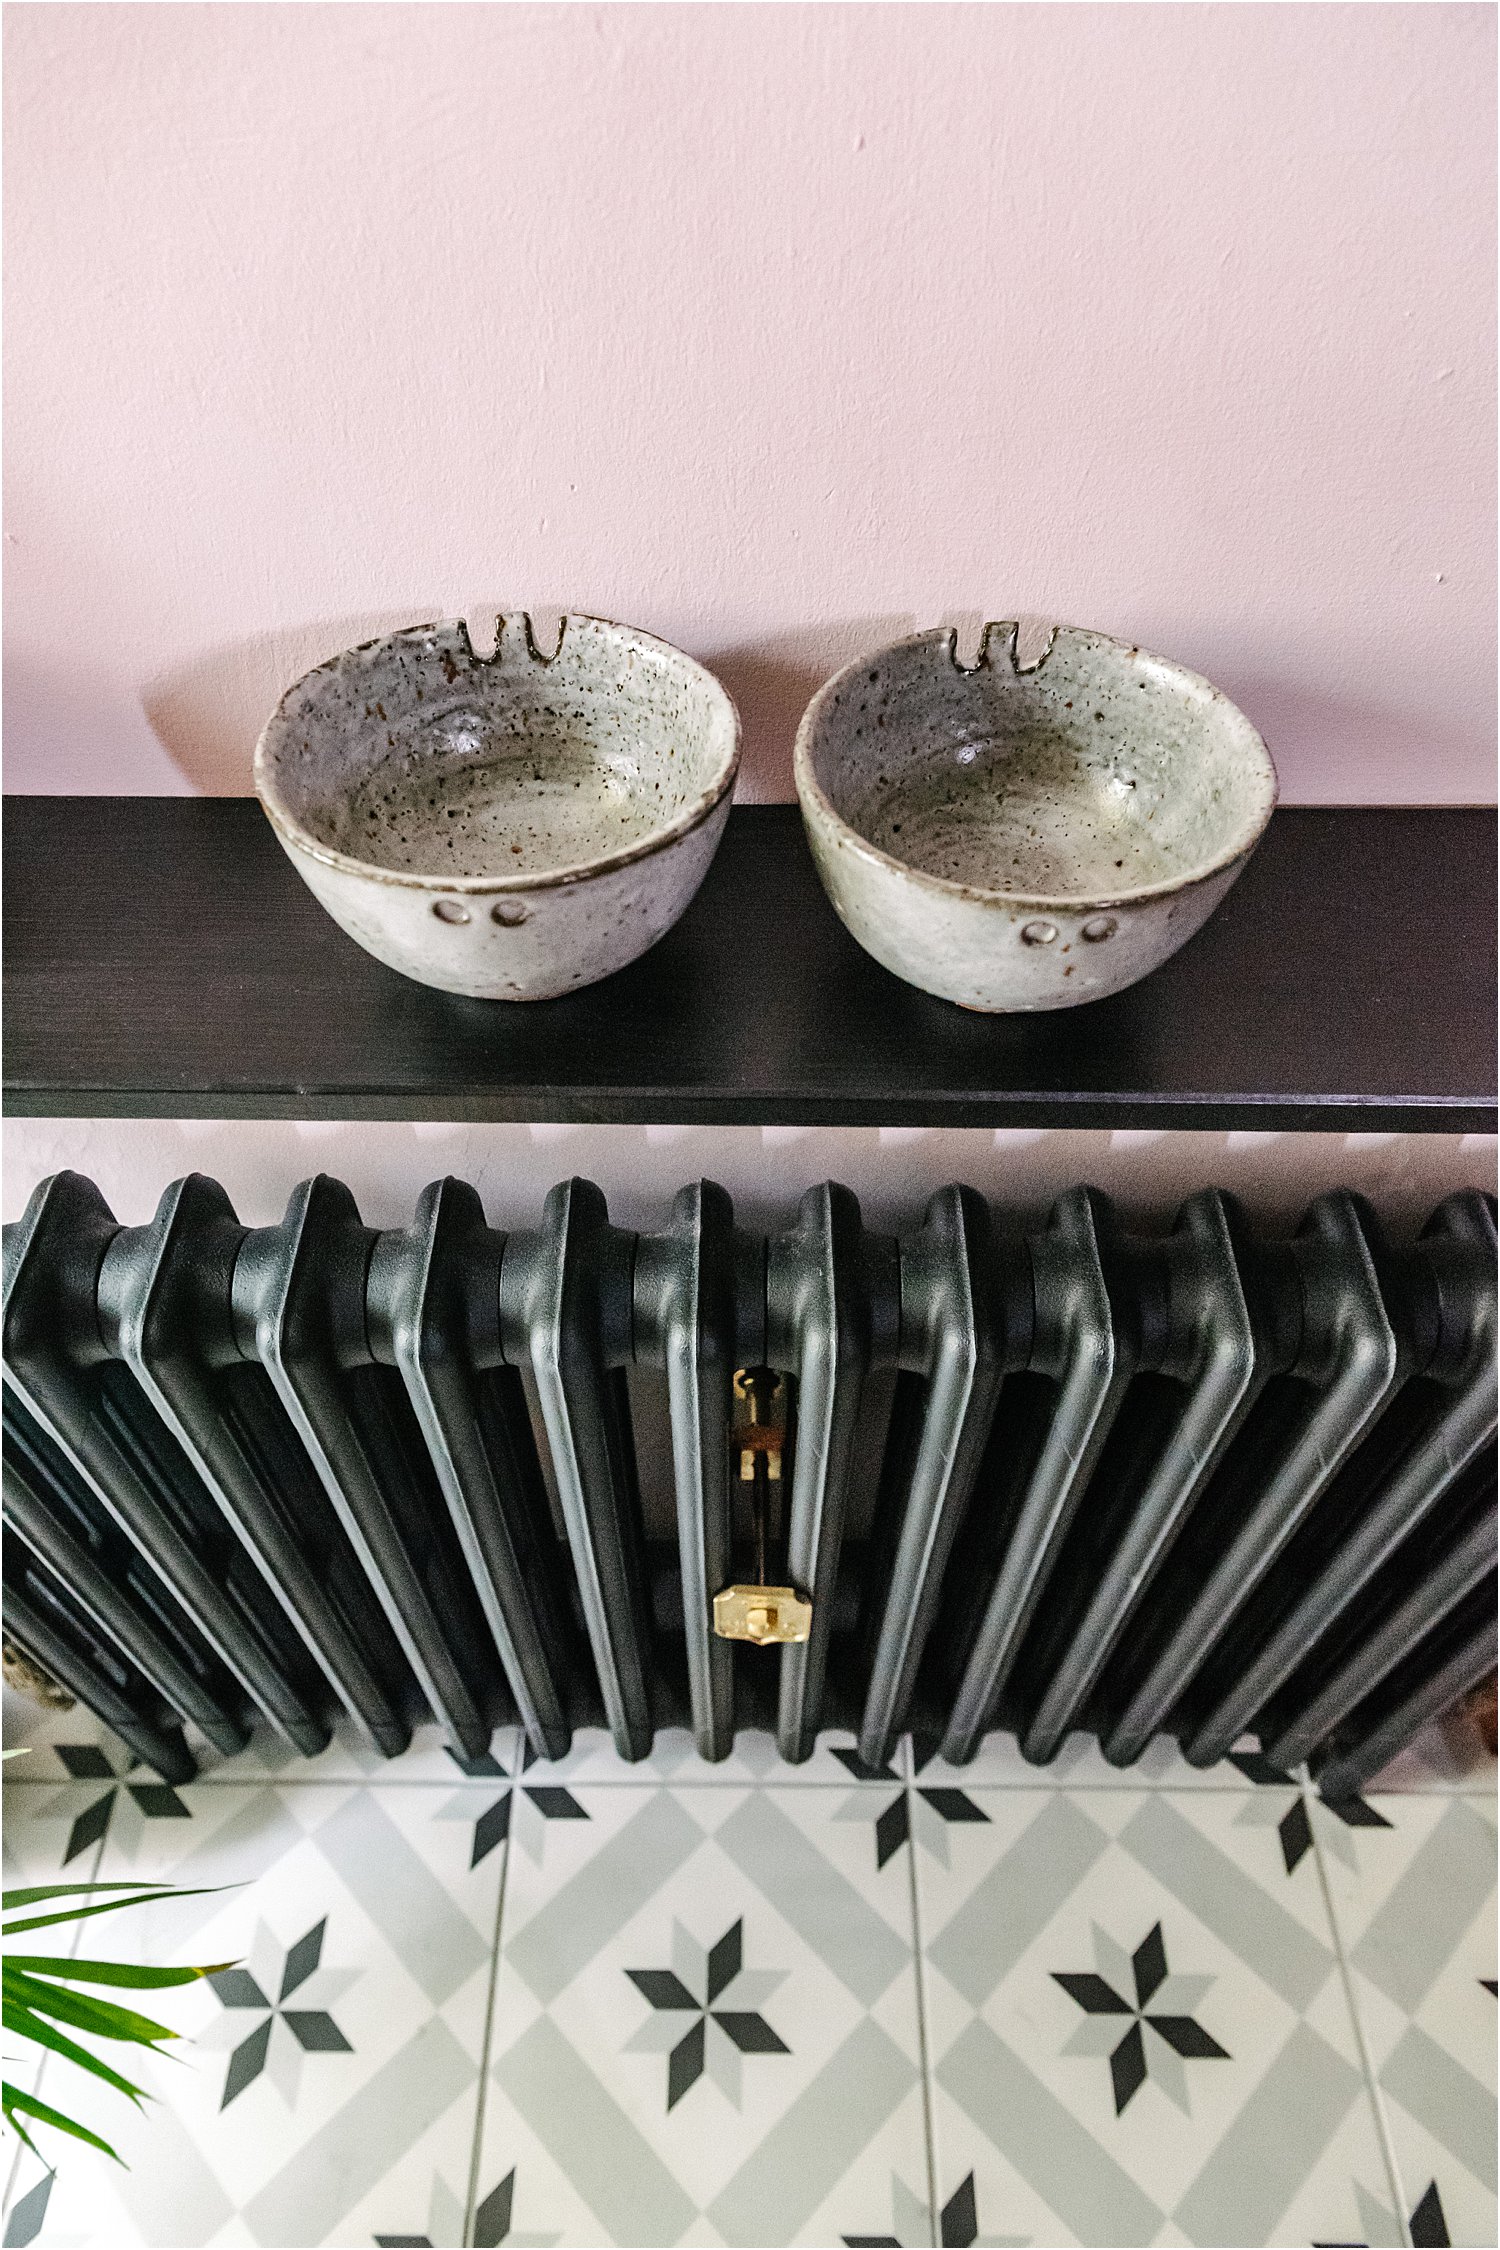
I decided to put a slim shelf above it to hold storage for house keys and bits and bobs but didn’t want it too close to the radiator so as not to cover it’s beauty. It’s a work of art in itself.
I chose the matching Milano Antique style valve in bronze and the Milano wall stay in brass to complete the classic look. They complement the slate black and adds to the sophisticated take on a traditional design without the thickness of old cast iron radiators.
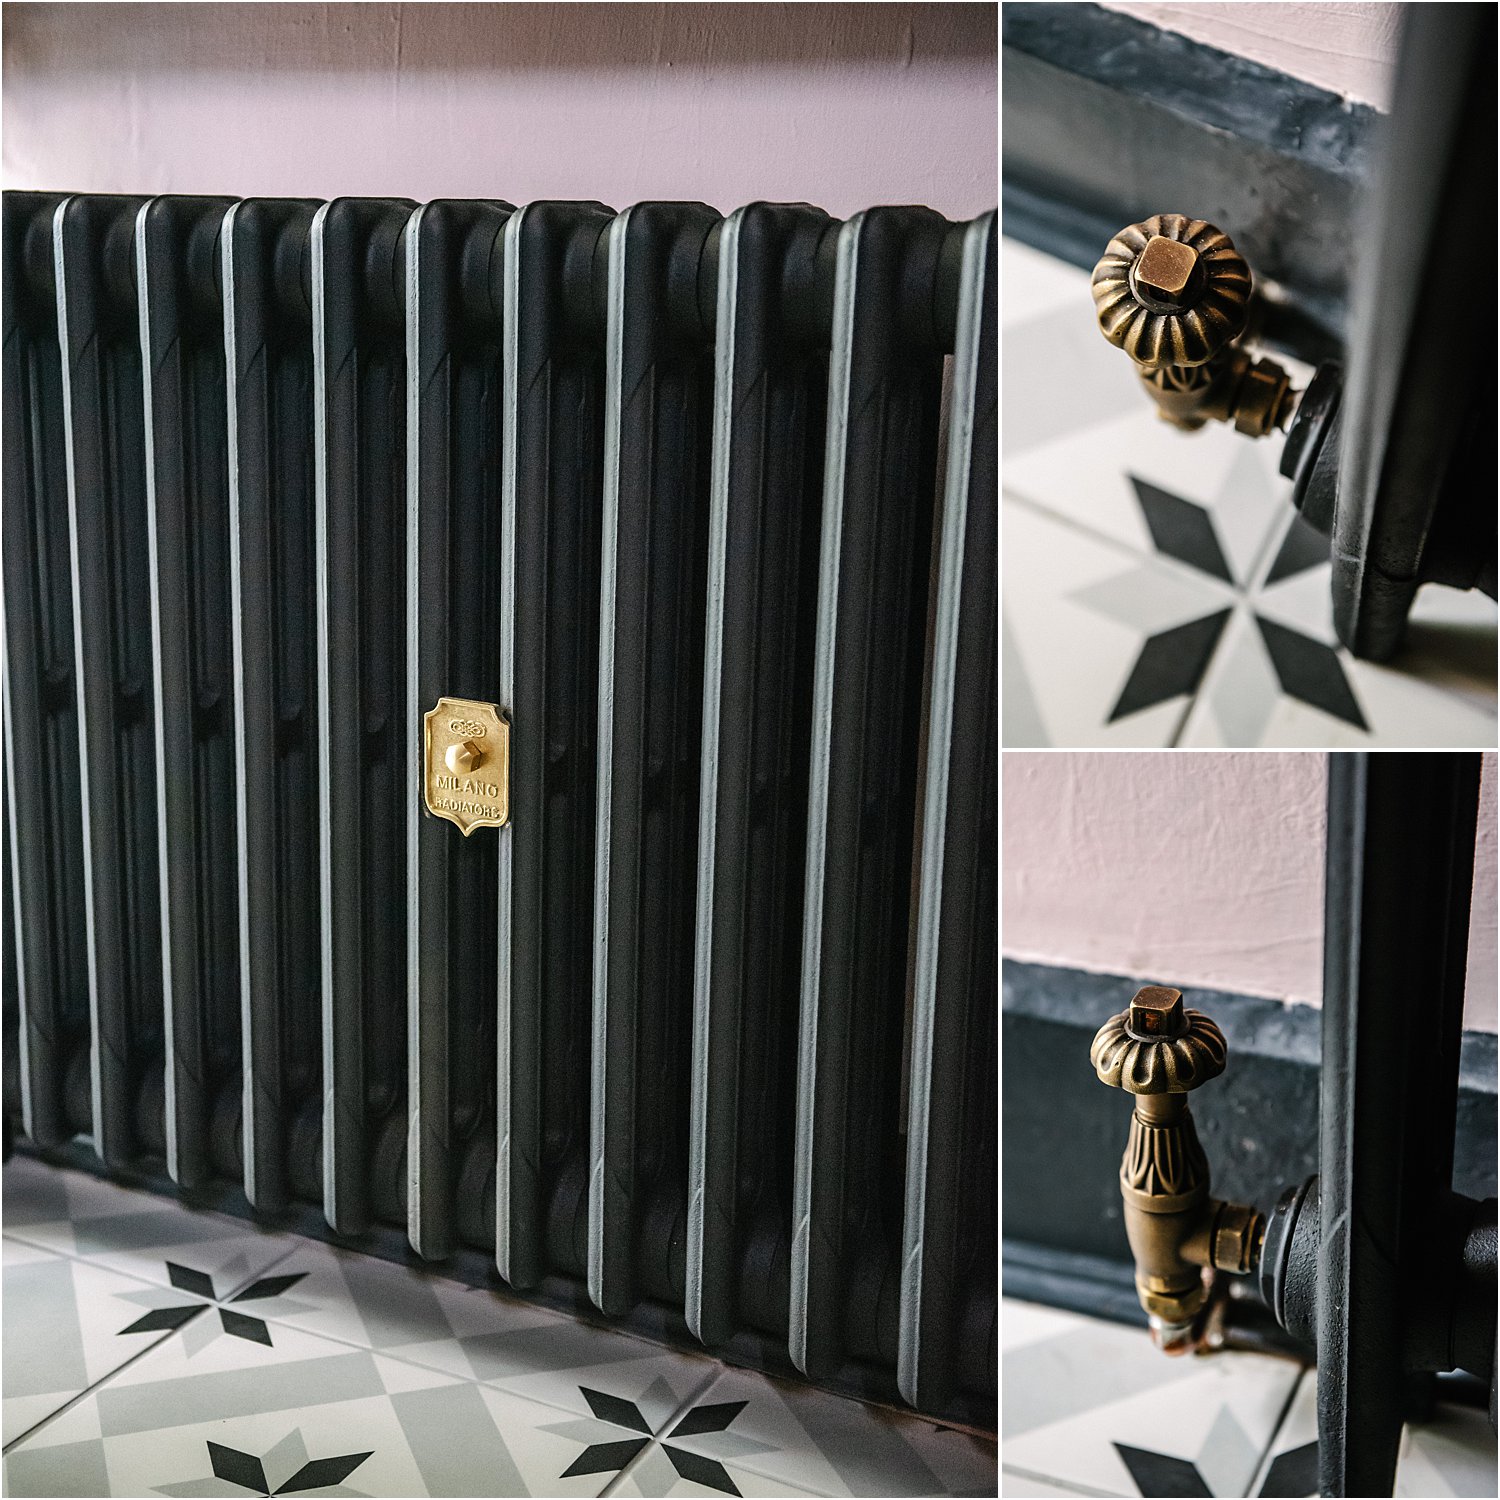
When I was choosing the cast iron radiator for this space, I really wanted the ones with the decorative ornate columns with floral etching design. But when I saw that this Milano Mercury is so slim at only 10cm depth, my mind was made. My narrow Victorian hall needed something slimmer than the old traditional cast iron depth so the Milano Mercury was a no-brainer.
I’m utterly delighted with my hallway and that finally I have finished it! I hope you found this article on 3 top tips for a bright hallway revamp useful.
This post is part of my collaboration with BestHeating and Designer Carpet. As always, all opinions in this article are mine and are true. You can follow BestHeating and Designer Carpet on Instagram for their latest offerings and features.
Don’t forget to download my free resources that will help you design your own interiors and grow your Instagram account! Let’s chat on Instagram Layered.Home and together get inspired!